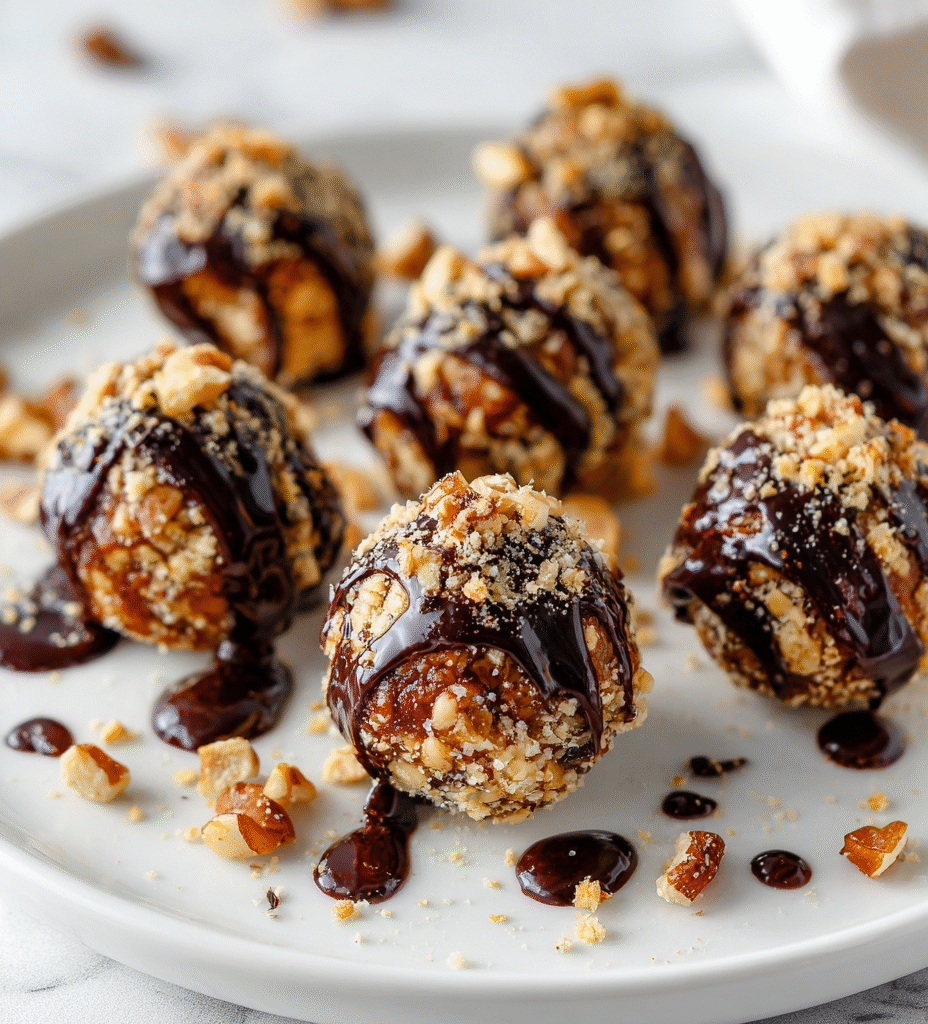

Using leftover date paste might seem like a small thing, but it’s a game changer in my kitchen. Instead of tossing that sticky, sweet stuff, I’ve learned to turn it into these no-bake date balls. They’re honestly a lifesaver on busy mornings or when friends drop by unannounced and I need something quick and nourishing.
The beauty of this recipe is how flexible it is. No oven, no fuss, just good ingredients coming together with minimal effort. Plus, I love how each bite carries that rich, caramel-like sweetness, with a hint of chew from the dates and a crunch from whatever nuts or seeds I toss in.
It’s a bit of a nostalgic act, really. Those sticky, sweet dates remind me of childhood treats, but turned into something grown-up and practical. Perfect for anyone looking to make something satisfying without much prep or clean-up.
Using leftover date paste to create a quick, no-fuss snack that’s both sweet and nourishing, perfect for busy mornings or unexpected guests.
Turning leftovers into sweet bites
- Making these date balls feels like a small victory, especially on mornings when I need a quick, satisfying snack.
- I love how the rich aroma of toasted nuts and sweet dates fills the kitchen while I’m rolling these together.
- There’s a nostalgic comfort in these simple bites—reminding me of childhood treats but with a grown-up twist.
- Sharing these with friends always sparks a smile; they’re so easy to customize and always disappear fast.
The inspiration behind these bites
- This recipe came together one rainy afternoon when I was rummaging through my pantry, looking for something sweet but simple to make without firing up the oven. I remembered how my grandma used to keep a jar of sticky dates on her shelf, always ready for a quick snack or a little treat. That nostalgic memory sparked the idea to turn those dates into something more portable and satisfying—no bake, no fuss.
- I started experimenting with different nuts and a splash of cocoa, just enough to add flavor without overpowering the natural sweetness. The first batch was a little crumbly, but perfectly chewy, which made me realize how forgiving and adaptable this recipe could be. Now, whenever I need a quick pick-me-up or an easy gift, these date balls are my go-to.
- heading: ‘The story behind this recipe’
Historical and Cultural Roots
- Dates have been a staple in Middle Eastern diets for thousands of years, used both as a sweetener and a snack.
- Turning leftover date paste into these balls is a modern twist on ancient preservation methods, making use of what’s readily available.
- No-bake treats like these date balls gained popularity during the early 20th century when home cooks looked for quick, energy-boosting snacks.
- This recipe reflects a trend towards minimal ingredients and simple, nourishing bites, inspired by traditional fruit-based sweets.
Key ingredients and tips
- Dates: I love the sticky, caramel-like sweetness they bring; if yours are too dry, soak them briefly in warm water for easier blending.
- Oats: I use rolled oats for texture, but quick oats work if you want a finer, more uniform bite — just watch the moisture level.
- Nuts: Toasted almonds or walnuts add crunch and flavor; skip or swap with sunflower seeds if nuts aren’t your thing, but you’ll lose that toasty aroma.
- Cocoa Powder: A splash of unsweetened cocoa deepens the richness; if you prefer a milder flavor, cut back or omit for a more date-forward taste.
- Sweetener: Sometimes I add a drizzle of honey or maple syrup if the dates aren’t quite sweet enough; use sparingly to keep it healthy and avoid stickiness.
- Flavor Boosters: A pinch of sea salt or a splash of vanilla extract elevates the natural sweetness; skip if you want a more straightforward, nutty bite.
- Optional Coatings: Rolled in shredded coconut or cocoa powder for a prettier finish; I like the contrast of texture and flavor when I roll them in toasted sesame seeds.
Spotlight on key ingredients
Dates:
- Their sticky, caramel-like sweetness is essential; if they’re dry, soak briefly in warm water for better blending.
- They become oozy and fragrant as they blend, creating a rich base that’s almost date syrup in texture.
Nuts:
- Toasted almonds or walnuts lend a smoky, crunchy contrast; their aroma is heightened during toasting, making the bites more indulgent.
- When chopped, they add a satisfying crunch and a nutty aroma that complements the sweetness of the dates.
Notes for ingredient swaps
- Dates: Medjool dates are my favorite for their rich, caramel flavor; if yours are dry, soak briefly in warm water to soften before blending.
- Oats: Rolled oats give a hearty texture, but quick oats can be used for a finer, less chewy bite—just reduce the moisture slightly.
- Nuts: Toasted almonds or walnuts add flavor and crunch; for nut allergies, swap with toasted sunflower or pumpkin seeds, though you’ll miss out on that toasty aroma.
- Cocoa Powder: Unsweetened cocoa deepens the chocolate flavor; if you prefer a milder taste, use cacao powder or omit altogether for a more date-forward sweetness.
- Sweetener: Honey or maple syrup can boost sweetness if your dates are a bit dull—add sparingly to avoid making the mixture too sticky.
- Flavor Enhancers: A pinch of sea salt or a splash of vanilla extract can lift the flavors; skip if you want a more straightforward, nutty taste.
- Coatings: Roll in shredded coconut or cocoa powder for presentation; toasted sesame seeds or chopped pistachios also work for added texture.
Equipment & Tools
- Food processor: To blend dates and nuts into a sticky, uniform paste.
- Mixing bowl: To combine ingredients and prevent mess.
- Spatula: To scrape down ingredients and handle mixture.
- Baking sheet: To rest and chill the formed balls.
- Parchment paper: To prevent sticking and easy cleanup.
Step-by-step guide to no bake date balls
- Gather all ingredients and equipment. Chop nuts, soak dates if dry, and set out bowls. Pre-measure everything for efficiency.
- Equipment & Tools: Food processor (to blend dates and nuts), mixing bowl (to combine ingredients), spatula (for scraping), baking sheet (for resting), parchment paper (to prevent sticking).
- Place pitted dates into the food processor. Pulse until they form a sticky, paste-like consistency, about 30 seconds. Smell for a caramel aroma—if it’s burnt, pulse less or add a splash of warm water.
- Add oats, nuts, cocoa powder, and optional flavorings. Pulse several times until everything is well combined but still slightly textured. The mixture should hold together when pressed; if too dry, add a tiny splash of water or honey.
- Scoop out about a tablespoon of mixture. Roll between your palms to form a ball, roughly 2.5 cm (1 inch) in diameter. Place on the prepared baking sheet. Repeat with remaining mixture.
- Chill the balls in the fridge for at least 30 minutes. This helps them firm up and develop flavor. If in a hurry, freeze for 15 minutes, but avoid overfreezing—they should stay chewy, not icy.
- Check the texture: they should be firm but not hard, with a slight give when pressed. The outside should be slightly shiny from the natural oils of the dates.
- Serve directly from the fridge or at room temperature. For an extra touch, roll in shredded coconut or cocoa powder just before serving.
- Resting & Finishing: Keep in an airtight container in the fridge for up to a week. Freeze in a single layer for longer storage, up to a month. Let thaw slightly before serving for best texture.
- Checkpoints & How to Know It’s Done: The balls should hold their shape without cracking, smell sweet and toasted, and feel chewy when bitten.
Chill the date balls in the fridge for at least 30 minutes before serving. For best flavor and texture, keep them in an airtight container. Serve directly from fridge or at room temperature, optionally rolled in coconut or cocoa powder for visual appeal.
How to Know It’s Done
- Firm but chewy texture when pressed.
- Shiny exterior from natural oils.
- Aromatic, caramel-like smell indicating proper blending.
No-Bake Date Balls
Ingredients
Equipment
Method
- Place the pitted dates into the bowl of a food processor. Pulse until they break down into a sticky, oozy paste with a caramel aroma filling the air, about 30 seconds.
- Add the rolled oats, toasted nuts, cocoa powder, and a pinch of sea salt to the food processor. Pulse several times until the ingredients are well combined but still slightly textured, resembling a coarse dough.
- If the mixture feels too dry and crumbly, drizzle in a teaspoon or two of honey or maple syrup and pulse again until it starts to hold together. It should be moist enough to roll into balls without cracking.
- Use a small cookie scoop or your hands to portion out about a tablespoon of mixture. Gently roll between your palms to form a compact ball, about 2.5 cm (1 inch) in diameter. Place the formed ball on a parchment-lined baking sheet.
- Repeat with the remaining mixture, placing all the balls on the prepared sheet. Once finished, chill the balls in the refrigerator for at least 30 minutes to help them firm up and develop flavor.
- After chilling, if desired, roll the date balls in shredded coconut or cocoa powder for a decorative finish and added flavor. Serve directly from the fridge or at room temperature for a chewy, sweet treat.
Notes
Pro Tips for Perfect Date Balls
- Bolded mini-head: Use a sticky date paste for easier rolling and a richer flavor.
- Bolded mini-head: Lightly toast your nuts to enhance aroma and add crunch.
- Bolded mini-head: Chill the mixture before rolling for better shape retention and chewiness.
- Bolded mini-head: If mixture feels too wet, add a bit more oats or nuts to firm it up.
- Bolded mini-head: For smoother bites, pulse ingredients just until combined, avoid over-processing.
- Bolded mini-head: Roll the balls gently to maintain their shape and avoid cracking.
- Bolded mini-head: Store in an airtight container in the fridge for up to a week to keep freshness.
Common mistakes and how to fix them
- FORGOT to soak dry dates → soak briefly for easier blending and better texture.
- DUMPED mixture too dry → add a tiny splash of water or honey to improve binding.
- OVER-TORCHED nuts → toast nuts gently until fragrant, avoid burning to keep flavor sweet.
- MISSED chill time → ensure at least 30 minutes in fridge for firm, chewable bites.
Quick Fixes & Pantry Swaps
- If mixture is too sticky, add a few more oats or chopped nuts.
- When mixture crumbles, splash a tiny bit of warm water or honey to bind.
- Splash some lemon juice if date flavor is dull or too sweet.
- Patch over cracks by gently pressing the balls back together before chilling.
- Shield delicate balls with a light dusting of shredded coconut if they crack.
Prep, store, and reheat tips
- Prepare the mixture ahead by chopping nuts and soaking dates if needed; the aroma of toasted nuts and sweet dates fills the kitchen as you work.
- Store the formed date balls in an airtight container in the fridge for up to a week; they stay chewy and fragrant with a slightly caramel scent.
- For longer storage, freeze the balls on a baking sheet until firm, then transfer to a bag—best enjoyed within a month, with a deep, nutty aroma upon thawing.
- Reheat by letting them sit at room temperature for 10-15 minutes; the texture softens slightly, and the sweetness becomes more pronounced, with a hint of melted date syrup.
Top questions about no bake date balls
1. How do I make dry dates easier to blend?
Use soft, sticky dates for easiest blending—soak dry dates in warm water if needed for about 10 minutes until plump and oozy.
2. Why is chilling important for these date balls?
Chill the mixture for at least 30 minutes; it firms up and becomes easier to roll without sticking or crumbling.
3. How do I shape the date balls properly?
Use a small cookie scoop or your hands to shape the mixture into balls, pressing firmly so they hold together well.
4. What if my mixture is too sticky or too dry?
If they’re too sticky, mix in a little extra oats or chopped nuts; if too dry, add a tiny splash of water or honey.
5. How do I store leftover date balls?
Store in an airtight container in the fridge for up to a week, or freeze for longer storage—thaw at room temperature for 10 minutes.
6. Can I customize the flavor of these date balls?
Add a pinch of sea salt or vanilla extract to enhance flavor, or roll in shredded coconut or chopped nuts for visual appeal.
7. Can I substitute the nuts in this recipe?
Use toasted nuts for added aroma and crunch; skip if allergic, but expect less depth in flavor.
8. What type of oats should I use?
Oats give texture, but quick oats can be used for a finer bite—just reduce moisture slightly to prevent crumbling.
9. How can I tweak the sweetness?
Add a splash of cocoa or a drizzle of honey to boost sweetness or deepen flavor—adjust to taste before blending.
10. How do I fix a crumbly or sticky mixture?
If the mixture feels too crumbly, add a tiny bit of warm water or extra dates; if too sticky, add more oats.
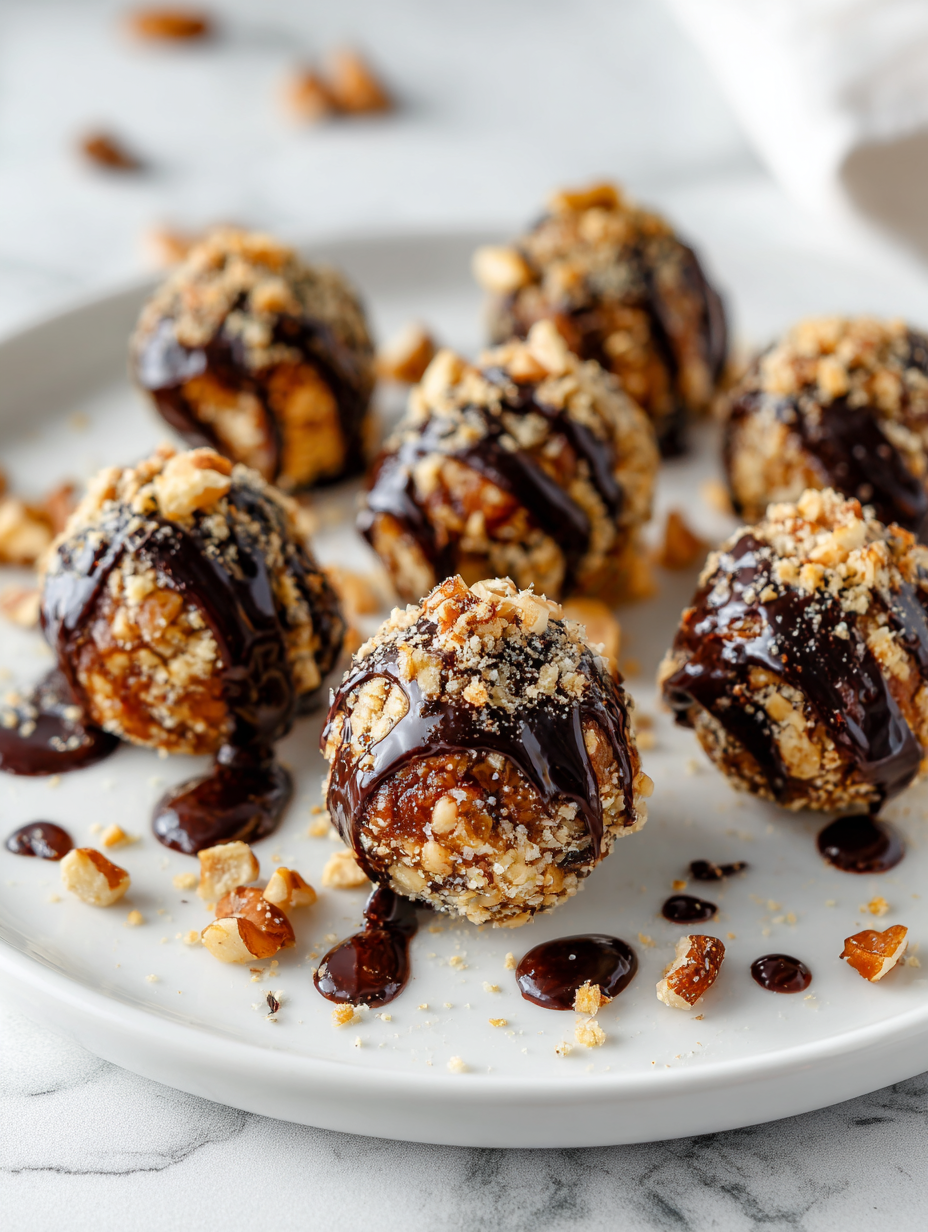
These no-bake date balls are a secret weapon when you need something quick and real. They carry the warmth of caramel and the crunch of toasted nuts, all wrapped up in a bite-sized package. Making them feels like a small act of kindness—something easy to whip up but hard to forget.
In a world of instant everything, these bites remind me that simple ingredients and a little patience can create something truly satisfying. They’re perfect for now—snacks that nourish, comfort, and don’t demand much fuss, just honest, tasty goodness.

Hi, I’m Ruby Thorn, the home cook behind The Tender Mess. Join me on the journey of Embracing the mess, fearlessly create —because in the kitchen, the mess sometimes leads to magic.