This no-bake chocolate oat slice is my secret weapon on hectic mornings. When I’m racing against the clock, it’s the one treat that comes together in minutes but feels like a little indulgence I can count on. It’s also a throwback to simpler times, with that rich cocoa smell mingling with toasted oats, making the kitchen smell like childhood comfort.
What I love most is how flexible it is—no oven, no fuss, just a quick mix and chill. It’s become my go-to when I need a sweet pick-me-up that’s honest, straightforward, and practically effortless. Plus, it’s perfect for sharing—or sneaking a slice when no one’s looking.
Focusing on how this no-bake chocolate oat slice became my go-to comfort food during hectic mornings, offering a quick, sweet fix that’s both nostalgic and practical when time is tight.
The story behind this recipe
This no-bake chocolate oat slice came about during a particularly chaotic week when I needed something quick, satisfying, and easy to whip up. I was craving that deep cocoa flavor but didn’t want to turn on the oven or fuss with complicated steps. It’s a recipe born from necessity but turned into a little ritual that reminds me of lazy afternoons and simple pleasures. Every time I make it, I think about how sometimes, the best recipes are just about keeping things straightforward and honest.
Ingredient Breakdown
- Oats: I love using rolled oats—they give a nice chewy texture and a hearty base that holds everything together. You can try quick oats if you’re in a rush, but they’ll be softer and less chewy.
- Cocoa powder: I prefer natural, unsweetened cocoa—it has that deep, smoky aroma that really makes the slice rich. Dutch-processed is fine too, but it’ll mellow out the flavor slightly.
- Sweetener: Honey has this warm, floral note I adore, but maple syrup works beautifully for a more caramel-like flavor. Use less if you want it slightly less sweet.
- Butter: I always go for unsalted butter—makes the slice taste richer and more buttery. Margarine can be a quick swap, but the flavor won’t be quite the same.
- Chocolate: I like dark chocolate chunks—they melt into pockets of richness, but melting down some Nutella can add a creamy, hazy chocolate scent.
- Optional add-ins: Nuts or dried fruits add crunch and bursts of flavor. Toast them lightly beforehand for extra aroma and crunch you can really sink your teeth into.
- Extras: A pinch of sea salt on top just before chilling enhances the chocolate flavor and balances the sweetness—don’t skip it!
Spotlight on key ingredients
Oats and cocoa powder:
- Oats: I love using rolled oats—they give a nice chewy texture and a hearty base that holds everything together. You can try quick oats if you’re in a rush, but they’ll be softer and less chewy.
- Cocoa powder: I prefer natural, unsweetened cocoa—it has that deep, smoky aroma that really makes the slice rich. Dutch-processed is fine too, but it’ll mellow out the flavor slightly.
Notes for ingredient swaps
- Dairy-Free: Coconut oil or vegan butter can replace butter, but expect a slightly different richness and aroma.
- Sweetener: Maple syrup or agave nectar can substitute honey; they add a different floral or neutral sweetness.
- Chocolate: Use coconut chocolate or carob chips for a dairy-free, slightly different cocoa flavor.
- Oats: Gluten-free oats work perfectly if you need a gluten-free version; they still provide that hearty chew.
- Add-ins: Dried cranberries or chopped dried apricots can swap dried fruits; they add a tangy or sweet-tart contrast.
- Nuts: Almonds or hazelnuts can replace walnuts or pecans; each brings its own aroma and crunch profile.
- Cocoa: Dark cocoa powder can be swapped for raw cacao powder for a more intense, less processed chocolate flavor.
Equipment & Tools
- Baking dish (20x20cm / 8×8 inch): Holds the mixture while it sets and makes slicing easier.
- Saucepan: Melts butter and honey evenly, preventing scorching.
- Mixing spoon and spatula: Stirs ingredients and presses mixture into the dish.
- Parchment paper: Prevents sticking and aids in removing the slice cleanly.
Step-by-step guide to no bake slice
- Gather your equipment: a 20x20cm (8×8 inch) baking dish, a saucepan, a mixing spoon, and a spatula. The dish is for setting the slice, the saucepan melts everything smoothly.
- Line the baking dish with parchment paper, leaving a little overhang. This makes lifting out the slice easier later.
- In the saucepan, combine 200g (7 oz) of butter and 1/3 cup of honey. Melt over low heat, stirring constantly. You want a gentle simmer, not a boil—about 3-4 minutes. Smell that warm, buttery aroma.
- Once melted, remove from heat and whisk in 1/2 cup of unsweetened cocoa powder until smooth. It should look glossy and deep in color.
- Add 3 cups of rolled oats to the chocolate mixture. Stir well until all oats are coated and glisten with chocolate. This takes about 2 minutes; the oats should be evenly darkened and sticky.
- Optional: Mix in 1/2 cup of chopped nuts or dried fruits for crunch and flavor. Stir until dispersed evenly.
- Transfer the mixture into the prepared dish. Use the spatula to press it down firmly, spreading evenly. The surface should be smooth and compact.
- Refrigerate uncovered for about 1 hour. This allows the slice to firm up, making it easier to cut. You might notice a faint crackle as it cools, which is normal.
- Once set, lift the slice out of the dish using the parchment overhang. Place on a cutting board and cut into squares or rectangles. Clean edges and even pieces are a good sign it’s ready.
- Serve immediately or store in an airtight container. For best texture, consume within 3 days if kept at room temperature, or up to a week in the fridge. The slice will develop a slightly firmer texture after chilling.
Refrigerate uncovered for at least an hour until firm. Lift out using parchment, then cut into pieces. Serve immediately or store in an airtight container.
How to Know It’s Done
- The mixture should be glossy and dark, not dry or crumbly.
- The slice should be firm but not hard, with a slight jiggle when gently shaken.
- Edges should look clean and smooth when cut, with a rich chocolate sheen.
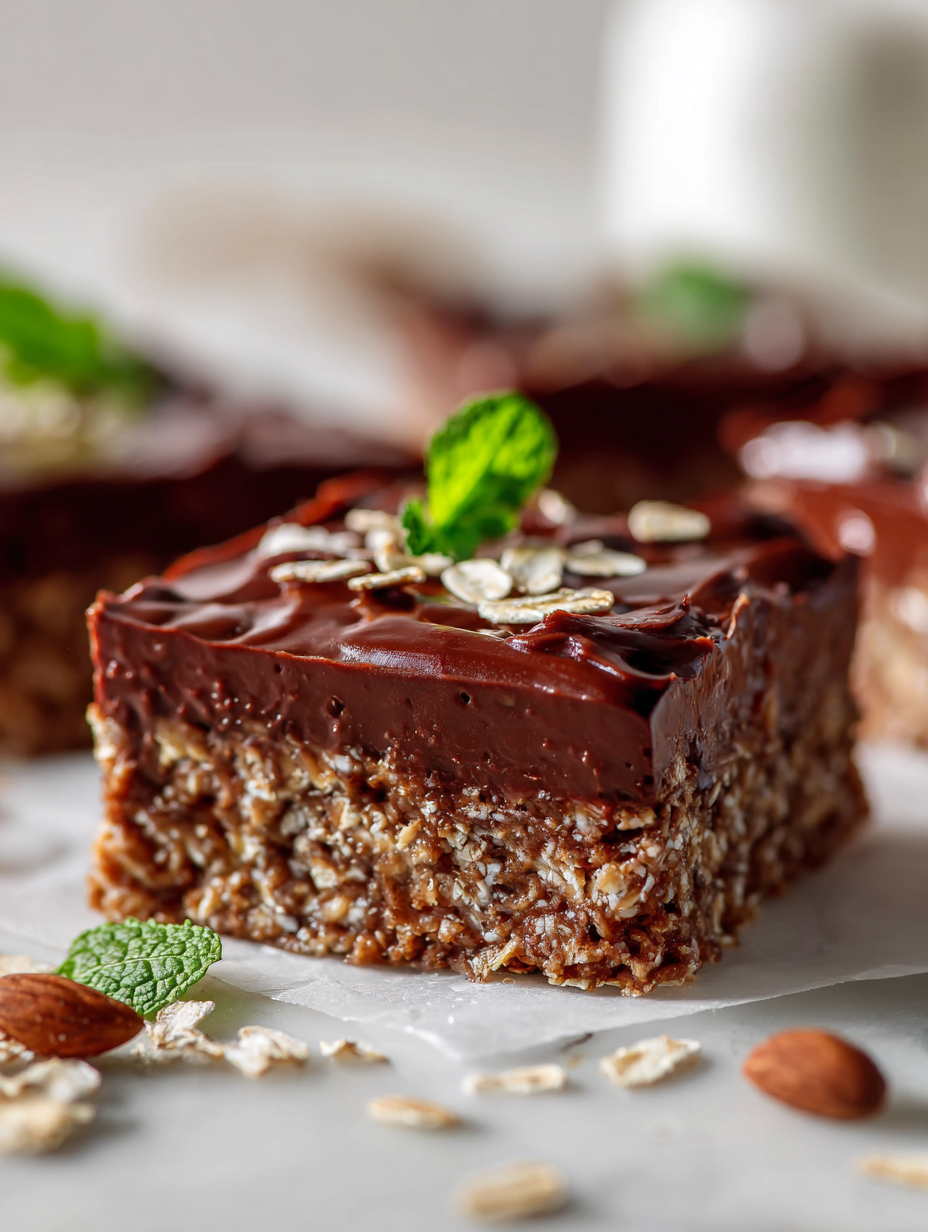
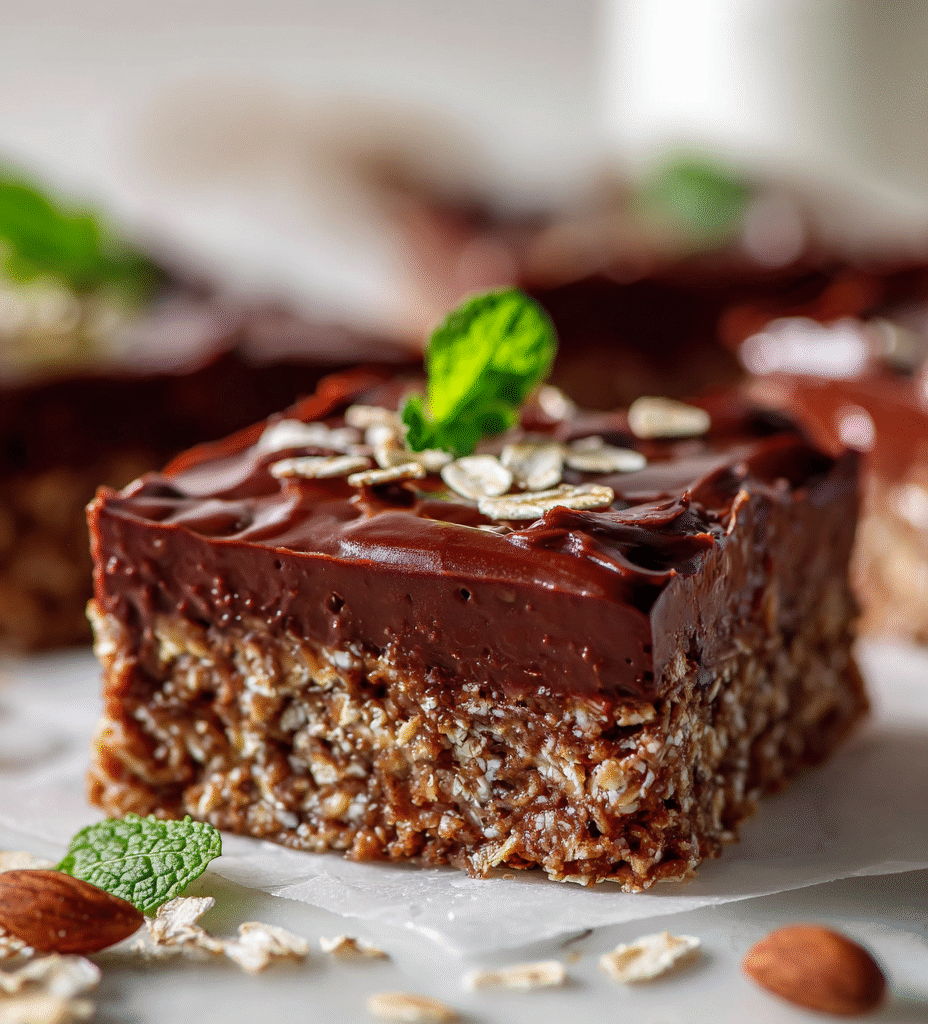
No-Bake Chocolate Oat Slice
Ingredients
Equipment
Method
- Line your baking dish with parchment paper, leaving some overhang for easy removal.
- In a saucepan over low heat, melt the butter and honey together, stirring gently until combined and fragrant, about 3-4 minutes. You’ll notice a warm, buttery aroma filling the kitchen.
- Remove the saucepan from heat and whisk in the cocoa powder until the mixture is glossy and smooth, with a deep, rich color.
- Stir in the rolled oats, mixing thoroughly until they’re fully coated in the chocolate mixture. The oats will glisten and begin to clump together slightly.
- If desired, fold in chopped nuts or dried fruits for extra texture and flavor, distributing them evenly throughout the mixture.
- Pour the mixture into the prepared dish, using a spatula to press it down firmly and evenly, creating a smooth, compact surface.
- Sprinkle a pinch of sea salt on top for a flavor boost and to enhance the chocolate aroma.
- Refrigerate the dish uncovered for about 1 hour, or until the slice is firm and has a slight crackle on top when pressed gently.
- Once set, lift the slice out of the dish using the parchment overhang and place on a cutting board.
- Cut into squares or rectangles with a sharp, warmed knife for clean edges, and serve immediately or store in an airtight container in the fridge for up to a week.
- Enjoy your rich, chewy, chocolatey no-bake treat—perfect for sharing or savoring on your own!
Pro tips for perfect slices
- Proper melting: Use low heat and stir constantly to prevent chocolate from seizing or burning, keeping it glossy and smooth.
- Oat texture: Toast oats lightly before mixing for a nutty aroma and better flavor development in the slice.
- Press firmly: When transferring to the dish, press the mixture down with the back of a spatula to ensure even setting and clean slices.
- Chilling goal: Refrigerate until the slice feels firm and slightly crackles on top when gently pressed, about 1 hour for best texture.
- Cutting tips: Use a sharp knife warmed slightly under hot water for clean, smooth edges on each slice.
- Flavor enhancement: Just before chilling, sprinkle a tiny pinch of sea salt on top to deepen the chocolate flavor and add a savory contrast.
- Variations: Mix in chopped nuts or dried fruits for added crunch and bursts of flavor—lightly toast nuts first for extra aroma.
Common mistakes and how to fix them
- FORGOT to check chocolate melting; fix by stirring constantly over low heat.
- DUMPED too much honey; fix by adding more oats to balance sweetness.
- OVER-TORCHED the butter mixture; fix by lowering heat and removing from stove early.
- MISSED chilling time; fix by refrigerating longer for full firmness.
Quick Fixes and Pantry Swaps
- When mixture feels too dry, splash in a teaspoon of hot water and stir until glossy.
- If slice cracks upon cutting, patch it with a warm knife and smooth edges gently.
- Splash a few drops of vanilla if the cocoa smells flat after melting.
- Patch over a crumbly base by pressing additional oats mixed with melted butter on top.
- Shield from moisture by wrapping tightly; a five-second shimmer of foil keeps it fresh.
Prep, store, and reheat tips
- Prepare the mixture in advance and press into the dish; refrigerate for at least 1 hour to set fully. The aroma of cocoa and butter will deepen overnight.
- Store the sliced pieces in an airtight container in the fridge for up to a week. The texture firms up slightly but retains a rich, chocolatey scent.
- For longer storage, freeze the slices wrapped tightly in plastic wrap and foil; they’ll keep for up to a month. Expect a firmer bite with a chilled, icy crunch.
- Reheat slices briefly in the microwave—about 10 seconds—until just soft enough to melt in your mouth. Watch for the glossy, oozy chocolate edges as a sign of perfect warmth.
Top questions about no bake oat slice
1. Can I use quick oats instead of rolled oats?
Yes, using quick oats will make the mixture softer and less chewy, but it still works fine.
2. Can I make this dairy-free?
Absolutely, coconut oil or vegan butter can replace butter, giving a slightly different richness and aroma.
3. How do I know when the slice is set?
Refrigerate the slice for at least an hour until it’s firm to the touch. It should crack slightly when pressed.
4. How long does it last in the fridge?
You can store slices in an airtight container in the fridge for up to a week, or freeze for longer storage.
5. What if the mixture is too dry or crumbly?
If the mixture feels too dry, splash a teaspoon of hot water and stir until glossy, then press back into the dish.
6. How do I get clean cuts?
Use a sharp knife warmed under hot water for clean, smooth slices, especially if the slice is firm.
7. Can I add other ingredients like nuts or dried fruits?
Adding chopped nuts or dried fruits can boost flavor and texture. Toast nuts beforehand for extra aroma.
8. Can I add melted chocolate to the recipe?
Yes, simply melt the chocolate and swirl it into the mixture before setting. It adds richness and extra chocolate flavor.
9. What’s the best type of cocoa to use?
Use natural or Dutch-processed cocoa based on your flavor preference. Dutch gives a milder, smoother taste.
10. My slices crack when I cut them. What to do?
If the slice cracks when cutting, gently reheat your knife under hot water or patch with a warm spatula.
This no-bake chocolate oat slice is a reminder that sometimes, the simplest ingredients come together to create something truly satisfying. It’s perfect for those busy days when you need a quick fix or a comforting treat without the fuss of baking. Plus, it’s a little piece of nostalgia, wrapped up in chocolate and oats, waiting to be enjoyed.
Sharing this slice feels like passing on a secret—one of those recipes that’s honest, straightforward, and honest in its charm. It’s become my go-to for impromptu gatherings or just a quiet moment of indulgence. Whatever the occasion, it’s a sweet, honest little reward I keep coming back to.

Hi, I’m Ruby Thorn, the home cook behind The Tender Mess. Join me on the journey of Embracing the mess, fearlessly create —because in the kitchen, the mess sometimes leads to magic.