This no bake fudge balls recipe is my go-to when I want something sweet but don’t want to turn on the oven. It’s a nostalgic fix, a little messy but totally forgiving. Plus, the smoky chipotle twist makes it feel like a grown-up treat, not just kid’s snacks.
I love how quick these come together—mix, roll, chill, and you’re done. No fuss, no heat, just rich, fudgy bites that hit the spot. They remind me of those afternoons spent sneaking into the kitchen for a sweet fix, only now I get to make them myself with a little smoky surprise.
This recipe is inspired by childhood nostalgia, but with a twist—adding a hint of smoky chipotle for a surprising depth of flavor that elevates the simple fudge ball into a more complex treat.
A Hidden Ingredient Surprise
- Making these fudge balls feels like a small act of rebellion—no heat, no fuss, just rich chocolate in every bite.
- Seeing the mixture turn from crumbly to silky smooth as I add the butter always surprises me, like magic in the kitchen.
- These bites remind me of lazy afternoons and messy hands, but they’re so worth it when I get that first bite.
- I love how adaptable this recipe is—swap in different nuts or add a pinch of sea salt for a new twist every time.
The story behind this recipe
This recipe came about on a lazy Sunday when I was rummaging through my pantry, craving something sweet but didn’t want to bother with cooking. I remembered making fudge balls as a kid, and I wanted to recreate that feeling—simple, quick, and satisfying. The idea to add a touch of sea salt and chopped nuts struck me one day, and it instantly made the classic treat feel a little more grown-up, a little more interesting. It’s funny how something so straightforward can evoke memories while still feeling fresh and new.
Historical Tidbits on Fudge Balls
- These fudge balls have roots in resourceful home kitchens of the early 20th century, where no-bake treats became a way to satisfy sweet cravings without heating the oven.
- Historically, similar recipes appeared during wartime shortages, using pantry staples like condensed milk, cocoa, and crushed biscuits to create quick, satisfying confections.
- The concept of fudge balls evolved from traditional candy-making techniques, simplified over decades to become a beloved no-fuss snack for busy families and parties.
- In some regions, these treats are called by different names—like ‘energy bites’ or ‘date balls’—but the core idea of quick, no-bake sweetness remains universal.
Key ingredients and tips
- Medjool dates: They’re my secret weapon—soft, caramel-sweet, and sticky. If yours are dry, soak them in warm water for 10 minutes to get that oozy texture.
- Unsweetened cocoa powder: I love how it deepens the chocolate flavor with a slightly bitter punch. For a richer taste, sift it first to avoid clumps—no one likes gritty bites.
- Butter: I use unsalted, and it melts smoothly, giving that luscious mouthfeel. If you’re dairy-free, coconut oil works but adds a subtle coconut aroma that’s pretty nice.
- Nuts (almonds or walnuts): They add crunch and a nutty richness. Toast them lightly first to bring out the aroma—your nose will thank you, and so will your bites.
- Chocolate chips: I prefer semi-sweet for balance—melts just enough when mixed in. For dairy-free, try dark chocolate chunks—more intense flavor, less sweetness.
- Sea salt: Just a pinch for contrast—brings out the chocolate and dates. Don’t skip it; it’s the secret to making these truly addictive.
- Vanilla extract: A splash adds warmth and depth. If you’re out, a tiny bit of almond extract can surprise you with a different kind of richness.
Spotlight on key ingredients
Medjool dates:
- They’re my secret weapon—soft, caramel-sweet, and sticky. If yours are dry, soak them in warm water for 10 minutes to get that oozy texture.
- They melt into a rich, fudgy paste, giving the bites their signature chew and sweetness. Look for plump, shiny dates for best results.
- Handling: Keep them sticky by storing in an airtight container. Too dry? Warm briefly or add a tiny splash of water to revive their oozy quality.
Unsweetened cocoa powder:
- I love how it deepens the chocolate flavor with a slightly bitter punch. For a richer taste, sift it first to avoid clumps—no one likes gritty bites.
- It adds a velvety, intense cocoa kick that makes these fudge balls feel indulgent. Use fresh, bright cocoa for a more aromatic experience.
- Handling: Sift before measuring to prevent lumps. Store in an airtight jar to keep it fresh and fragrant, ready for your next chocolate fix.
Notes for ingredient swaps
- Fruits: Dried apricots or figs can replace dates for a different sweetness and slightly chewier texture.
- Nut Butter: Almond or cashew butter works well instead of butter, adding a different nutty flavor and slightly different consistency.
- Sweetener: Honey or maple syrup can substitute for some of the dates, but may alter the chewiness and sweetness balance.
- Chocolate: Use carob chips or white chocolate for a different flavor profile—expect a different richness and appearance.
- Add-ins: Dried cranberries or cherries can add a tangy twist, replacing some nuts for a chewy, fruity bite.
- Cocoa Powder: Dutch-processed cocoa offers a smoother, less bitter flavor compared to natural cocoa powder.
- Salt: Flaked sea salt can be swapped for Himalayan pink salt, which adds a subtle mineral note and a bit of color.
Equipment & Tools
- Mixing bowl: Combine ingredients and mix thoroughly.
- Spatula: Scrape down sides and mix ingredients evenly.
- Parchment paper: Prevent sticking and easy cleanup.
- Knife and cutting board: Chop dates and nuts uniformly.
- Measuring spoons: Ensure consistent ball size.
Step-by-step guide to fudge balls
- Gather all your ingredients and equipment. A mixing bowl, a spatula, and a parchment-lined tray are your essentials.
- Pit the dates if they have pits—no one wants a surprise crunch. Chop them into smaller pieces for easier blending.
- In a mixing bowl, combine the chopped dates, cocoa powder, and vanilla extract. Mix until the dates are coated and start to break down.
- Add the softened butter (or coconut oil if dairy-free). Mix thoroughly until the mixture is sticky and holds together when pressed.
- Chop the nuts coarsely—your choice of almonds or walnuts—and fold them into the mixture. Stir well to distribute evenly.
- If using chocolate chips, gently fold them in now. They should be evenly dispersed but still look like little pockets of melty goodness.
- Scoop out about a tablespoon of mixture. Roll between your palms to form smooth balls, about 1 inch in diameter.
- Place the formed balls on your parchment-lined tray. Repeat with remaining mixture, aiming for uniform size.
- Chill the tray in the fridge for at least 30 minutes. The fudge balls firm up, making them easier to handle and bite into.
- Once chilled and firm, they’re ready to serve. Keep leftovers in an airtight container in the fridge for up to a week or freeze for longer storage.
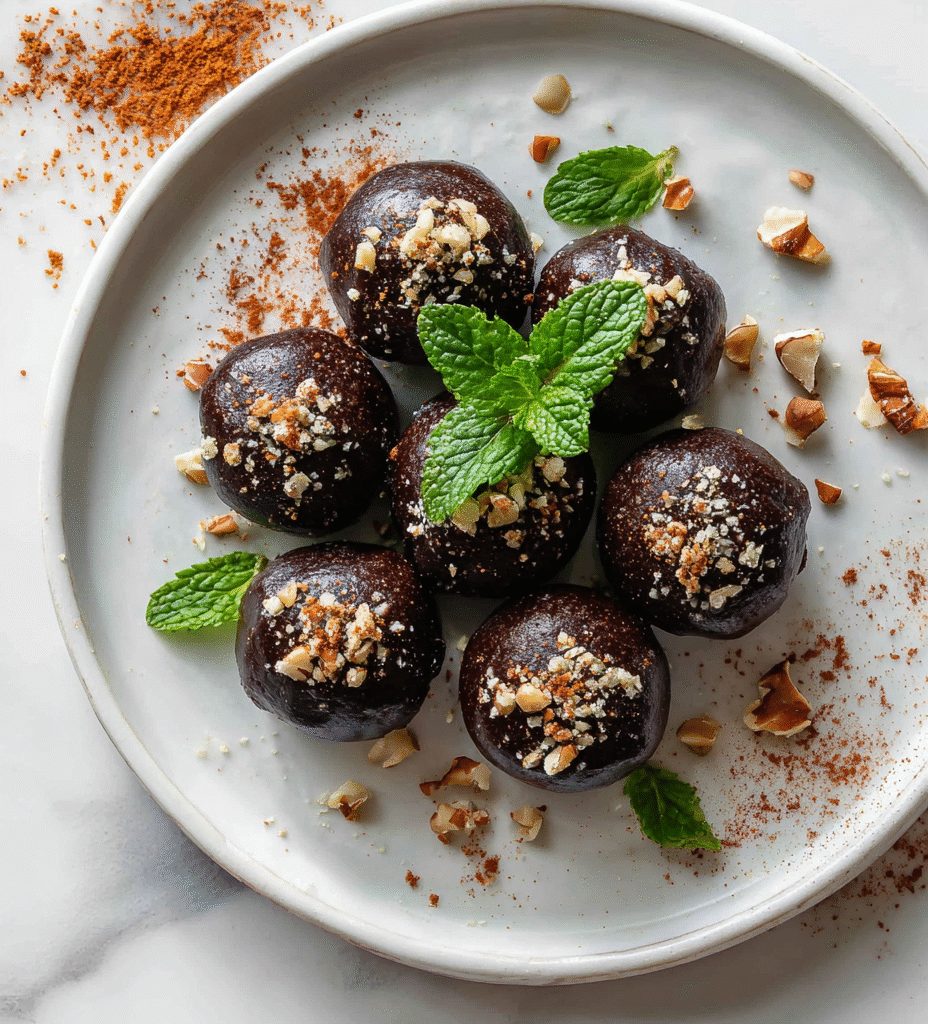
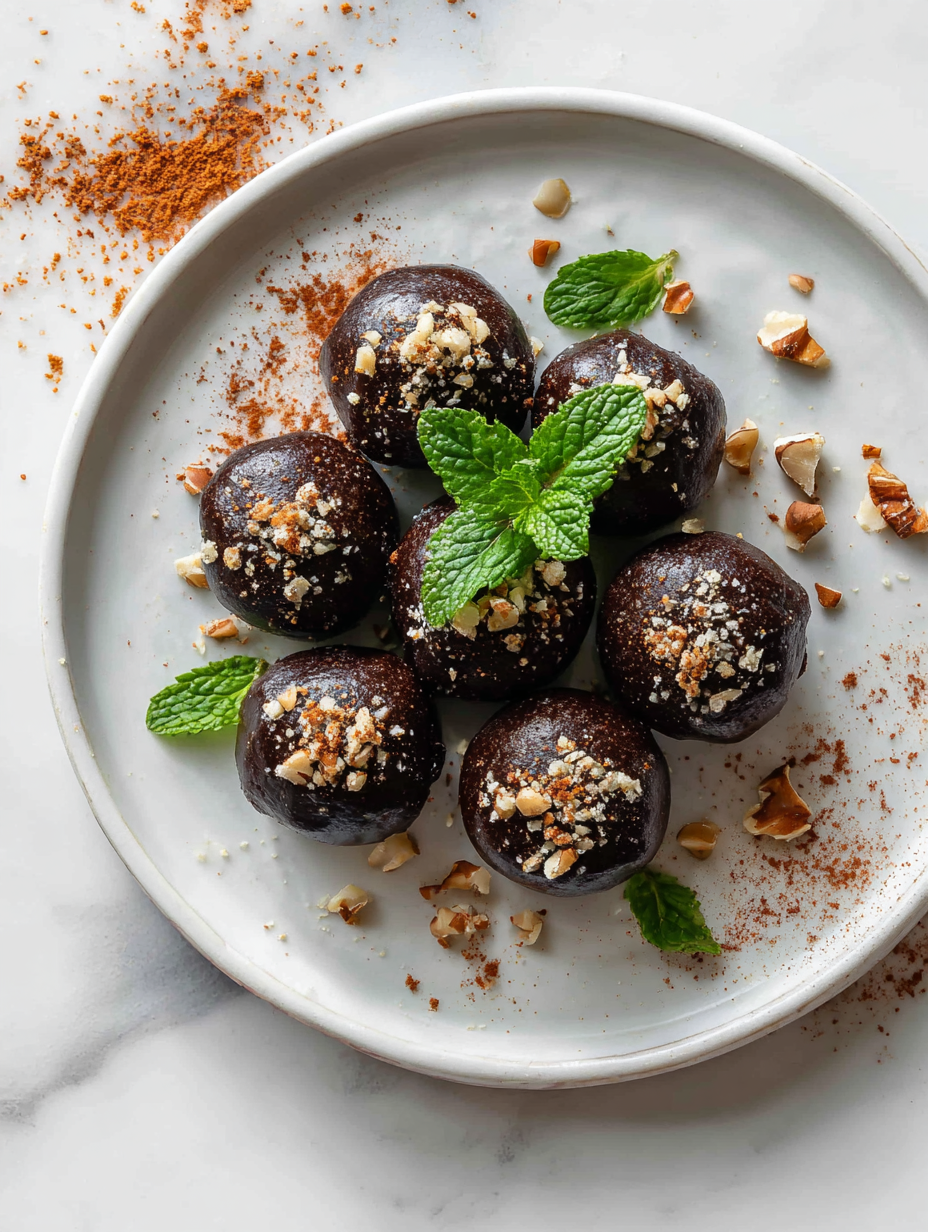
Chill the fudge balls in the fridge for half an hour to set. Serve directly from the fridge for a firm bite, or let sit at room temperature for a few minutes for softer, richer flavor. Arrange on a plate or store in an airtight container.
How to Know It’s Done
- The mixture should be sticky enough to roll without crumbling.
- Fudge balls hold their shape firmly after chilling, not sticky or soft.
- When pressed lightly, the balls should crackle slightly on the surface, indicating firmness.
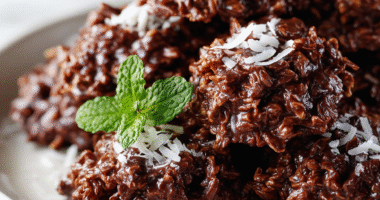
Smoky No-Bake Fudge Balls
Ingredients
Equipment
Method
- Start by chopping your pitted Medjool dates into smaller pieces to help them blend more easily.
- In a mixing bowl, combine the chopped dates with sifted cocoa powder, vanilla extract, and softened butter. Mix everything together using a spatula until the dates are coated and start to break down, creating a sticky, fudgy mixture.
- Add the toasted chopped nuts and gently fold them into the mixture, ensuring an even distribution of crunch and flavor.
- If using chocolate chips, fold them in now, spreading them throughout the mixture for little melty pockets.
- Sprinkle the smoked chipotle powder and sea salt into the mixture, then fold to incorporate those smoky, salty notes.
- Using a tablespoon or your hands, scoop out about a tablespoon of the mixture and roll it between your palms to form a smooth, round ball. Repeat with the remaining mixture.
- Place the formed fudge balls onto a parchment-lined tray, spacing them evenly. Chill in the fridge for at least 30 minutes to let them firm up.
- Once chilled and firm, enjoy these chewy, fudgy bites straight from the fridge or at room temperature for a softer experience. Store leftovers in an airtight container in the fridge for up to a week.
Notes
Pro tips for perfect fudge balls
- Bolded mini-head: Chill the mixture for at least 30 minutes to firm it up, making rolling easier.
- Bolded mini-head: Toast nuts lightly before chopping to bring out their aroma and add depth.
- Bolded mini-head: Sift cocoa powder to avoid clumps and ensure a smooth, velvety texture throughout.
- Bolded mini-head: Use slightly warm, softened butter for a silky incorporation that makes the mixture more cohesive.
- Bolded mini-head: When rolling, dampen your hands slightly to prevent sticking and achieve smooth balls.
- Bolded mini-head: Add a pinch of sea salt to enhance chocolate and date sweetness, balancing flavors beautifully.
- Bolded mini-head: Mix in chopped nuts or chocolate chips gently to keep pockets of crunch or melty goodness intact.
Common mistakes and how to fix them
- FORGOT to measure ingredients precisely → Use measuring spoons for consistency.
- DUMPED in all ingredients at once → Add ingredients gradually for even mixing.
- OVER-TORCHED the chocolate mixture → Stir constantly; remove from heat if it begins to crackle.
- MISSED the chilling step → Chill for at least 30 minutes for firm, bite-ready fudge balls.
Quick fixes and pantry swaps
- When mixture is crumbly, splash in a tiny bit of water and knead until sticky.
- If fudge balls are too soft, freeze for 10 minutes before rolling again.
- Splash melted chocolate with a pinch of oil to shimmer and smoothen texture.
- Patch over cracks with a small dab of warm chocolate to seal imperfections.
- Shield delicate bites with a light dusting of cocoa powder for a refined finish.
Prep, store, and reheat tips
- Prepare the mixture ahead of time and refrigerate for up to 24 hours—keeps the flavors fresh and makes rolling easier.
- Store the fudge balls in an airtight container in the fridge for up to one week, maintaining their firm, fudgy texture.
- For longer storage, freeze the balls for up to 3 months; thaw in the fridge for a few hours before serving.
- Refrigerated fudge balls develop a richer chocolate aroma; let sit at room temperature for 5 minutes to soften slightly before eating.
- Chilled or frozen, they stay firm but should be checked for any signs of freezer burn or dryness after extended storage.
Top questions about fudge balls
1. Can I use other sweeteners instead of dates?
Yes, using honey or maple syrup can work, but it may change the texture and sweetness slightly.
2. Can I make these dairy-free?
Absolutely, coconut oil is a good substitute for butter, adding a subtle coconut aroma.
3. Can I omit nuts or add other mix-ins?
Yes, you can skip the nuts or replace them with dried fruit for different textures and flavors.
4. How long should I chill the mixture?
Chill the mixture for at least 30 minutes until firm to make rolling easier and the bites hold shape.
5. How should I store the fudge balls?
Store in an airtight container in the fridge for up to a week or freeze for longer storage.
6. My mixture is crumbly, what do I do?
If the mixture is too crumbly, add a tiny splash of water and knead until sticky.
7. How do I get perfect round balls?
Use a damp hand when rolling to prevent sticking and achieve smooth, round balls.
8. The fudge balls are too soft, how can I fix them?
When mixture is too soft, freeze it for 10 minutes before rolling to firm up.
9. Should I add salt to the recipe?
Add a pinch of sea salt to enhance the chocolate flavor and balance the sweetness.
10. What kind of cocoa powder is best?
Use high-quality cocoa powder for a rich, intense chocolate flavor that really shines in the bites.
These fudge balls are more than just a quick treat; they’re a reminder that simple ingredients can create something special. Making them brings a little chaos and a lot of joy—especially when everyone ends up with sticky fingers and smiles.
Right now, when we crave comfort but want something manageable, this recipe hits the spot. It’s honest, straightforward, and oddly satisfying—perfect for those moments when you need a sweet fix without fuss.

Hi, I’m Ruby Thorn, the home cook behind The Tender Mess. Join me on the journey of Embracing the mess, fearlessly create —because in the kitchen, the mess sometimes leads to magic.