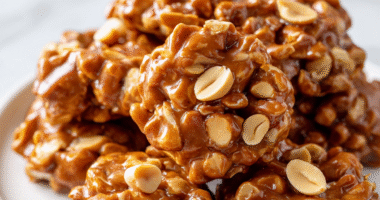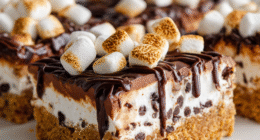

These no bake chocolate honey bars are my go-to when chaos hits the fan on weekends. They come together in no time, no oven required, which is a huge relief when I’m juggling a million things and still craving something sweet.
There’s something about the combination of rich chocolate and sticky honey that feels like a warm hug, even if I’m just grabbing a quick snack between errands or after a long day. It’s a simple recipe, but the flavor punch it delivers makes it feel like a treat worth savoring.
I love how flexible this recipe is—add a sprinkle of sea salt or toss in some chopped nuts if I want a little extra crunch. It’s the kind of dessert that saves me during those chaotic weekends when I need comfort, fast.
How these bars became my emergency sweet fix during chaotic weekends, when I need comfort in a quick, no-fuss treat.
The story behind this recipe
- This recipe came from a lazy afternoon craving something rich and sweet, but I didn’t want to turn on the oven. I was rummaging through my pantry and found some honey, chocolate chips, and a handful of oats. It struck me how these simple ingredients could come together into something more than just a snack — a small act of comfort that’s quick and honest.
- One day, I was rushing through a chaotic weekend, juggling chores and kids, when I remembered how my grandmother used to keep a stash of homemade treats for emergencies. This recipe felt like a modern twist on that—no fuss, no mess, just pure, straightforward sweetness.
- Every time I make these bars, I think of those quiet moments of relief, knowing I’ve got a sweet, sticky rescue ready in the fridge. They’re my little secret weapon for pulling through busy days without sacrificing flavor or comfort.
Ingredient breakdown: key components
- Honey: It’s my secret weapon for that gooey, sticky sweetness that holds everything together. If you prefer a milder flavor, try agave syrup—less floral, but still sweet and smooth.
- Chocolate Chips: I use semi-sweet for a balanced richness that’s not too overpowering. Swap with dark chocolate chunks if you want a more intense cocoa punch, or white chocolate for a sweeter, creamier bite.
- Oats: Old-fashioned rolled oats are my go-to—they add a pleasant chewiness. For a nuttier flavor, toast them lightly before mixing, or try certified gluten-free oats if needed.
- Butter: I melt it just until silky, which helps everything blend smoothly. You can substitute with coconut oil for a dairy-free version that adds a subtle coconut aroma, but be mindful of the slightly different melting point.
- Nuts (optional): Chopped almonds or walnuts add crunch and depth. If you’re allergic or out, sunflower or pumpkin seeds are a good crunch alternative that won’t disappoint.
- Vanilla Extract: Just a splash brightens the whole mix with warm, floral notes. If you’re out, a pinch of almond extract can add a different, lovely aroma.
- Salt: A pinch of flaky sea salt enhances the chocolate and honey’s richness. Skip if you want a purely sweet profile, but don’t forget—it really pulls the flavors together.
Spotlight on key ingredients
Honey:
- It’s my secret weapon for that gooey, sticky sweetness that holds everything together. If you prefer a milder flavor, try agave syrup—less floral, but still sweet and smooth.
- Chocolate Chips: I use semi-sweet for a balanced richness that’s not too overpowering. Swap with dark chocolate chunks if you want a more intense cocoa punch, or white chocolate for a sweeter, creamier bite.
Oats:
- Old-fashioned rolled oats are my go-to—they add a pleasant chewiness. For a nuttier flavor, toast them lightly before mixing, or try certified gluten-free oats if needed.
- Vanilla Extract: Just a splash brightens the whole mix with warm, floral notes. If you’re out, a pinch of almond extract can add a different, lovely aroma.
Notes for ingredient swaps
- Honey: My go-to for sticky sweetness, but maple syrup offers a slightly smoky flavor and thinner consistency. Agave syrup can be a neutral, vegan alternative, though it’s less sticky.
- Chocolate Chips: Semi-sweet are my favorite for balance, but dark chocolate chunks intensify the cocoa punch, and white chocolate provides a sweeter, creamier alternative. For dairy-free, look for vegan dark chocolates.
- Oats: Old-fashioned rolled oats give the right chew, but quick oats can be used if you’re in a hurry — just expect a slightly softer texture. Toast them lightly beforehand for extra nutty flavor.
- Butter: I melt unsalted butter for richness; coconut oil can replace it for a dairy-free version, adding a subtle coconut aroma, but keep an eye on melting points to avoid separation.
- Nuts (optional): Chopped almonds or walnuts add crunch, but sunflower or pumpkin seeds are great nut-free options that still give that satisfying bite. Toasted nuts add extra flavor.
- Vanilla Extract: Just a splash enhances the sweetness, but almond extract can add a different, warm aroma if you’re out of vanilla. Skip if you want a more straightforward chocolate-honey flavor.
- Salt: Flaky sea salt really pulls the flavors together; if you prefer a sweeter profile, skip it, but don’t underestimate how much salt can elevate the chocolate and honey.
Equipment & Tools
- 20×20 cm (8×8 inch) square pan: Holds the mixture as it sets and shapes the bars.
- Spatula: Spreads and presses the mixture evenly into the pan.
- Microwave-safe bowl: Melts the honey and chocolate chips smoothly.
- Parchment paper: Prevents sticking and makes removal easy.
Step-by-step guide to no bake bars
- Gather your equipment: a 20×20 cm (8×8 inch) square pan, a spatula, a microwave-safe bowl, and parchment paper. Line the pan with parchment for easy removal.
- In the microwave-safe bowl, combine 1/2 cup (120 ml) of honey and 1/2 cup (90 g) of chocolate chips. Microwave in 30-second bursts, stirring after each, until smooth and glossy, about 1-2 minutes.
- Add 1/4 cup (60 g) of melted butter to the chocolate mixture. Stir well until fully combined, creating a shiny, cohesive sauce. The aroma should be rich and chocolatey.
- Stir in 2 cups (160 g) of rolled oats and 1/2 teaspoon of vanilla extract. Mix until the oats are evenly coated and the mixture is thick but spreadable. It should smell warm and inviting.
- Pour the mixture into the prepared pan. Use a spatula to spread it evenly, pressing down gently to compact. The surface should be smooth and slightly shiny.
- Place the pan in the fridge. Chill for at least 2 hours, or until firm and set. During this time, the mixture will harden and develop a dense, chewy texture.
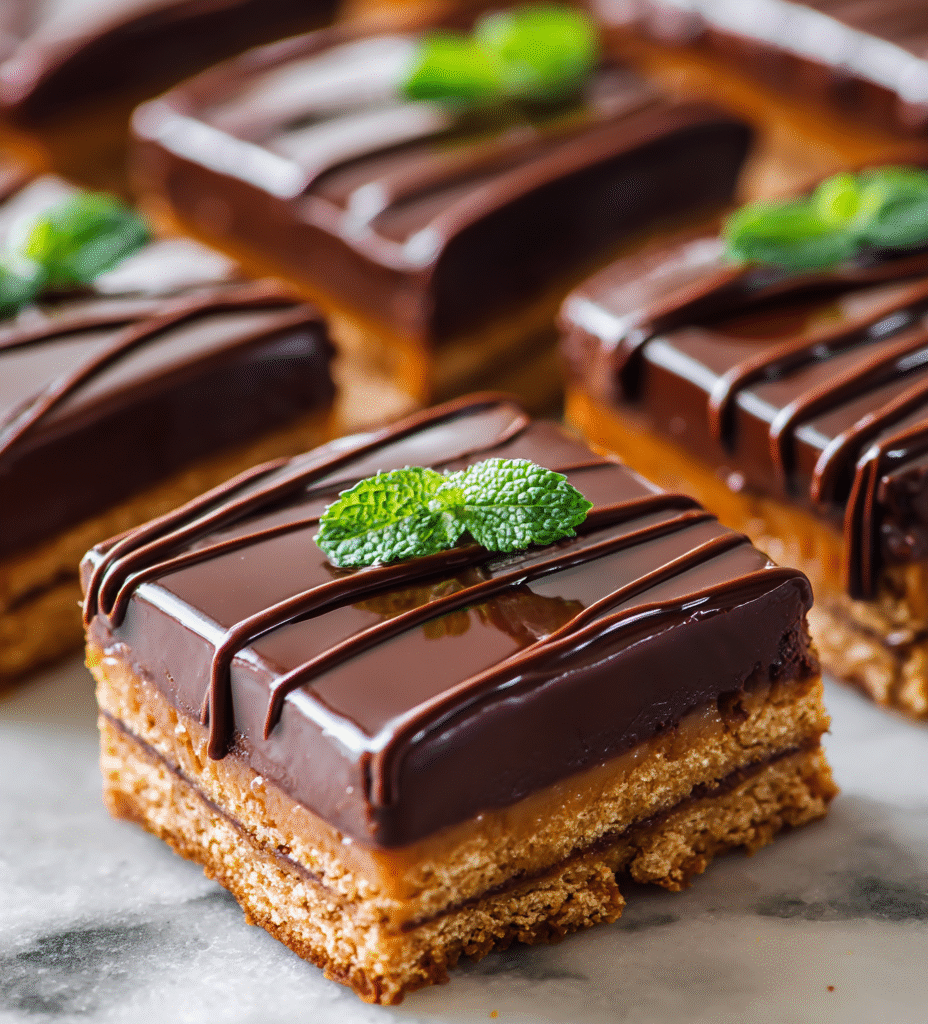
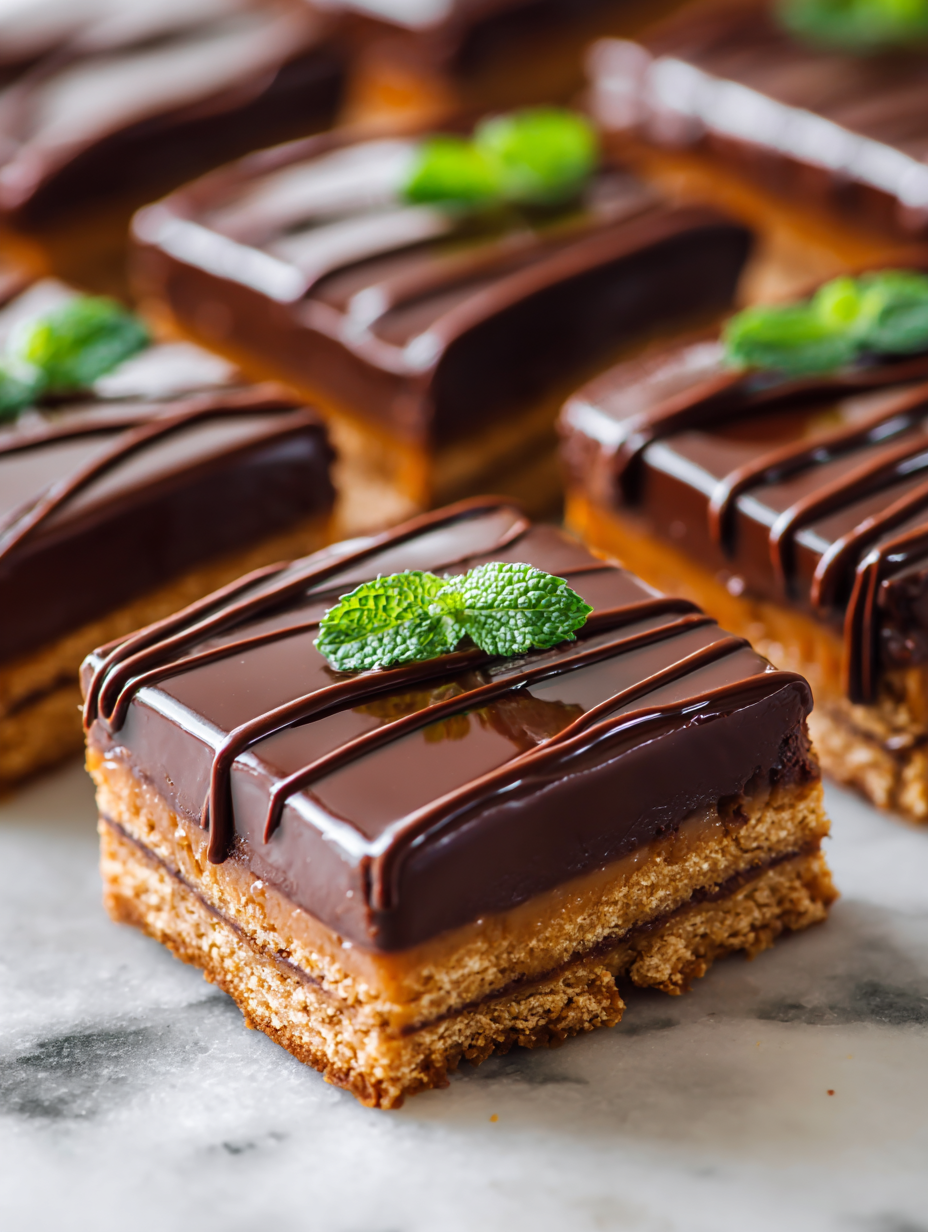
- Once set, lift the slab out using the parchment paper. Cut into squares or bars with a sharp knife. The edges should be clean, and the bars should hold their shape without crumbling.
- Finish by drizzling with extra honey or melted chocolate if desired. Serve immediately or store in an airtight container in the fridge for up to a week.
Chill the bars in the fridge for at least 2 hours until firm. Once set, lift out with parchment, cut into squares, and serve. Store leftovers in an airtight container in the fridge for up to a week.
How to Know It’s Done
- Chocolate mixture is smooth, glossy, with no lumps.
- The mixture is evenly spread and pressed into the pan without gaps.
- Bars are firm and hold shape when cut, with a dense but chewy texture.
No Bake Chocolate Honey Bars
Ingredients
Equipment
Method
- Line your square pan with parchment paper, leaving some overhang for easy removal.
- In a microwave-safe bowl, combine honey and chocolate chips. Microwave in 30-second bursts, stirring between each, until the mixture is smooth, glossy, and fragrant—about 1-2 minutes.
- Add the melted butter to the chocolate mixture and stir well until fully incorporated, creating a rich, shiny sauce.
- Stir in the vanilla extract, then add the rolled oats. Mix until the oats are evenly coated and the mixture feels thick and sticky.
- Pour the mixture into your prepared pan, using a spatula to spread it evenly across the surface. Press down gently to compact the mixture and eliminate air pockets.
- Optional: sprinkle chopped nuts or a pinch of sea salt on top for extra flavor and crunch.
- Place the pan in the fridge and chill for at least 2 hours, or until the bars are firm and set.
- Once chilled, lift the bars out of the pan using the parchment overhang, then cut into squares or bars with a sharp knife.
- Serve immediately or store in an airtight container in the fridge for up to a week. Enjoy the dense, chewy texture and rich chocolate-honey flavor!
Notes
Tips for perfect no bake bars
- Use high-quality chocolate chips for a richer, more velvety melt that coats the tongue.
- Chill the mixture briefly before spreading—this helps it firm up and makes for cleaner cuts.
- Gently press the mixture into the pan to eliminate air pockets and create a dense, chewy texture.
- Use a warm spatula to smooth the top—dip it in hot water and wipe for a shiny, even surface.
- Let the bars sit at room temperature for 10 minutes before slicing—reduces crumbling and gives cleaner edges.
- Add a pinch of sea salt on top after spreading—enhances the chocolate and honey’s depth with a shimmer of salt crystals.
- Store in an airtight container in the fridge for up to a week—keeps bars firm and maintains that sticky, gooey goodness.
Common mistakes and how to fix them
- FORGOT to check temperature → Use a thermometer to ensure 35°C (95°F) for proper melting.
- DUMPED ingredients too quickly → Add ingredients gradually, mixing after each addition.
- OVER-TORCHED chocolate → Remove from heat immediately and stir until smooth.
- MISSED spreading step → Press mixture firmly into pan for even setting and better texture.
Quick fixes for common issues
- When chocolate seizes, splash in a teaspoon of vegetable oil to smooth out the crackle.
- If mixture is too stiff, gently warm it in short bursts to loosen without melting completely.
- DUMPED too much honey? Add a few more oats to balance the sweetness and sticky texture.
- Over-torched chocolate? Patch with a splash of warm milk and stir quickly to recover gloss.
- Shield from humidity—if bars get sticky or shiny, store in a cool, dry place and refrigerate if needed.
Prep, store, and reheat tips
- Prepare the mixture and line your pan the night before; it firms up better after a prolonged chill, making slicing easier.
- Bars can be stored in an airtight container in the fridge for up to a week, maintaining their chewy texture and rich aroma.
- For longer storage, wrap bars individually in parchment and freeze for up to a month; thaw at room temperature for 10 minutes for optimal texture.
- Reheat by letting the bars sit at room temperature for 5 minutes or gently warming in the microwave for 10 seconds, until slightly melty and fragrant.
Top questions about no bake bars
1. Can I use a different sweetener?
Yes, you can swap honey for maple syrup or agave, but the texture might be slightly less sticky.
2. Can I substitute the chocolate chips?
Absolutely. White chocolate chips will give a sweeter, creamier taste, while dark chocolate adds depth.
3. Can I use quick oats instead of rolled oats?
Yes, toasted oats give more flavor, but raw oats work fine if you’re in a rush or prefer a softer bite.
4. What can I replace butter with?
Coconut oil melts easily and adds a subtle coconut aroma, making it a good dairy-free substitute for butter.
5. Can I add nuts or seeds?
Adding chopped nuts gives extra crunch, but seeds like sunflower or pumpkin are good nut-free options.
6. How long should I chill the mixture?
Chilling for at least 2 hours ensures the bars set properly, making cutting easier and cleaner.
7. My mixture is too stiff, what do I do?
If the mixture is too thick to spread, warm it slightly or let it sit at room temperature for a few minutes.
8. How should I store these bars?
Store in an airtight container in the fridge for up to a week, or freeze for longer storage. Let thaw before serving.
9. What if my chocolate melts or cracks?
If the chocolate seizes or cracks, add a teaspoon of vegetable oil and stir until smooth.
10. My bars are crumbling, how can I fix them?
If the bars are too crumbly, gently warm the mixture, or add a touch more honey to bind everything together.
Making these no bake chocolate honey bars reminded me how simple ingredients can come together to create something truly satisfying. They’re a little piece of comfort that I keep coming back to, especially during busy or chaotic days.
In a way, these bars are more than just a quick treat—they’re a small act of kindness I give myself when I need it most. Sometimes, that’s all it takes to turn a rough moment around with a little sticky sweetness and rich chocolate aroma.

Hi, I’m Ruby Thorn, the home cook behind The Tender Mess. Join me on the journey of Embracing the mess, fearlessly create —because in the kitchen, the mess sometimes leads to magic.