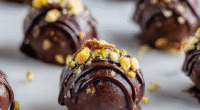
There’s a certain magic in how childhood treats can still feel fresh and satisfying, even as an adult. These no-bake peanut clusters bring back that nostalgic warmth, but with a modern twist that makes them perfect for busy days or last-minute cravings. I love how simple ingredients come together in a sticky, nutty hug that’s hard to beat.
What I really appreciate about this recipe is how forgiving it is. No oven, no fuss — just melting, mixing, and chilling. It’s the kind of treat that feels like a cozy secret, perfect for sharing or sneaking a handful when you need a quick pick-me-up. Plus, the rich peanut flavor with just a touch of sweetness hits every time.
Focusing on the nostalgic comfort and simplicity of childhood treats, but with a modern, no-bake twist that emphasizes quick assembly and rich, nutty flavor.
A Secret Childhood Favorite
- Making these peanut clusters always sparks a rush of childhood nostalgia, reminding me of lazy weekend afternoons.
- I love how quickly I can whip these up when friends drop by unannounced—no fuss, just pure comfort.
- There’s a quiet pride in turning simple ingredients into something that’s both rich and satisfying without turning on the oven.
- Every bite of these luscious clusters feels like a warm, nutty hug — especially on chilly evenings or when I need a quick treat.
- It’s oddly satisfying how these little bites can brighten a dull day, like a secret stash of happiness tucked away.
A Secret Childhood Favorite
- This recipe came about during a chaotic weekend when I needed something sweet, quick, and satisfying without turning on the oven. I remembered how my grandma used to toss together similar clusters during busy mornings, using whatever nuts and chocolate she had. It’s funny how a handful of ingredients can suddenly feel like a warm hug, especially when life’s a bit hectic.
- I started experimenting with different nuts and chocolates, trying to replicate that nostalgic feeling but with a modern, no-fuss approach. Each batch became a little ritual—melting, mixing, then chilling—like a tiny act of self-care during a chaotic day. Now, these peanut clusters are my go-to for a quick treat that’s honest, simple, and just a little bit special.
- heading
- story_type
Trivia and History of Peanut Clusters
- These peanut clusters have roots in Southern comfort food, where nuts and chocolate often mingled in home kitchens.
- During the Great Depression, no-bake treats like these became popular because they used pantry staples and required no oven.
- The combination of chocolate and peanuts was popularized in the early 20th century, becoming a staple in American candy making.
- Many families passed down their secret ratios and techniques, making each batch a little family tradition over generations.
Ingredient breakdown: key components
- Peanut butter: I use creamy, velvety peanut butter that melts smoothly—opt for natural if you want a richer, roasted flavor, but skimp on sugar if you prefer less sweetness.
- Chocolate chips: I prefer semi-sweet for balance—melted chocolate should be glossy and smooth, with a faint aroma of cocoa. Swap with dark or milk for different depth.
- Honey or syrup: Adds just enough stickiness and sweetness—go for honey if you want a floral note, or maple syrup for a smoky undertone. Adjust for your desired chewiness.
- Nuts: I love crunchy roasted peanuts or almonds—make sure they’re well toasted for extra flavor, but you can swap for cashews or pecans if you like a softer bite or different nut oils.
- Salt: A pinch of flaky sea salt enhances the chocolate and peanut flavor—skip or reduce if you’re watching sodium, but don’t forget that burst of saltiness.
- Vanilla extract: A splash of vanilla adds warmth and depth—use pure extract for a richer aroma, or skip if you want a more straightforward nutty taste.
- Optional add-ins: Dried cranberries, chopped pretzels, or shredded coconut—these bring textural contrast and surprise, so feel free to customize based on what you love.
Spotlight on key ingredients
Peanut butter:
- I prefer creamy, velvety peanut butter that melts smoothly—opt for natural for a richer, roasted flavor, but avoid overly oily varieties that can make the clusters greasy.
- Chocolate chips: I go for semi-sweet, aiming for a glossy, smooth melt with a cocoa aroma that’s faint but inviting. Swap with dark or milk chocolate for different flavor depths.
- Peanuts: Roasted, salted peanuts add crunch and depth. Their oily, toasted aroma is key; skipping the roasting dulls the flavor. Try almonds or cashews for a different nut profile.
Chocolate and sweeteners:
- Chocolate: It’s the backbone of these clusters—melting it should release a rich, cocoa scent, and the texture should be silky. Overheating causes seize, so gentle heat is best.
- Nuts: Roasted peanuts or almonds bring crunch and a smoky aroma. During melting, they stay firm but become slightly glossy, adding a satisfying bite. Toast to boost flavor.
- Honey or syrup: Adds stickiness and sweetness—honey brings floral notes, while maple syrup adds a caramel undertone. Their viscosity affects how well the mixture holds together.
Notes for ingredient swaps
- Nuts: Swap peanuts for almonds or cashews for a milder, buttery flavor. Toast well for extra aroma.
- Chocolate: Use dark, milk, or white chocolate depending on your preference. Carob chips work for a caffeine-free option.
- Sweetener: Substitute honey with agave syrup or maple syrup for different floral and smoky notes.
- Nut butter: Try almond or cashew butter if peanut allergies are a concern. Keep in mind, they might alter the flavor and texture slightly.
- Salt: Reduce or omit if you’re watching sodium, but a pinch really enhances the overall flavor. Flaky sea salt adds a nice crunch.
- Add-ins: Dried fruits, shredded coconut, or pretzels can be swapped or added for texture and flavor contrast.
- Flavor enhancer: Vanilla extract can be replaced with a splash of bourbon or rum for a different aromatic dimension.
Equipment & Tools
- Microwave-safe bowl: Melting chocolate and peanut butter evenly.
- Spatula: Stirring and combining ingredients smoothly.
- Parchment-lined baking sheet: Preventing sticking and easy cleanup.
- Spoon or small scoop: Portioning clusters uniformly.
Step-by-step guide to peanut clusters
- Gather your equipment: a microwave-safe bowl, a spatula, a baking sheet lined with parchment, and a spoon or small scoop for portioning.
- In the microwave-safe bowl, combine 1 cup of chocolate chips and 1/2 cup of creamy peanut butter.
- Microwave in 30-second bursts on high, stirring after each, until smooth and glossy (about 1-2 minutes total). Be attentive; over-microwaving can cause the chocolate to seize.
- Add 1 tablespoon of honey or maple syrup, a pinch of salt, and 1 teaspoon of vanilla extract to the melted mixture. Stir until evenly incorporated and fragrant.
- Fold in 2 cups of roasted peanuts or your preferred nuts. Mix well, ensuring nuts are coated with the chocolate-peanut mixture.
- Using a spoon or small scoop, drop spoonfuls of the mixture onto the prepared baking sheet, spacing them about 2 inches apart.
- Gently press down each cluster if you prefer a flatter, more uniform shape. Chill in the refrigerator for 30 minutes to set. If you’re in a rush, pop them in the freezer for 15 minutes, but avoid rushing the chilling—proper setting develops the texture.
- Once firm and shiny, remove from fridge or freezer. Let sit at room temperature for 5 minutes before serving to allow flavors to mellow. Plate and enjoy!
Let the clusters rest in the fridge until set, about 30 minutes. Serve directly from the fridge for best texture or let sit at room temperature for a few minutes to soften slightly before eating. Store leftovers in an airtight container in the fridge for up to a week.
How to Know It’s Done
- Chocolate is smooth and glossy, with a rich cocoa aroma.
- Nuts are well coated and slightly toasted in scent and crunch.
- Clusters are firm but not hard, with a slight jiggle when gently shaken.
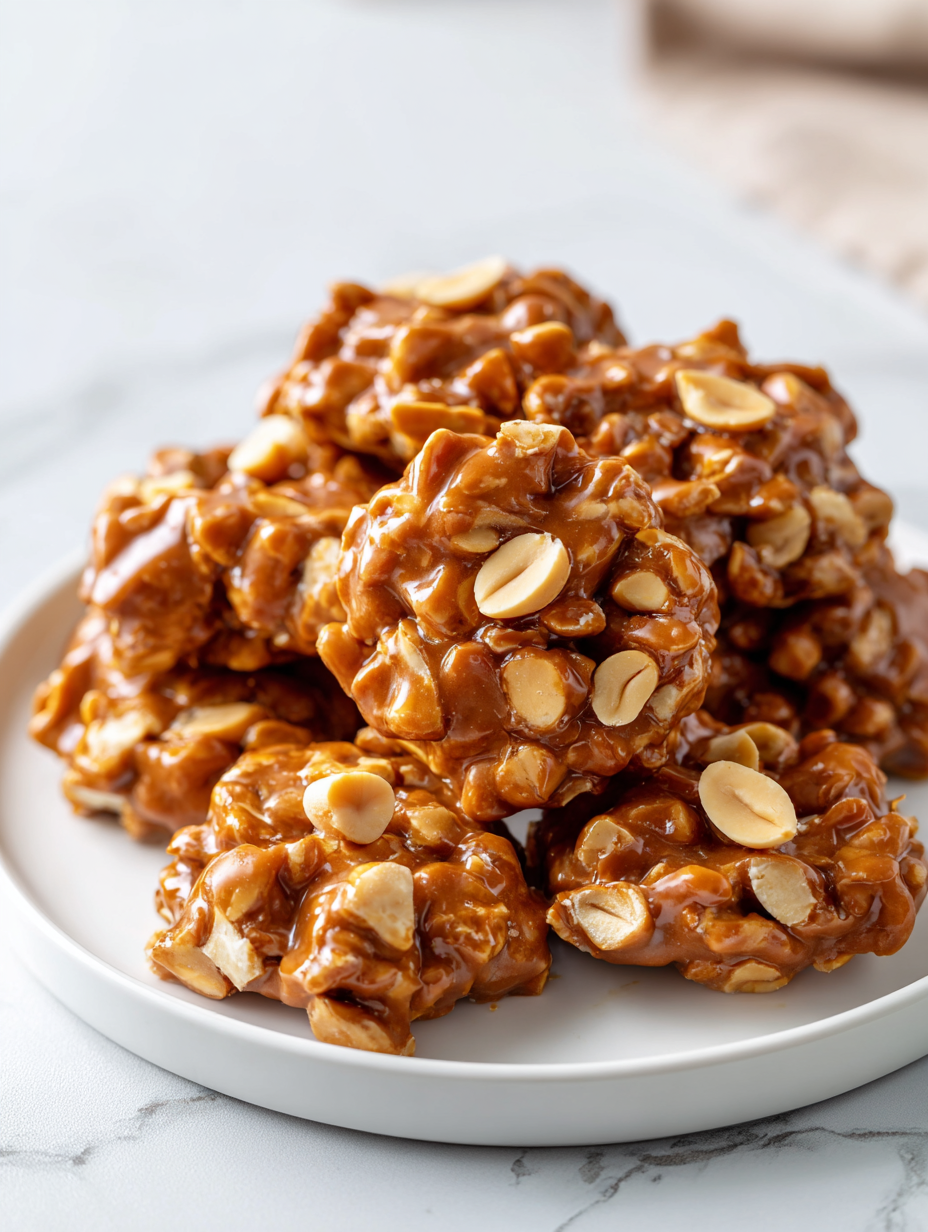
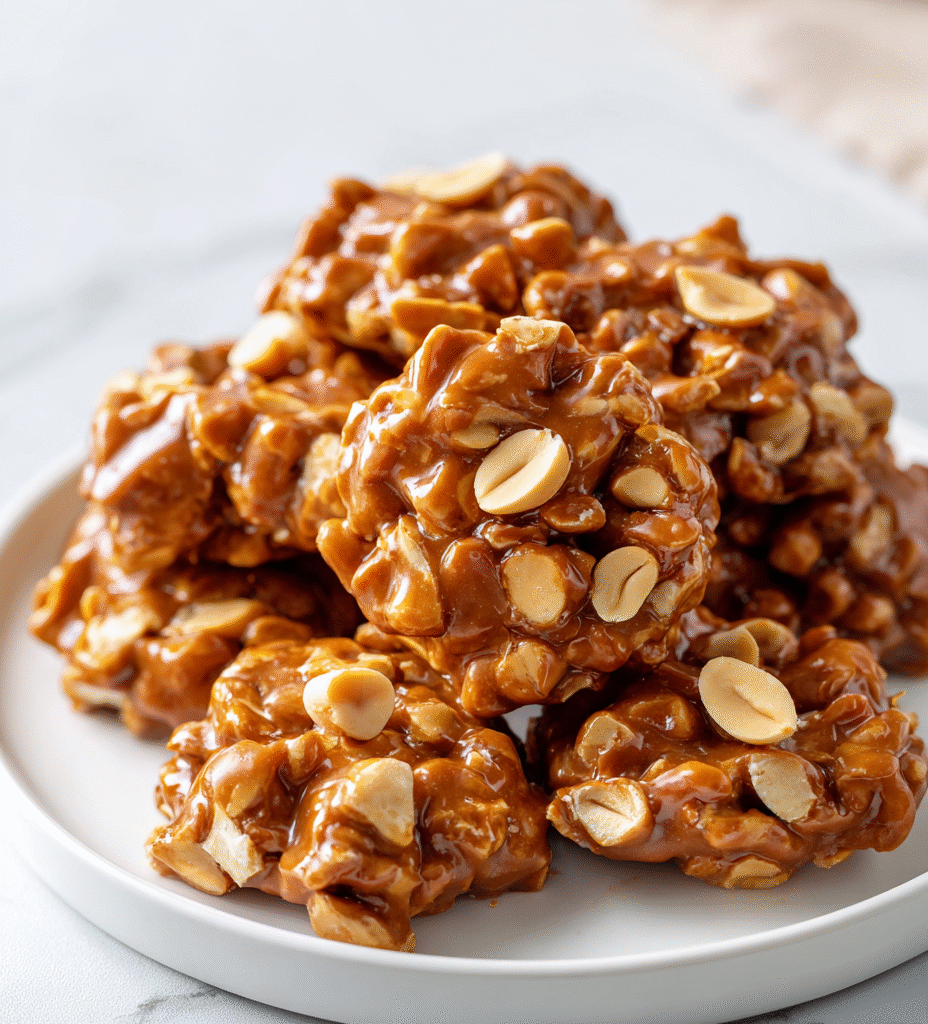
No-Bake Peanut Clusters
Ingredients
Equipment
Method
- Place the chocolate chips and peanut butter in a microwave-safe bowl. Microwave in 30-second bursts, stirring well after each, until the mixture is smooth, glossy, and fully melted.
- Add honey or maple syrup, a pinch of salt, and vanilla extract to the melted mixture. Stir until everything is evenly combined and fragrant.
- Fold in the roasted peanuts, ensuring they are thoroughly coated with the chocolate mixture. The mixture should become thick and sticky.
- Using a spoon or small scoop, drop dollops of the mixture onto a parchment-lined baking sheet, spacing them about 2 inches apart.
- Gently press down each cluster if you prefer a flatter shape. Place the tray in the refrigerator and chill for about 30 minutes until they are firm and shiny.
- Once set, remove the clusters from the fridge and let sit at room temperature for 5 minutes. Serve and enjoy these rich, nutty treats!
Notes
Pro tips for perfect clusters
- Bolded mini-head: Use low heat → Melt chocolate slowly to prevent seize, stirring often for a glossy finish.
- Bolded mini-head: Keep nuts dry → Toast and cool nuts thoroughly before mixing for maximum crunch and aroma.
- Bolded mini-head: Chill in stages → Chill the clusters until just set, then bring to room temp for optimal texture.
- Bolded mini-head: Adjust sweetness → Taste melted mixture before adding nuts; add more honey if too bland.
- Bolded mini-head: Use fresh ingredients → Fresh chocolate chips melt smoother and have richer flavor.
- Bolded mini-head: Uniform size matters → Use a small scoop for evenly sized clusters, ensuring consistent texture.
- Bolded mini-head: Don’t rush cooling → Allow clusters to set fully in fridge for a crisp exterior and chewy interior.
Common mistakes and how to fix them
- FORGOT to stir thoroughly → Stir until glossy, smooth, and fragrant.
- DUMPED in all ingredients at once → Add ingredients gradually for even coating.
- OVER-TORCHED chocolate → Remove from heat immediately; add a teaspoon of oil to loosen.
- FAILED to chill properly → Chill for at least 30 minutes until clusters are firm and shiny.
Quick fixes and pantry swaps
- When chocolate seizes, splash in a teaspoon of vegetable oil to smooth it out.
- If nuts are soggy, toast them again briefly for extra crunch and aroma.
- DUMPED in too much salt? Rinse the mixture quickly and add a bit more chocolate to balance.
- Over-chilled clusters become brittle; allow them to sit at room temp for 5 minutes before serving.
- Splash a tiny bit of warm water if the mixture is too thick to stir smoothly.
Prep, store, and reheat tips
- You can prepare the mixture a day ahead; keep it covered in the fridge to prevent moisture from developing, which can affect texture.
- Store the clusters in an airtight container in the fridge for up to a week. The cold keeps them firm and fresh, but they might soften slightly at room temperature.
- For longer storage, freeze the clusters for up to a month. Wrap them tightly to avoid freezer burn and preserve flavor.
- Reheat by letting them sit at room temperature for 5-10 minutes to soften slightly before serving. Do not microwave, as it can melt the chocolate unevenly and affect texture.
Top questions about peanut clusters
1. Can I use chunky peanut butter?
Use smooth, creamy peanut butter for the best melt and flavor. Chunky can work but might be less uniform.
2. Is microwave melting necessary?
Yes, you can melt chocolate in a double boiler if you prefer avoiding the microwave. Just keep the heat gentle.
3. How do I know when they’re ready?
Chill the clusters until they’re firm and shiny, about 30 minutes in the fridge. They should crack easily when gently pressed.
4. How long do they last?
Store leftovers in an airtight container in the fridge for up to a week. They might soften at room temp, so keep them cool.
5. My clusters are too sticky or too hard, how fix?
If clusters are too sticky, chill longer or add a bit more melted chocolate. If too hard, let sit at room temp for a few minutes.
6. Can I change the type of chocolate?
You can swap dark, milk, or white chocolate depending on your taste. Use good-quality chips for best melting.
7. Should I add salt?
Adding a pinch of flaky sea salt enhances the flavor and balances the sweetness. Skip if you prefer less salt.
8. Can I customize with add-ins?
Yes, you can add dried fruits, shredded coconut, or pretzels for extra texture and flavor contrast.
9. How do I get evenly sized clusters?
Use a small scoop for uniform clusters. Keep the mixture chilled so it’s easier to handle and shape.
10. What if my chocolate seizes?
If chocolate seizes, add a teaspoon of vegetable oil and stir until smooth. It helps loosen the mixture.
These no-bake peanut clusters are a perfect little escape—rich, nutty, and just a bit messy in the best way. They’re quick to throw together, but they carry all that nostalgic warmth that sticks with you long after the last bite. It’s the kind of treat that sneaks up on you, comforting and honest, especially when you need a quick moment of joy.
In a world that’s constantly rushing, these simple bites remind me that the best things often come from just a handful of ingredients and a little patience. They’re a small, sweet anchor—something real to hold onto, no oven required. And honestly, that’s enough for me right now.

Hi, I’m Ruby Thorn, the home cook behind The Tender Mess. Join me on the journey of Embracing the mess, fearlessly create —because in the kitchen, the mess sometimes leads to magic.