
Sometimes, the best recipes are the ones you can whip up in a flash, especially when unexpected guests arrive or that sudden craving hits. No-bake marshmallow bars are my go-to for those moments—creamy, sweet, and packed with nostalgic comfort. They come together fast, no oven required, making them perfect for spontaneous sweet fixes.
I remember the first time I made these with my little sister—it was a chaotic afternoon, but the kitchen filled with the smell of melting marshmallows and toasted graham crackers. That simple joy, the quick satisfaction of a homemade treat, has stuck with me. It’s one of those recipes that’s magic in its simplicity, ready whenever you need a little sweet escape.
Focusing on how this simple, nostalgic treat can be a quick fix for unexpected guests or last-minute cravings, emphasizing its comfort and spontaneity.
The story behind this recipe
- This recipe took shape on a rainy afternoon when I needed a quick sweet fix that wouldn’t demand turning on the oven. I was craving that sticky, gooey texture of marshmallow treats but wanted something a bit more grown-up, a little less of the kids’ snack aisle stuff. So, I started experimenting with different crunchy bases and gooey layers, hoping to find that perfect balance.
- The first batch was a disaster—too sweet, too sticky, the texture all wrong. But I learned that a good ratio of marshmallows to butter is key, and a sprinkle of sea salt really balances out the sweetness. Now, these bars are my go-to when I want something satisfying but effortless, especially for last-minute gatherings or lazy weekends.
- heading: The story behind this recipe
Ingredient breakdown: key components
- Marshmallows: I love using the classic mini marshmallows—they melt quick and give that gooey texture, but if you want a firmer bar, try larger marshmallows for chunkier bites.
- Butter: I always go for unsalted to control the saltiness—plus, it melts into the mixture smoothly, creating that rich, buttery aroma. For a vegan tweak, coconut oil works but loses some of that classic richness.
- Graham crackers: Their toasty, slightly sweet crunch is key. If you’re out, digestive biscuits are a fine substitute, though they add a slightly different flavor profile.
- Chocolate chips: I prefer semi-sweet for a balanced sweetness, but dark or milk chocolate can be swapped depending on your mood. Melted chocolate adds a glossy, decadent finish, so don’t skimp.
- Sea salt: Just a pinch enhances the sweetness—think of it as a flavor booster, not a salt overload. A flaky sea salt sprinkle on top before chilling makes a lovely, crunchy contrast.
- Optional add-ins: Nuts or dried fruit can be folded in—just a handful for texture and extra flavor. Toasted nuts bring a warm aroma, while dried fruit adds chewy bursts.
- Vanilla extract: A splash rounds out the sweetness with a subtle depth—skip if you’re in a rush, but it really elevates the overall flavor.
Spotlight on key ingredients
Marshmallows:
- I love using the classic mini marshmallows—they melt quick and give that gooey texture, but if you want a firmer bar, try larger marshmallows for chunkier bites.
- Butter: I always go for unsalted to control the saltiness—plus, it melts into the mixture smoothly, creating that rich, buttery aroma. For a vegan tweak, coconut oil works but loses some of that classic richness.
Graham crackers & chocolate chips:
- Graham crackers: Their toasty, slightly sweet crunch is key. If you’re out, digestive biscuits are a fine substitute, though they add a slightly different flavor profile.
- Chocolate chips: I prefer semi-sweet for a balanced sweetness, but dark or milk chocolate can be swapped depending on your mood. Melted chocolate adds a glossy, decadent finish, so don’t skimp.
Notes for ingredient swaps
- Dairy-Free: Swap butter for coconut oil or vegan margarine. It changes the richness slightly and adds a subtle coconut aroma.
- Marshmallows: Use vegan marshmallows or homemade marshmallow fluff. The texture may be a tad less gooey but still sweet and satisfying.
- Graham Crackers: Digestive biscuits are a good substitute, offering a similar toasty crunch but a slightly different flavor profile.
- Chocolate Chips: Dark chocolate or milk chocolate chips can be swapped depending on your preference. For a more intense chocolate flavor, opt for bittersweet.
- Salt: Sea salt flakes add a nice crunch and burst of flavor. If you don’t have flaky salt, regular coarse salt works fine too.
- Add-ins: Nuts or dried fruit can be mixed in for extra texture. Toasted nuts give a warm aroma, dried fruit adds chewy bursts.
- Vanilla Extract: Use almond or coconut extract for a different aromatic twist, or skip altogether for a more neutral flavor.
Equipment & Tools
- 20×20 cm (8×8 inch) pan: Holds the mixture and shapes the bars.
- Spatula or butter knife: Spreads and presses the mixture evenly.
- Microwave-safe bowl: Melts the marshmallows and butter efficiently.
Step-by-step guide to no bake bars
- Gather your equipment: a 20×20 cm (8×8 inch) square pan, a spatula or butter knife, and a microwave-safe bowl.
- In the bowl, melt 1/4 cup (60 g) unsalted butter in the microwave on high for about 30 seconds. Watch for a bubbling, fragrant melt.
- Add 4 cups (150 g) mini marshmallows to the melted butter. Microwave in 20-second bursts, stirring each time, until marshmallows are completely melted and smooth. This takes about 1 minute total.
- Quickly stir in 1 teaspoon vanilla extract and a pinch of sea salt if desired. Smell that warm, sweet aroma filling the kitchen.
- Crumble 2 cups (150 g) graham crackers into the marshmallow mixture. Fold gently until evenly coated and sticky.
- Transfer the mixture to your prepared pan. Use the spatula or butter knife to press it evenly into the corners and smooth the top. This part should feel firm but sticky.
- If you want to add chocolate, sprinkle 1/2 cup (90 g) chocolate chips over the top and gently press them in. They’ll melt slightly, creating a glossy finish.
- Let the bars set at room temperature for at least 30 minutes, or refrigerate for 15-20 minutes if you’re in a rush. The mixture should be firm, with a slight give when pressed.
- Cut into squares with a sharp knife. Wipe the blade between cuts for clean edges. Watch out for sticky residue—if it sticks, dip your knife in warm water first.
- Enjoy immediately, or store in an airtight container for up to 3 days at room temperature. For longer storage, refrigerate for up to a week, but the texture may change slightly.
Allow the bars to cool and set at room temperature, then cut into squares. For cleaner cuts, chill briefly in the fridge. Serve directly from the pan or lift out using parchment paper for neat edges.
How to Know It’s Done
- Marshmallow mixture is smooth and glossy after melting.
- Pressed mixture holds its shape when cut without crumbling.
- Chocolate chips are slightly melted or glossy on top after setting.
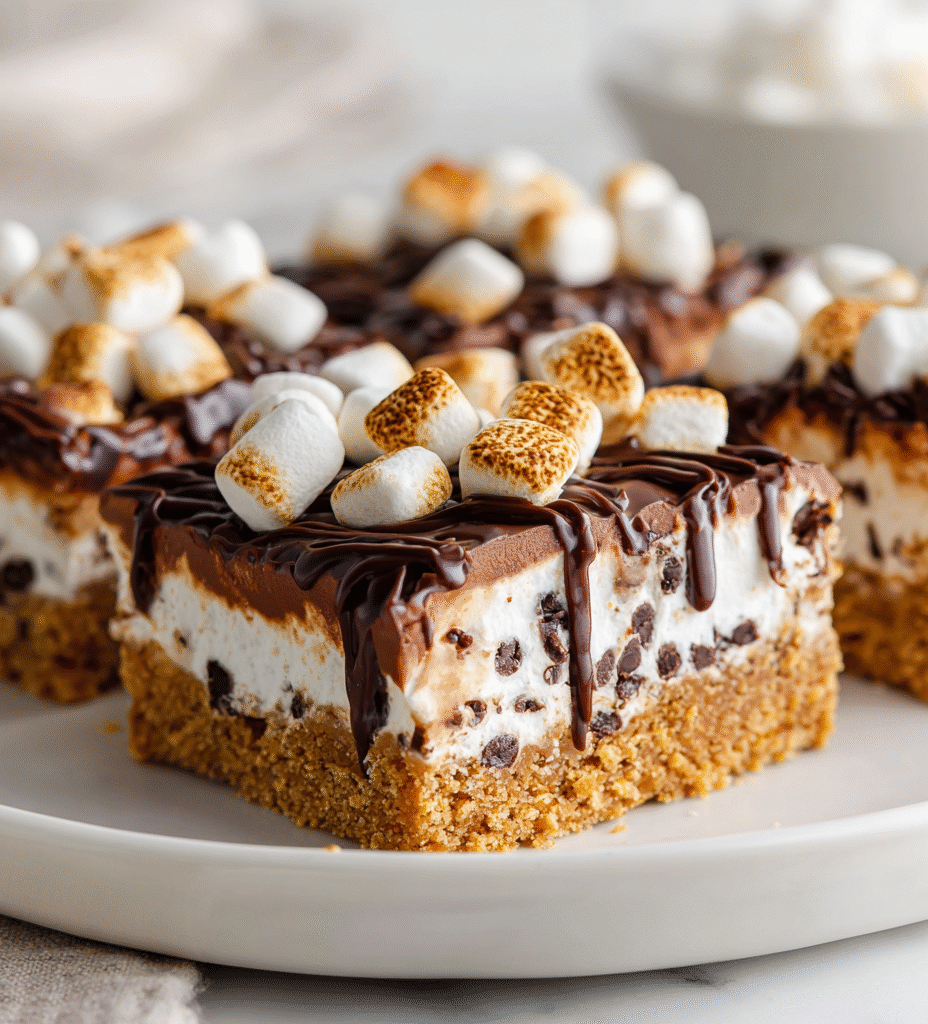
No-Bake Marshmallow Bars
Ingredients
Equipment
Method
- Place the unsalted butter in a microwave-safe bowl and microwave on high for about 30 seconds until melted and fragrant.
- Add the mini marshmallows to the melted butter and microwave in 20-second bursts, stirring each time, until completely melted and smooth. The mixture should be bubbling and glossy.
- Stir in the vanilla extract and a pinch of sea salt into the marshmallow mixture. The aroma should be sweet and fragrant, and the mixture will be thick and shiny.
- Gently fold in the crushed graham crackers until evenly coated and sticky, creating a textured, dough-like mixture.
- Transfer the mixture into your prepared pan and press it firmly with a spatula or butter knife to create an even layer. Press down until the mixture feels compact and smooth on top.
- Sprinkle the chocolate chips evenly over the surface and gently press them in so they slightly melt into the top layer, adding a glossy, decadent appearance.
- Let the bars set at room temperature for about 30 minutes, or refrigerate for 15-20 minutes if you prefer a firmer texture. The mixture should be firm enough to cut cleanly.
- Use a sharp knife to cut into squares, wiping the blade between cuts for neat edges. The bars are ready to serve once fully set and firm.
- Enjoy these gooey, crunchy bars immediately or store in an airtight container at room temperature for up to 3 days. For longer storage, wrap tightly and refrigerate or freeze for up to a month.
Notes
Pro tips for perfect bars
- Bolded Mini-Head: Use fresh marshmallows for maximum gooiness—older ones can be a bit stiff and less melty.
- Bolded Mini-Head: Melt marshmallows slowly—short bursts in the microwave prevent scorching and keep that fluffy texture.
- Bolded Mini-Head: Press mixture firmly into the pan—this ensures clean cuts and a compact bar with no crumbles.
- Bolded Mini-Head: Add chocolate chips while hot—press them in slightly so they melt into the surface, creating a shiny finish.
- Bolded Mini-Head: Chill before cutting—refrigerate for at least 15 minutes for neat, tidy squares without sticking.
- Bolded Mini-Head: Use parchment paper—line your pan for easy removal and clean edges, especially if you don’t want to wash the pan.
- Bolded Mini-Head: Wipe your knife between cuts—warm the blade under hot water for cleaner slices and less sticking.
Common mistakes and how to fix them
- FORGOT to level the pan? Use a flat surface to prevent uneven bars.
- DUMPED in too many marshmallows? Keep to the recipe’s ratio for proper melting.
- OVER-TORCHED the marshmallow mixture? Remove from heat immediately to avoid burning.
- MISSED a chill step? Refrigerate for at least 15 minutes for cleaner cuts and better texture.
Quick fixes and pantry swaps
- When marshmallow mixture is too thick, splash in a little warm water and stir gently.
- If bars are crumbly, patch with a quick drizzle of melted chocolate and press down firmly.
- Splash a few drops of vanilla or water if marshmallows are not melting smoothly.
- Shield the mixture from burning by stirring constantly once the marshmallows start to melt.
- When bars stick to the pan, spray with non-stick spray or line with parchment for easy removal.
Prep, store, and reheat tips
- Prepare the mixture in advance and store in an airtight container at room temperature for up to 24 hours; the marshmallow texture remains soft and sticky, perfect for quick assembly later.
- You can refrigerate the assembled bars for up to 3 days; the chill firms them up, making slicing easier but slightly dulling the gooey appeal.
- Wrap individual bars tightly in plastic wrap before refrigerating to prevent them from sticking together or absorbing fridge odors.
- Reheat a bar briefly in the microwave—10 seconds on high—until just warm and slightly melty, with a fragrant marshmallow aroma filling the kitchen.
- For longer storage, freeze bars wrapped in plastic and foil for up to 1 month; thaw at room temperature for 10-15 minutes before serving, noting the texture will be firmer but still sweet and satisfying.
Top questions about marshmallow bars
1. Can I make these vegan?
Yes, you can swap in vegan marshmallows, but expect a slightly different texture and less gooeyness.
2. Can I use regular marshmallows instead of mini ones?
Using large marshmallows gives chunks, but mini marshmallows melt faster and create a uniform goo.
3. How long do these bars last?
Refrigerate for up to 3 days for best texture. For longer, freeze for a month, then thaw at room temp.
4. Can I add mix-ins?
Yes, adding nuts or dried fruits gives extra crunch and flavor, but can make the bars more crumbly if overdone.
5. Should I chill the bars before cutting?
Chill the bars in the fridge for at least 15 minutes to make cutting easier and cleaner.
6. What if my marshmallows won’t melt?
If marshmallows aren’t melting smoothly, microwave in short bursts and stir gently—avoid overheating.
7. How do I prevent sticking?
Use parchment paper for easy removal and clean edges, especially if your pan isn’t non-stick.
8. Can I skip the salt?
Adding a pinch of sea salt enhances sweetness and adds a slight crunch on top.
9. How do I make them look shiny?
To get a glossy finish, press chocolate chips into the warm mixture and let them melt slightly.
10. Can I reheat these bars?
Yes, you can reheat a slice in the microwave for a few seconds to soften the marshmallow texture.
These no-bake marshmallow bars are more than just a quick treat—they’re a reminder that sometimes simplicity yields the best moments. The sticky sweetness, the crunch of graham crackers, and that glossy chocolate top come together with minimal fuss, making them a favorite for busy weekends or last-minute cravings.
Once you get the hang of the basic steps, you’ll see how forgiving and adaptable this recipe truly is. It’s a snack that sparks childhood memories and practical enough for your current busy life, all without turning on the oven. Sometimes, the easiest recipes carry the most comforting, familiar joy.

Hi, I’m Ruby Thorn, the home cook behind The Tender Mess. Join me on the journey of Embracing the mess, fearlessly create —because in the kitchen, the mess sometimes leads to magic.