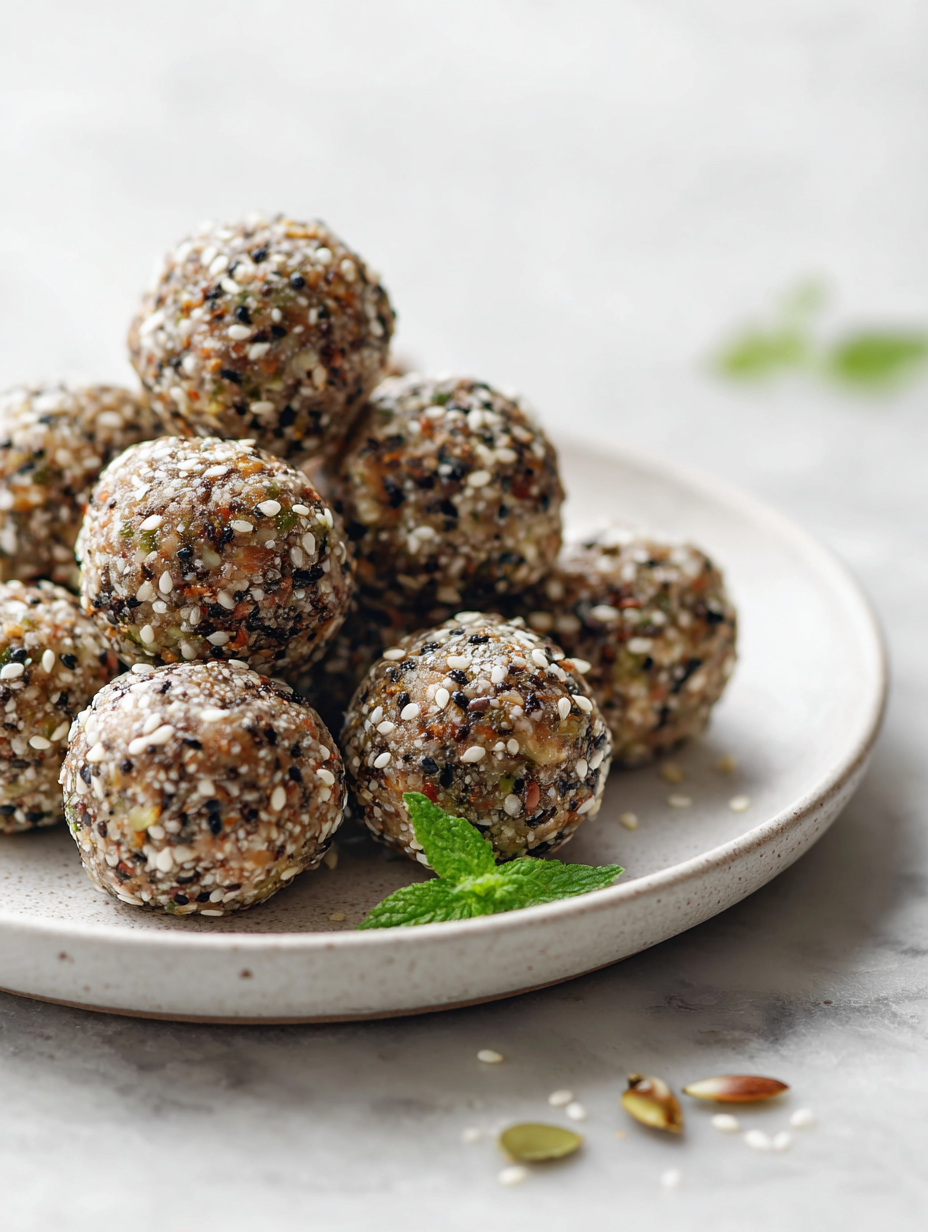
Seeds often get the short end of the stick in snack recipes. We toss them on salads or sprinkle on yogurt, but they have a silent, potent personality that deserves center stage. These no-bake seed energy bites are my way of showcasing how versatile and satisfying seeds can be, especially when pressed into a chewy, nutty, flavor-packed little ball.
Making these bites is like a quick nod to all the mornings I’ve rushed out the door, clutching a small, dense ball of goodness. No heat, no fuss, just a handful of ingredients that come together while I barely lift a finger. It’s honest kitchen work—mildly chaotic, but deeply rewarding—and always a little surprise to see how the flavors meld and turn into something I crave again and again.
Focusing on the often-overlooked nutritional power of seeds, this recipe highlights how they can be the main event, not just a garnish or supplement, turning a simple snack into a concentrated burst of health and flavor that’s perfect for busy mornings or quick energy boosts.
Seeds as the Star
- These bites remind me of childhood picnic snacks, simple yet unexpectedly satisfying.
- I love how seeds lend a nutty, earthy flavor that keeps me coming back for more.
- There’s a quiet pride in making something healthy and no-fuss, perfect for busy mornings.
- Sometimes, I get a little nostalgic, thinking of my grandma’s pantry filled with seeds and grains.
- Nothing beats the feeling of grabbing a small, dense ball of energy when I need a quick pick-me-up.
Seeds as the Star
Making these seed energy bites started as a way to clear out my pantry and turn a jumble of seeds and dried fruits into something snackable. One afternoon, I mixed a handful of sunflower, pumpkin, and chia seeds with a sticky medley of honey and nut butter, just to see if it would hold together. The first batch was a bit crumbly, but I realized I’d added too much seed and not enough binder. Once I adjusted the ratios, it became my go-to quick fix when I needed a burst of energy without the fuss of baking. It’s funny how a simple, messy kitchen experiment turned into something I keep making, especially on mornings when I’m rushing out the door and craving something honest and wholesome.
Trivia and Historical Roots
- Seed-based snacks have roots in ancient civilizations, where seeds like sesame and flax were valued for their nutritional density.
- This recipe echoes modern trends of plant-based, whole-food eating, emphasizing seeds as both flavor and health powerhouse.
- I stumbled upon the idea when trying to find a portable, no-fuss snack that packs a punch of fiber and healthy fats.
Ingredient breakdown: key components
- Sunflower seeds: I love their nutty, slightly sweet aroma that wakes up my senses. You can swap them for pepitas if you prefer a milder flavor.
- Pumpkin seeds: These add a chewy texture and smoky undertone. If you’re out, chopped walnuts work well but bring a different crunch.
- Chia seeds: They turn the mixture slightly gelatinous, helping everything stick together. Feel free to omit if you dislike the texture or add a bit more honey instead.
- Honey: It’s my go-to binder and provides a mild floral sweetness. Maple syrup is a good substitute, but it lends a richer, caramel note.
- Nut butter: I usually use almond or peanut butter for richness. If allergies are an issue, tahini offers a nutty, sesame twist that’s equally creamy.
- Dried fruit (optional): I like chopped apricots or cranberries for a burst of tartness. Dried figs or dates work too, adding chewiness and natural sweetness.
- Coconut flakes (optional): They add a subtle, tropical aroma and a slight crunch. Skip if you prefer a more neutral bite or want to keep it low-fat.
Spotlight on key ingredients
Sunflower seeds:
- I love their nutty, slightly sweet aroma that wakes up my senses. You can swap them for pepitas if you prefer a milder flavor.
- Pumpkin seeds: These add a chewy texture and smoky undertone. If you’re out, chopped walnuts work well but bring a different crunch.
- Chia seeds: They turn the mixture slightly gelatinous, helping everything stick together. Feel free to omit if you dislike the texture or add a bit more honey instead.
Pumpkin seeds:
- These add a chewy texture and smoky undertone. If you’re out, chopped walnuts work well but bring a different crunch.
- Chia seeds: They turn the mixture slightly gelatinous, helping everything stick together. Feel free to omit if you dislike the texture or add a bit more honey instead.
- Honey: It’s my go-to binder and provides a mild floral sweetness. Maple syrup is a good substitute, but it lends a richer, caramel note.
Notes for ingredient swaps
- Nut Butters: Almond, peanut, or cashew butter work well. Each adds a slightly different flavor and texture—try tahini for a sesame twist.
- Seeds: Sunflower and pumpkin seeds are classic, but swap in sesame, flax, or hemp seeds for different nutrient profiles and flavors.
- Sweeteners: Honey is my go-to, but maple syrup or agave are good vegan options, adding a richer, caramel note.
- Dried Fruit: Apricots, cranberries, or chopped dates add tartness and chewiness. Dried figs or cherries are lovely alternatives.
- Add-ins: Coconut flakes, cacao nibs, or chopped nuts can be swapped in or added for texture and flavor variety.
- Binder: If honey isn’t available, use molasses or brown rice syrup—just expect a different sweetness profile.
- Optional Extras: Chia or hemp seeds can replace or supplement, adding more omega-3s and a slightly different crunch.
Equipment & Tools
- Large mixing bowl: To combine and mix the dry ingredients evenly.
- Small bowl: To mix the wet ingredients for easy pouring.
- Spatula or wooden spoon: For folding ingredients together thoroughly.
- Measuring cups and spoons: To measure ingredients accurately.
- Parchment paper: To prevent sticking when setting the bites.
- Baking tray or plate: To hold the formed bites while they rest.
- Refrigerator: To chill and set the bites properly.
Step-by-step guide to seed bites
- Gather all your ingredients and tools. Use a large mixing bowl for the seeds and dried fruit, and a small bowl for the nut butter and honey mixture.
- In the large bowl, combine 1 cup sunflower seeds, 1/2 cup pumpkin seeds, and 2 tablespoons chia seeds. Mix well to distribute evenly.
- In the small bowl, stir together 1/2 cup honey, 1/2 cup almond butter, and 1 teaspoon vanilla extract until smooth and slightly runny. Warm gently if needed (about 20 seconds in the microwave).
- Pour the wet mixture over the dry ingredients. Use a spatula or wooden spoon to fold everything together until thoroughly coated and sticky. If it feels too dry, add a tiny splash of honey or nut butter.
- If the mixture is too crumbly, add a small drizzle of honey or a splash of water and stir until it starts to hold together. Conversely, if it’s too sticky, sprinkle in a little more seeds.
- Once combined, scoop out small portions and roll between your palms to form about 1-inch bites. Place them on a parchment-lined tray or plate.
- Optional: Roll some bites in shredded coconut or chopped dried fruit for extra flavor and visual appeal.
- Let the bites rest in the fridge for at least 30 minutes. This helps them firm up and makes them easier to handle.
- After resting, check their firmness. They should be chewy but hold their shape. If they crumble, give the mixture a little more honey or nut butter and reshape.
- Store in an airtight container in the fridge for up to 1 week, or freeze for longer storage. They’re best enjoyed chilled or at room temperature.
Place the formed bites on a parchment-lined tray and refrigerate for at least 30 minutes. Once firm, transfer to an airtight container. Serve chilled or at room temperature, and enjoy whenever you need a quick energy boost.
How to Know It’s Done
- Bites hold their shape when squeezed gently.
- aroma of toasted seeds should be present, not raw.
- Bites are chewy, not crumbly or overly sticky.
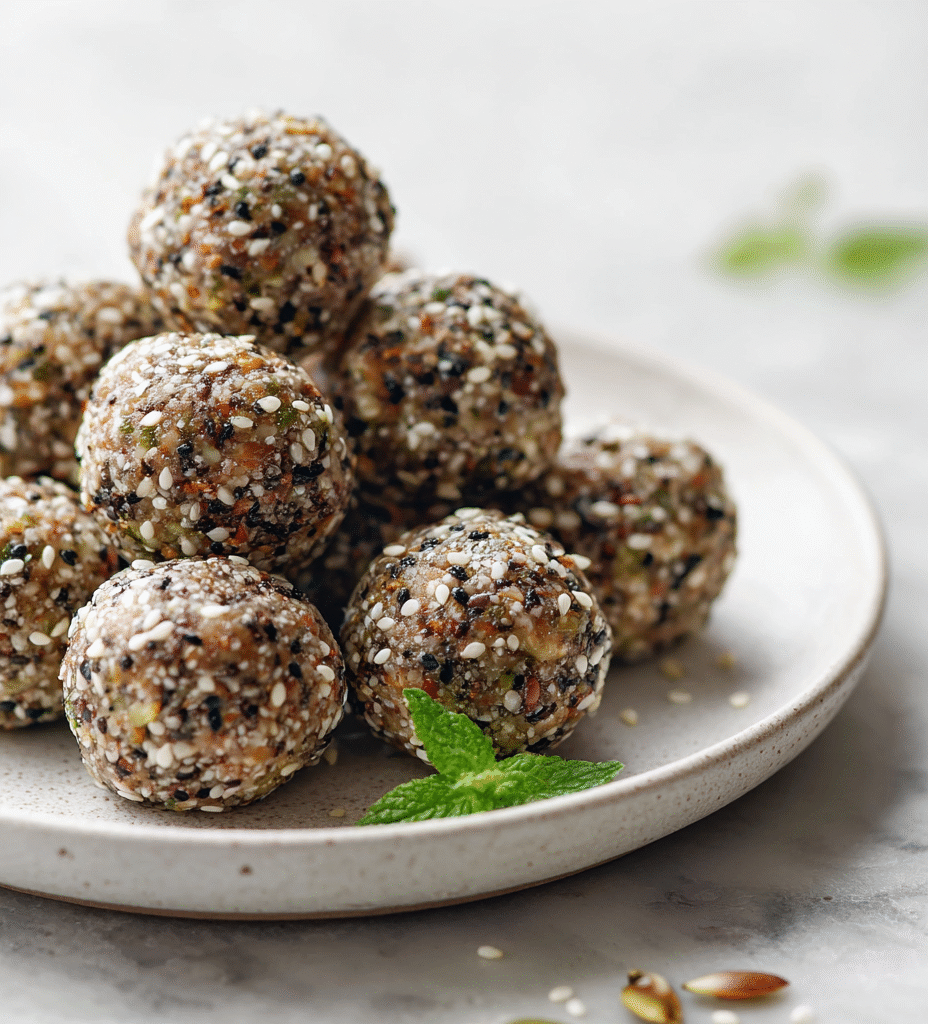
No-Bake Seed Energy Bites
Ingredients
Equipment
Method
- Gather all your ingredients: toasted sunflower seeds, pumpkin seeds, chia seeds, honey, nut butter, dried fruit, and coconut flakes.
- In a large mixing bowl, combine the sunflower seeds, pumpkin seeds, and chia seeds. Mix them together until evenly distributed.
- In a small bowl, stir together the honey and nut butter until smooth and slightly runny—warm gently if needed to melt and blend.
- Pour the honey and nut butter mixture over the seed mixture. Use a spatula or wooden spoon to fold everything together until the seeds are thoroughly coated and sticky.
- If the mixture feels too crumbly, add a tiny splash of honey or water and stir again to help it come together. If it’s too sticky, sprinkle in a few more seeds and fold in.
- Take small portions and roll them between your palms to form about 1-inch diameter bites. Place each ball on a parchment-lined tray or plate.
- If you like, roll some bites in shredded coconut or add chopped dried fruit on top for extra flavor and visual appeal.
- Refrigerate the bites for at least 30 minutes to firm up and set their shape.
- Once chilled and firm, check the bites—they should hold their shape and be chewy with a slight crunch from the seeds.
- Store the bites in an airtight container in the fridge for up to one week, or freeze for longer storage. Serve chilled or at room temperature for a satisfying, healthy snack.
Pro tips for perfect seed bites
- Use freshly toasted seeds for maximum flavor and aroma.
- Slightly warm honey helps it blend smoothly and coat ingredients evenly.
- Press bites firmly to ensure they hold together during chilling.
- Chill the mixture for at least 30 minutes to firm up and make handling easier.
- Adjust sweetness and stickiness by adding small amounts of honey or water as needed.
- Mix in dried fruit or coconut flakes last to avoid breaking down their texture.
- Store in an airtight container in the fridge for freshness and easy grab-and-go snacks.
Common mistakes and how to fix them
- FORGOT to measure ingredients precisely → Use a scale for accuracy.
- DUMPED in too much honey → Add gradually, adjusting for stickiness.
- OVER-TORCHED the seeds → Toast at 160°C (320°F) until fragrant, not browned.
- CRUMBLED the mixture before chilling → Press firmly and refrigerate to set properly.
Quick kitchen fixes
- When mixture feels too dry → Splash with a tiny bit of water or honey, then knead gently.
- If bites are crumbly → Chill longer or add more honey for stickiness.
- Splash seeds in the pan → Toast until fragrant, not browned or burnt.
- Patch over sticky spots → Use damp hands to reshape bites for a smoother finish.
- Shield from moisture → Store in an airtight container to keep bites firm and fresh.
Prep, store, and reheat tips
- Prepare the mixture and form the bites up to a day ahead. Keep them covered in the fridge for fresh handling.
- Store the energy bites in an airtight container in the fridge for up to one week. The flavors deepen slightly, with a firmer bite over time.
- For longer storage, freeze the bites in a single layer, then transfer to a container. They’ll keep for up to a month, and stay chewy and fresh.
- Refrigerate or thaw as needed. Let chilled bites sit at room temperature for 5–10 minutes for a softer, more aromatic experience. They should smell nutty and feel just firm enough to bite through.
Top questions about seed energy bites
1. Can I use a different sweetener?
Yes, you can swap out honey for maple syrup or agave; the bites will be slightly richer and less floral.
2. Can I add dried fruit or other mix-ins?
Absolutely, dried cranberries or chopped apricots add a tart punch and chewiness that balances the seeds’ earthiness.
3. My mixture is crumbly, what do I do?
If the mixture is too crumbly, add a teaspoon of honey or water, then knead gently until it sticks together better.
4. Can I freeze seed energy bites?
Yes, you can freeze these bites for up to a month. Thaw in the fridge or at room temperature before eating.
5. Can I customize the seeds?
Use any combination of seeds you like—sesame, flax, hemp—each brings its own nutty flavor and nutrition boost.
6. What do chia seeds do in this recipe?
Chia seeds help bind the mixture and add omega-3s. Feel free to omit or replace with ground flax if preferred.
7. How long should I chill the bites?
Chill the bites for at least 30 minutes to help them firm up and hold their shape better.
8. How should I store these bites?
Store the bites in an airtight container in the fridge for up to a week for maximum freshness.
9. How do I toast seeds properly?
Use freshly toasted seeds for a better aroma and flavor. Toast until fragrant, not browned or burnt.
10. What if the mixture is too sticky?
When mixture feels too sticky, sprinkle in a few more seeds or oats to balance the moisture.
These no-bake seed energy bites are more than just a quick snack; they’re a reminder that simple ingredients can come together into something nourishing and satisfying. I keep a batch in the fridge for mornings when I need a boost or an afternoon pick-me-up, and they rarely last long.
In a world that’s constantly rushing, having a little wholesome treat ready to go feels like a small victory. Plus, the act of making them is almost meditative—measuring, mixing, shaping—before that satisfying chill. They’re honest, unpretentious, and just about perfect for right now.

Hi, I’m Ruby Thorn, the home cook behind The Tender Mess. Join me on the journey of Embracing the mess, fearlessly create —because in the kitchen, the mess sometimes leads to magic.