
In the midst of busy mornings and hectic afternoons, these no-bake energy balls offer a tiny pause—a moment to connect with something nourishing without fuss. They’re a small ritual I turn to when I need a quick boost, a little treat that doesn’t ask for oven time or complicated steps. It’s about reclaiming a bit of calm in the chaos, one bite at a time.
What I love most is how versatile they are—no two batches need to look or taste alike. Sometimes I toss in dried cherries, other times a dash of cocoa powder or a handful of chopped nuts. It’s like a tiny canvas for spontaneous kitchen creativity, a way to turn simple ingredients into something satisfying and genuinely handy.
These energy balls aren’t just about fueling the day, though. They remind me to slow down, even for a few minutes, and enjoy the process of making something wholesome with my own hands. It’s a little act of mindfulness, wrapped in a chewy, nutty package.
Turning the everyday into a mindful ritual with no-bake energy balls, these treats become a simple act of self-care amid chaos.
Transforming Snacks into Self-Care
- These little bites remind me of childhood afternoons—simple, sweet, and packed with nostalgia.
- Sometimes I toss in a handful of dark chocolate chips just to make the chaos a bit sweeter.
- I feel a quiet pride when I realize I’ve whipped up something wholesome without turning on the oven.
- It’s oddly comforting to have these energy balls ready in the fridge—like a tiny, portable hug.
- Nothing beats the satisfaction of biting into one that’s perfectly chewy, with just the right crunch from nuts.
The story behind this recipe
- I started making these no-bake energy balls during a particularly hectic stretch at work. I needed something quick, nutritious, and portable that wouldn’t add to my stress. One afternoon, I threw together a few ingredients I had on hand—oats, nut butter, a drizzle of honey—and ended up with these little bites that saved my day.
- What kept me coming back was how adaptable they are—no oven needed, just a bowl and a spoon. I’d experiment with different mix-ins, from dried fruits to seeds, trying to find that perfect balance of chewy and crunchy. Over time, they became my go-to when I needed a quick, satisfying snack that I could make in minutes and store in the fridge.
- They remind me that sometimes the simplest recipes are the ones that stick around. No fancy ingredients, no fuss, just honest, homemade energy that fuels my day and keeps my hands busy during small moments of calm.
Historical & Cultural Roots
- These energy bites gained popularity in the health food movement of the early 2000s, emphasizing quick, nutritious snacks.
- They have roots in traditional no-bake desserts and energy foods used by athletes for portable fuel.
- Many recipes draw from ancient grain snack traditions, modernized with ingredients like dates and nut butters for convenience.
Ingredient breakdown: key components
- Oats: I love how they add a hearty, chewy texture and absorb flavors well. If you prefer a smoother bite, try blitzing them into a finer powder before mixing.
- Nut Butter: Creamy peanut butter is my go-to—rich, savory, and satisfying. For a different twist, almond or sunflower seed butter works well, but the flavor will be milder.
- Honey: I adore the sticky, sweet aroma honey brings when warmed slightly. If you want a vegan version, maple syrup or agave nectar can swap in, but expect a slightly different flavor profile.
- Add-ins: Dried cranberries or chopped nuts give these balls a delightful crunch. Feel free to experiment with coconut flakes or mini chocolate chips for extra flair.
- Chia Seeds: They add a subtle crunch and boost the nutrition. If you prefer a more cohesive texture, skip them or soak beforehand for a softer bite.
- Cocoa Powder: For a hint of richness and depth, I stir in some cocoa. If you want a lighter flavor, reduce the amount or leave it out entirely.
- Vanilla Extract: Just a splash elevates everything with a warm aroma. Skip it if you want a more neutral, straightforward energy bite.
Spotlight on key ingredients
Dates:
- I love how they turn sticky and caramel-sweet when blended, giving these balls a natural sweetness and moisture. If you prefer less chew, soak them briefly in warm water first.
- Chia Seeds: They add a subtle crunch and a gel-like texture as they hydrate, helping the mixture bind. If you skip them, the mixture might be a tad drier but still work fine.
Oats:
- They provide a hearty chew and absorb flavors well. Toast them lightly beforehand for extra nutty aroma or pulse in a blender for finer texture if you like a smoother bite.
- ingredient”: “Oats”
Notes for ingredient swaps
- Nuts: I often swap in walnuts or cashews for a different crunch and flavor. Try sunflower seeds if you’re nut-allergic, but expect a milder taste.
- Sweetener: Maple syrup or agave nectar can replace honey for a vegan option, though they add a slightly different sweetness and aroma.
- Oats: Use gluten-free rolled oats if needed. For a finer texture, pulse oats in a blender until slightly coarse.
- Add-ins: Dried blueberries or chopped dried apricots add a tangy sweetness. Coconut flakes or mini chocolate chips also work, but adjust quantity for sweetness.
- Binding agent: If the mixture is too dry, a splash of extra honey or nut butter helps. Too sticky? Chill before rolling or add more oats.
- Flavor accents: A pinch of cinnamon or nutmeg boosts warmth. Skip if you prefer a plain, neutral flavor.
- Chocolate: Swap dark chocolate chips with white chocolate or carob chips for a different flavor profile, but expect a different melt-in-your-mouth feel.
Equipment & Tools
- Mixing bowl: To combine all ingredients evenly.
- Spoon or spatula: To stir and mix ingredients thoroughly.
- Small scoop or spoon: To portion out uniform-sized balls.
- Parchment paper: To prevent sticking on the baking sheet.
- Baking sheet: To hold the energy balls during chilling.
Step-by-step guide to no bake energy balls
- Gather your equipment: a mixing bowl, a spoon, a small baking sheet, and parchment paper. Preheat your fridge to around 4°C (39°F).
- In the mixing bowl, combine 1 cup of rolled oats, 1/2 cup of nut butter, and 1/4 cup of honey. Stir well until all ingredients are evenly coated and sticky.
- Add 1/4 cup of mini chocolate chips, 2 tablespoons of chia seeds, and 1 teaspoon of vanilla extract. Mix thoroughly, ensuring everything is evenly distributed.
- Once the mixture is cohesive and slightly sticky, use your hands or a small scoop to portion out about 1-inch sized balls. Roll each between your palms to smooth out.
- Place the formed balls onto the parchment-lined baking sheet. Repeat until all mixture is used, typically makes about 12-15 balls.
- Chill the energy balls in the fridge for at least 30 minutes. This helps them firm up and hold their shape better.
- Check for firmness: they should be slightly firm to the touch, not sticky or crumbly. If too soft, refrigerate longer. If dry, add a tiny splash of honey and mix again.
- Once set, transfer the energy balls to an airtight container. Store in the fridge for up to a week or freeze for up to a month.
- Serve straight from the fridge for a chewy, slightly cool snack. They keep well in a small container for quick bites on the go.
Chill the balls in the fridge for at least 30 minutes to set. Serve directly from fridge or store in an airtight container. For longer storage, freeze for up to a month, letting them thaw slightly before enjoying.
How to Know It’s Done
- Energy balls hold shape and are slightly firm when pressed.
- Mixture is uniformly combined with no dry patches or excess stickiness.
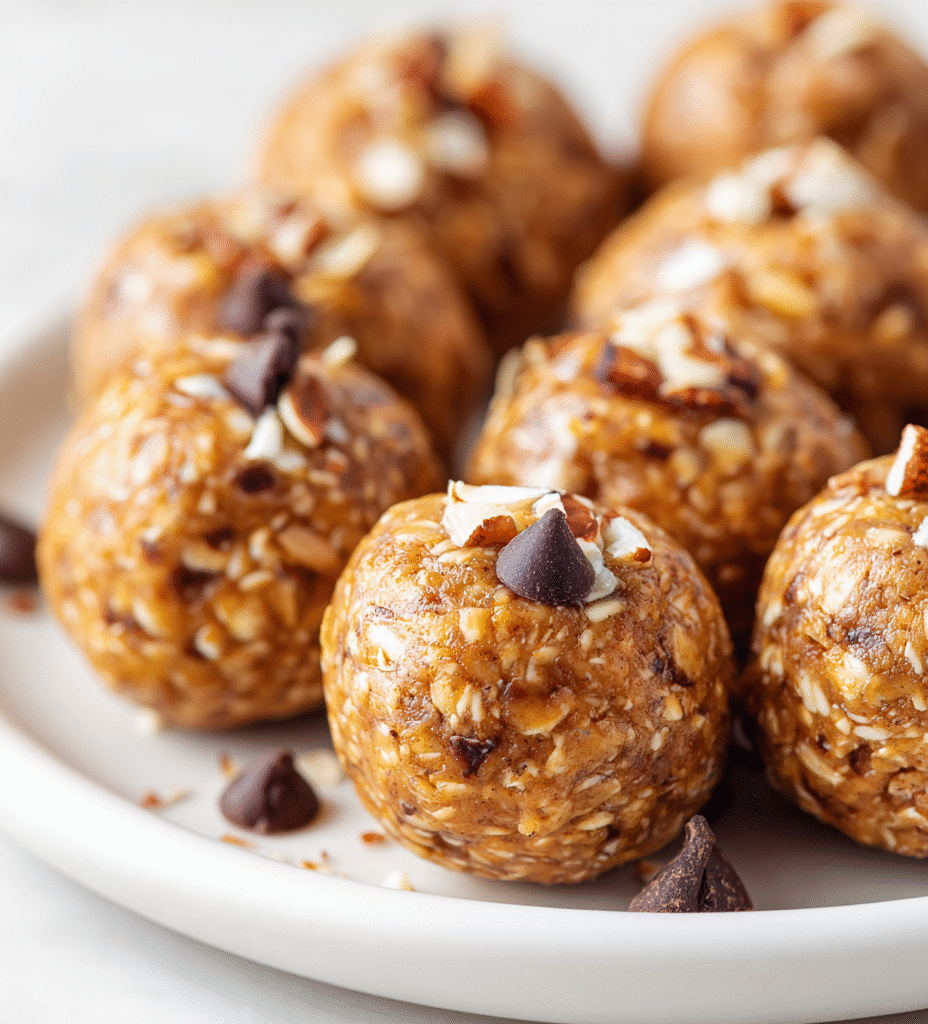
- They look moist but not greasy, with visible inclusions like chocolate or seeds.

No-Bake Energy Balls
Ingredients
Equipment
Method
- Measure out the oats and toast them lightly in a dry skillet over medium heat until fragrant and slightly golden, then let them cool.
- In a large mixing bowl, combine the toasted oats, nut butter, and honey. Stir vigorously with a spoon until the mixture becomes thick, sticky, and well combined.
- Add the mini chocolate chips, chia seeds, and vanilla extract to the bowl. Fold everything together gently until evenly distributed, ensuring the mixture is sticky but manageable.
- Using your hands or a small scoop, portion out about 1-inch pieces of the mixture and roll them into tight balls. Place each ball onto a parchment-lined baking sheet.
- Repeat until all the mixture is used, usually yielding 12-15 balls. Lightly press each ball to flatten slightly if desired.
- Place the baking sheet in the refrigerator for at least 30 minutes to allow the energy balls to firm up and hold their shape.
- Once chilled and firm, transfer the energy balls to an airtight container. Keep them refrigerated and enjoy within a week for best freshness. Serve straight from the fridge for a chewy, cool snack.
Notes
Pro tips for perfect energy balls
- Bolded mini-head: Use slightly toasted oats for a nuttier flavor and deeper aroma.
- Bolded mini-head: Chill the mixture well—about 30 minutes—so it’s easier to roll without sticking.
- Bolded mini-head: When adding liquids, warm honey or nut butter first to help ingredients combine smoothly.
- Bolded mini-head: To prevent over-mixing, fold ingredients gently—overmixing can make the texture too dense.
- Bolded mini-head: For a more uniform shape, slightly dampen your hands before rolling the balls.
- Bolded mini-head: Add a pinch of sea salt to enhance sweetness and balance flavors, especially with chocolate.
- Bolded mini-head: If mixture feels too dry, a tiny splash of water or additional honey can bring it together.
Common mistakes and how to fix them
- FORGOT to chill mixture → refrigerate longer if too sticky.
- DUMPED in too much honey → reduce quantity for less stickiness.
- OVER-TORCHED nuts → toast at lower heat, stir often.
- MISREAD ingredient amounts → measure precisely to avoid dry or sticky balls.
Quick fixes and pantry swaps
- If mixture is too sticky, splash in cold water and knead briefly.
- When energy balls crumble, chill mixture longer to firm up.
- Dumped in too much honey? Mix in more oats to balance moisture.
- Over-torched nuts? Shield them with a lower heat setting and stir often.
- Splash a little water or extra honey if the mixture feels dry and crumbly.
Prep, store, and reheat tips
- Prepare the mixture and portion into balls ahead of time; keep them covered in the fridge for up to 24 hours, retaining their chewy texture and fresh aroma.
- Store the energy balls in an airtight container in the fridge for up to one week; for longer, freeze them for up to a month, where they remain chewy and flavorful.
- Refrigerated energy balls will stay fresh and firm but can become slightly drier over time; enjoy within the recommended storage period for best texture.
- Reheat by letting the energy balls sit at room temperature for a few minutes or enjoy straight from the fridge for a chewy, cool treat; avoid microwaving to preserve texture.
Top questions about energy balls
1. Can I use a different sweetener?
Yes, you can substitute honey with maple syrup or agave nectar. The texture stays sticky, but the flavor shifts slightly towards a more neutral sweetness.
2. Can I make these nut-free?
Absolutely. If you’re nut-free, try sunflower seed butter or tahini. They add richness, but the flavor will be a bit different.
3. How long do energy balls last?
Storing in the fridge keeps them chewy and fresh for about a week. For longer, freeze them up to a month, then thaw slightly before eating.
4. Can I customize the mix-ins?
Yes, you can add mini chocolate chips or dried fruits for extra flavor. Just fold them in at the end to prevent crushing.
5. How do I make rolling easier?
Chill the mixture for at least 30 minutes so it’s easier to roll without sticking. If too sticky, refrigerate longer.
6. How do I shape the energy balls?
Use a cookie scoop or your hands to portion out the balls. Dampening your hands slightly helps shape them smoothly.
7. How do I fix sticky or dry mixture?
Yes, for a softer texture, add a splash of milk or water. For a firmer bite, refrigerate longer or add a bit more oats.
8. How should I store energy balls?
To keep them fresh, store in an airtight container in the fridge. For long-term storage, freeze and thaw when needed.
9. What if the mixture is too dry or wet?
If mixture feels dry, add a tiny drizzle of honey or nut butter. If too wet, mix in extra oats or cocoa powder.
10. Can I eat them at room temperature?
Enjoy straight from the fridge for a chewy, cool snack or let them sit at room temp for a softer bite.
These no-bake energy balls are more than just a quick snack; they’re a small act of mindfulness, a way to slow down and nourish yourself amid chaos. Each bite offers a chewy, nutty reminder to enjoy simple pleasures, even in busy moments.
In a season where convenience often trumps care, these little bites stand out as a reminder that wholesome, homemade treats don’t need fancy equipment or long hours. They’re a testament to how easy it is to turn everyday ingredients into something genuinely satisfying, right in your own kitchen.

Hi, I’m Ruby Thorn, the home cook behind The Tender Mess. Join me on the journey of Embracing the mess, fearlessly create —because in the kitchen, the mess sometimes leads to magic.