Making no bake granola bars feels like a gentle nod to those childhood mornings when everything was sticky and sweet, and the kitchen was filled with the aroma of toasted oats and honey. It’s one of those recipes that’s almost meditative—measuring, mixing, pressing—and somehow it reconnects you to a simpler, more tactile way of cooking.
There’s no fuss, no waiting for the oven to preheat, just a handful of ingredients coming together into something nourishing and satisfying. It’s a small act of self-care that’s perfect when life feels busy or when you need a quick, wholesome snack. Plus, it’s endlessly adaptable—swap out nuts, dried fruit, or sweeteners to make it your own.
Focusing on the nostalgic comfort of childhood snacks, this recipe transforms the simple act of making no bake granola bars into a mindful, almost meditative process. It’s about reconnecting with those warm, sticky mornings and the satisfaction of creating something nourishing with your own hands, without fuss or waiting.
The story behind this recipe
I first started making these bars during a particularly hectic week when I needed something quick, filling, and portable. I was tired of the overly processed snacks that left me feeling sluggish, so I began experimenting with combining ingredients I already had—oats, honey, nuts, and dried fruit. The moment I pressed the mixture into the pan and saw it set into firm, sticky goodness, I knew I had found a simple, honest snack that I could turn to anytime. Over the years, it’s become a staple in my kitchen, especially on mornings when I need a little extra energy or a treat without the fuss of baking.
Ingredient breakdown: key components
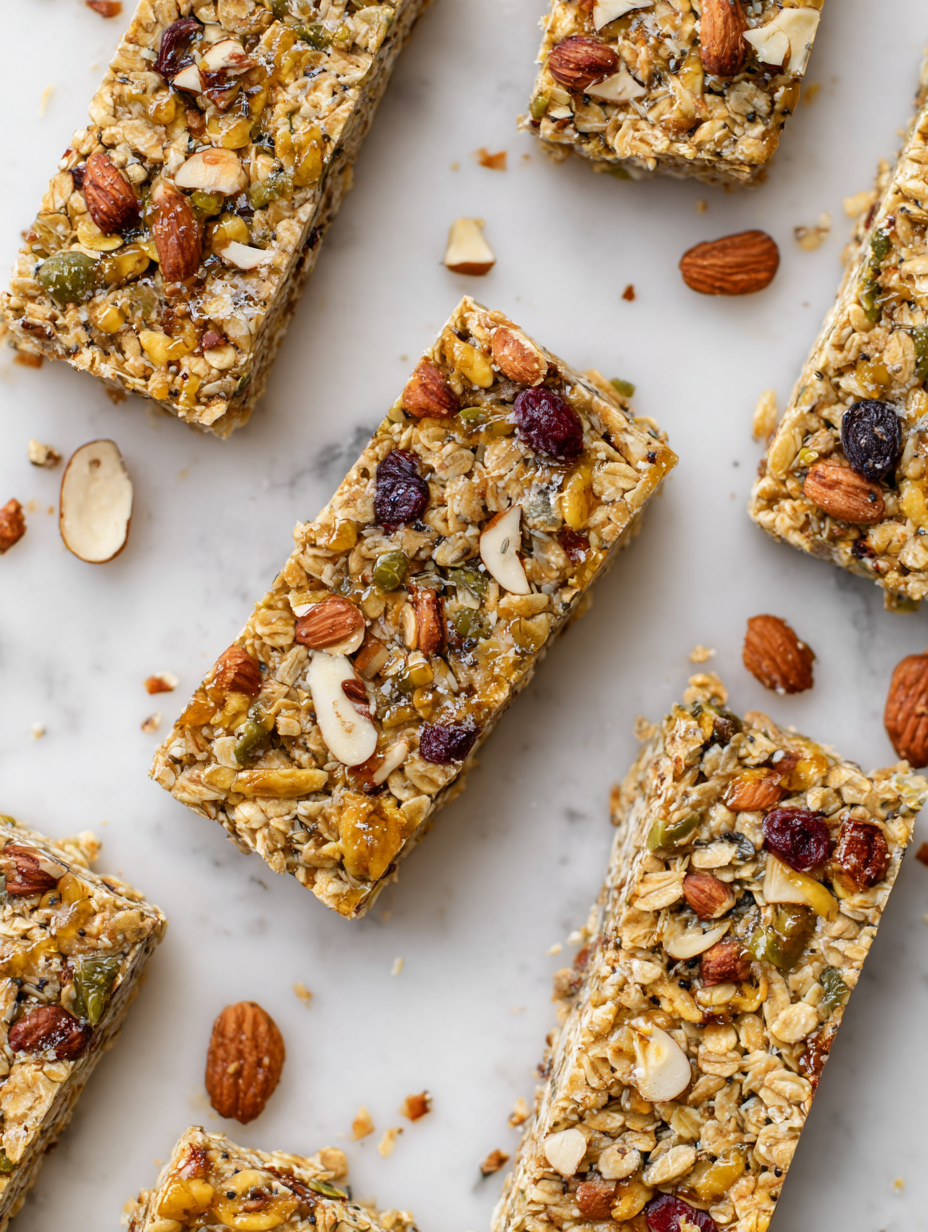
- Old-fashioned rolled oats: I love the chewy texture they bring, but feel free to swap some for quick oats for a softer bite—just watch the moisture balance. The aroma of toasted oats is my cue to move on.
- Honey: It acts as the glue here, giving that sticky sweetness I crave. If you want a more neutral taste, maple syrup works, but you’ll lose that golden, floral aroma that makes these bars special.
- Nuts: I usually use almonds or walnuts, their crunch adding contrast to the chewy oats. Toast them first for a richer, smoky flavor, or pulse them a bit finer if you prefer smaller bites.
- Dried fruit: I go for cranberries or apricots—they add a tangy, chewy burst. Soak them in warm water for 10 minutes if they’re too leathery, to plump them up and mellow their flavor.
- Butter or coconut oil: I use butter for richness, but coconut oil makes it dairy-free and adds a subtle coconut aroma. Melt it gently so the mixture stays cohesive and easy to press.
- Salt: Just a pinch balances the sweetness and enhances the nutty flavor. Don’t skip it, or the bars might feel flat and dull in taste.
- Vanilla extract: A splash deepens the sweetness and adds warmth. Skip if you prefer a more neutral flavor, but honestly, it’s the little touch that makes it feel homemade.
Spotlight on key ingredients
Old-fashioned rolled oats:
- I love the chewy texture they bring, but feel free to swap some for quick oats for a softer bite—just watch the moisture balance. The aroma of toasted oats is my cue to move on.
- Honey: It acts as the glue here, giving that sticky sweetness I crave. If you want a more neutral taste, maple syrup works, but you’ll lose that golden, floral aroma that makes these bars special.
Nuts and dried fruit:
- Nuts: I usually use almonds or walnuts, their crunch adding contrast to the chewy oats. Toast them first for a richer, smoky flavor, or pulse them a bit finer if you prefer smaller bites.
- Dried fruit: I go for cranberries or apricots—they add a tangy, chewy burst. Soak them in warm water for 10 minutes if they’re too leathery, to plump them up and mellow their flavor.
Notes for ingredient swaps
- Sweetener: Maple syrup or agave nectar can replace honey for a vegan option, though the flavor will be slightly different—less floral, more neutral.
- Nuts: Use sunflower seeds or pumpkin seeds if you have nut allergies; they add crunch but lack the same richness of flavor.
- Dried fruit: Swap dried cranberries for chopped dried apricots or cherries; each brings a different tang and chewy texture.
- Butter/Dairy: Coconut oil or vegan butter makes it dairy-free and adds a subtle coconut aroma, but may alter the richness slightly.
- Oats: Quinoa flakes can be a gluten-free alternative, though they’re more delicate and less chewy—adjust the pressing time accordingly.
- Add-ins: Seeds, coconut flakes, or even chocolate chips can be mixed in; just keep in mind they can change the texture and moisture content.
- Binding agent: Instead of honey, brown rice syrup or molasses can be used for a more intense flavor, but may require slight adjustments in quantity.
Equipment & Tools
- 8×8 inch baking dish: Holds and sets the bar mixture
- Parchment paper: Prevents sticking and makes removal easier
- Mixing bowl: Combines dry ingredients and coats with honey
- Spatula: Stirs and presses the mixture
- Small saucepan: Melts butter and combines with honey
- Sharp knife: Slices the set bars
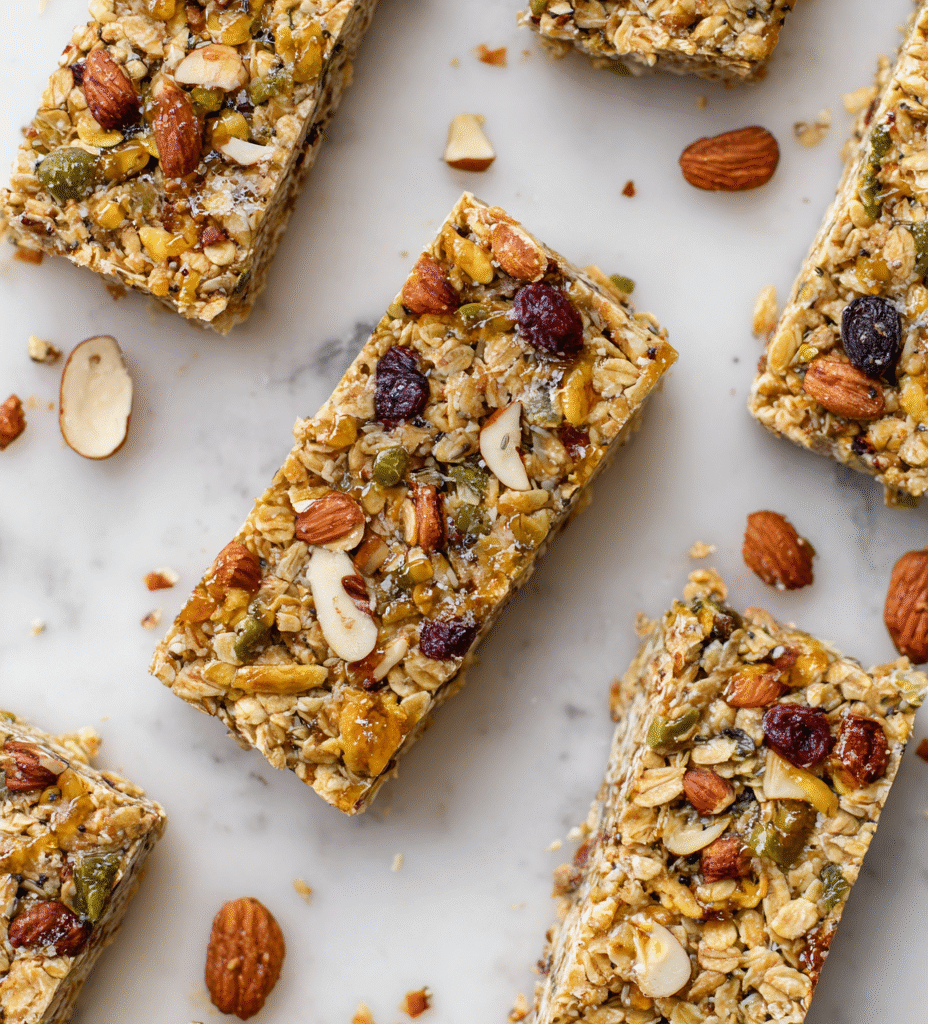
Step-by-step guide to no bake bars
- Gather your equipment: an 8×8 inch baking dish, a mixing bowl, a spatula, and parchment paper for easy removal.
- Line the baking dish with parchment paper, leaving overhang on two sides for easy lifting later.
- In a large bowl, combine 2 cups of old-fashioned oats, and toast them in a dry skillet over medium heat (about 160°C / 320°F) for 3-5 minutes, until fragrant and lightly golden. Stir frequently to prevent burning.
- While oats toast, roughly chop 1/2 cup of nuts (almonds or walnuts). Toast in the same skillet for 2-3 minutes until aromatic and slightly darker. Let cool.
- In a small saucepan, melt 1/4 cup butter or coconut oil over low heat. Once melted, stir in 1/3 cup honey, 1 teaspoon vanilla extract, and a pinch of salt. Heat gently until just combined, about 2 minutes; do not boil.
- Pour the warm honey mixture over the toasted oats and nuts. Add 1/2 cup dried fruit (cranberries, apricots), and stir well until everything is evenly coated and sticky.
- Transfer the mixture to your prepared baking dish. Use a spatula or parchment paper to press it down firmly and evenly, about 1 inch thick. Pressing tightly helps the bars hold together.
- Let the mixture cool at room temperature for 30 minutes, or chill in the fridge for 15 minutes if you’re in a rush. The bars should set into a firm, sticky block.
- Once cooled and set, lift the whole block out using the parchment overhang. Slice into bars or squares with a sharp knife. For clean cuts, wipe the knife with warm water between slices.
- Store in an airtight container at room temperature for up to 3 days, or in the fridge for up to a week. Wrap individually for portable snacks.
Let the bars cool completely at room temperature or in the fridge. Slice into squares and serve or store in an airtight container. For best texture, keep at room temp for 2-3 days, then refrigerate if needed.
How to Know It’s Done
- Bars feel firm and hold their shape when pressed. They shouldn’t crumble easily.
- The top is golden and slightly shiny from the honey and butter mixture.
- When pressed, the bars crackle slightly, indicating they’re set and not too sticky or soft.
No Bake Granola Bars
Ingredients
Equipment
Method
- Line your 8x8 inch baking dish with parchment paper, leaving overhang on two sides for easy removal.
- Place the oats in a dry skillet over medium heat and toast for 3-5 minutes, stirring constantly until fragrant and lightly golden.
- While the oats toast, chop your nuts roughly and toast them in the same skillet for 2-3 minutes until aromatic and darker in color. Set aside to cool.
- In a small saucepan, melt the butter or coconut oil over low heat. Once melted, stir in honey, vanilla extract, and a pinch of salt. Warm gently until the mixture is smooth and just bubbling, about 2 minutes.
- Pour the warm honey mixture over the toasted oats and nuts in a large bowl, then add the chopped dried fruit. Mix thoroughly with a spatula until everything is evenly coated and sticky.
- Transfer the mixture into your prepared baking dish. Use the back of a spatula or a piece of parchment to press it down firmly and evenly, about 1 inch thick.
- Let the mixture cool at room temperature for about 30 minutes, or refrigerate for 15 minutes to help it set faster.
- Once cooled and firm, lift the entire block out of the dish using the overhanging parchment paper.
- Slice into bars or squares with a sharp knife. Wipe the knife with warm water between cuts for clean edges.
- Enjoy immediately or store in an airtight container at room temperature for up to 3 days, or refrigerate for up to a week.
Pro tips for perfect bars
- Use a light hand when pressing the mixture into the pan. Too much pressure can make the bars tough.
- Toast oats and nuts thoroughly—aromatic and golden hues signal they’re ready, adding depth to flavor.
- Warm honey mixture until just bubbling—this ensures it coats evenly and helps bars set firm.
- Wipe your knife between cuts for clean, neat edges—warm water prevents sticking and crumbling.
- Use parchment overhang for easy removal—no sticking, no mess, just perfect bars every time.
- Chill the mixture briefly if it feels too sticky—this makes pressing easier and improves texture.
- Add dried fruit last—stir gently to prevent crushing and distribute evenly without breaking apart.
Common mistakes and how to fix them
- FORGOT to check mixture texture before pressing, leading to crumbly bars.
- DUMPED ingredients into pan without measuring, causing inconsistent sweetness and texture.
- OVER-TORCHED the honey mixture, resulting in a burnt flavor—use low heat and stir constantly.
- MISSED pressing firmly enough, so bars didn’t hold together—press with the back of a spatula or glass.
Quick fixes and pantry swaps
- When mixture is too dry, splash in a teaspoon of warm water to loosen it up.
- If bars crumble, patch with a tiny bit of honey or melted coconut oil, then press again.
- Splash a few drops of lemon juice if dried fruit feels too leathery; it plumps them up.
- When honey caramelizes and smells burnt, immediately remove from heat and stir in a splash of cold water.
- Patch sticky spots on parchment with a dab of neutral oil or butter for easy removal.
Prep, store, and reheat tips
- You can prepare the mixture up to a day ahead; keep it covered in the fridge to prevent drying out.
- Store the assembled bars in an airtight container at room temperature for up to 3 days, or in the fridge for a week. Expect a firmer texture from refrigeration.
- For longer storage, wrap bars individually in parchment or plastic wrap and freeze for up to a month. Thaw at room temperature for about 10 minutes before eating.
- Reheating isn’t necessary; these bars are best enjoyed at room temperature, but if they feel too firm, a quick 10-second zap in the microwave can soften them slightly, releasing a faint toasted aroma and making them more pliable.
Top questions about no bake granola bars
1. Can I use a different sweetener?
Yes, you can swap honey for maple syrup or agave nectar, but expect a slightly different sweetness and aroma. The texture remains similar, but honey gives that sticky, golden finish.
2. Can I substitute dried fruit?
Absolutely. Dried cranberries can be replaced with apricots, cherries, or raisins. The flavor shifts slightly, but the chewy texture stays consistent.
3. Can I make it nut-free?
Yes, nuts like almonds or walnuts work well. For allergies, sunflower or pumpkin seeds are good options—just watch for moisture and crunch.
4. How do I speed up setting?
Chilling the mixture in the fridge for 15 minutes helps it set faster. If your bars are too soft, pop them in the freezer for 10 minutes before slicing.
5. How do I get clean slices?
Use a sharp knife wiped with warm water for clean cuts. Wiping between slices prevents sticking and crumbling, especially with sticky honey mixture.
6. How should I store leftovers?
Storing in an airtight container at room temperature keeps them fresh for 3 days. For longer, refrigerate for up to a week or freeze for a month.
7. What if the mixture is too dry or sticky?
If mixture feels too dry, add a teaspoon of warm water and stir well. For overly sticky mixture, lightly dust with oats or press more firmly.
8. Can I make these in advance?
You can prepare the mixture a day ahead and keep it covered in the fridge. Just press into the pan when ready to set.
9. My bars are crumbly, how do I fix it?
If bars crumble, gently press the mixture back together with a spatula or your hands. Slightly warmed honey or coconut oil can help bind loose bits.
10. Any tips for toasting ingredients evenly?
Adjust the cooking time for toasted oats and nuts to deepen flavor. Keep heat moderate to avoid burning, stirring frequently.
These no bake granola bars are a little reminder that sometimes the simplest snacks carry the most satisfaction. They’re perfect for busy mornings or when you need a quick, nourishing boost that doesn’t require turning on the oven.
In times when store-bought feels too processed, making your own turns into a small act of control and care. Plus, they’re endlessly customizable—an honest little project with a tasty payoff, every time.

Hi, I’m Ruby Thorn, the home cook behind The Tender Mess. Join me on the journey of Embracing the mess, fearlessly create —because in the kitchen, the mess sometimes leads to magic.