
In the mornings when everything feels chaotic, these no-bake oat squares are a lifeline. There’s no need to turn on the stove or wait for dough to chill—just a quick mix, press, and chill, and you’re set for a nourishing snack. They’re perfect for busy days or when you want something homemade without the fuss.
What I love most is how flexible this recipe is. You can toss in dried fruits, nuts, or even a splash of nut butter to change up the flavor. It’s a simple, honest recipe that’s become a staple in my kitchen for those mornings when time is tight but I still want a little comfort in every bite.
This recipe is inspired by those hectic mornings when I need a quick, nourishing snack that doesn’t require turning on the stove. It’s about harnessing the simplicity of pantry staples and the comforting crunch of oats, all packed into a bite that’s easy to grab and go.
The story behind this recipe
- This recipe came about during a summer camping trip. We had a limited kitchen setup, but I still craved something sweet and satisfying that wouldn’t spoil or require heating. I started mixing oats, honey, and a few pantry staples around the campfire, and the result was surprisingly delicious.
- Later, I tweaked that simple idea back home, adding in dried fruits and nuts to make it more filling. It’s become my go-to when I need a quick, no-fuss snack that’s honest, straightforward, and reminds me of those lazy, outdoor mornings.
- heading
Ingredient breakdown: key components
- Old-fashioned oats: I love the chewiness and nutty flavor they bring, but quick oats can work if you’re in a pinch and want a softer bite.
- Honey: It’s the glue that makes these hold together, offering a sticky, sweet aroma. Swap with maple syrup for a richer, slightly smoky note.
- Nut butter: I prefer peanut for its creamy richness, but almond or cashew butters add a more delicate, buttery flavor—just stir well to avoid separation.
- Dried fruit: Raisins or chopped apricots add chew and sweetness, but dried cranberries give a tart punch—so pick what matches your mood.
- Nuts: Toasted almonds or walnuts give crunch and depth, but raw versions keep it lighter; chop them fine or leave whole depending on your texture preference.
- Vanilla extract: Just a splash brightens everything up with a warm aroma—skip if you want a more neutral, straightforward flavor.
- Salt: I always add a pinch to elevate the sweetness and balance the richness; don’t skip it, even if it seems small.
Spotlight on key ingredients
Old-fashioned oats:
- I love the chewiness and nutty flavor they bring, but quick oats can work if you’re in a pinch and want a softer bite.
- Honey: It’s the glue that makes these hold together, offering a sticky, sweet aroma. Swap with maple syrup for a richer, slightly smoky note.
Nut butter and dried fruit:
- Nut butter: I prefer peanut for its creamy richness, but almond or cashew butters add a more delicate, buttery flavor—just stir well to avoid separation.
- Dried fruit: Raisins or chopped apricots add chew and sweetness, but dried cranberries give a tart punch—so pick what matches your mood.
Notes for ingredient swaps
- Sweetener: Maple syrup can replace honey for a richer, caramel-like aroma, though it may alter the chewiness slightly.
- Nut Butter: Almond or cashew butter adds a different nutty flavor and creaminess—stir well to prevent separation.
- Dried Fruit: Chopped dried apricots or cranberries swap in tartness or chew, but dried cherries might turn the bite unexpectedly juicy.
- Nuts: Use toasted walnuts or pecans for deeper flavor, or raw for a lighter crunch—adjust chop size for texture.
- Oats: Quick oats will make a softer, more delicate square, while steel-cut oats need longer soaking—stick to traditional rolled oats for best structure.
- Vanilla Extract: Swap with a splash of almond extract for a different aromatic layer—use sparingly to avoid overpowering.
- Salt: A pinch enhances sweetness—skip if you prefer a milder, less savory taste.
Equipment & Tools
- Mixing bowl: Hold and mix ingredients evenly.
- Spatula: Combine ingredients and press mixture into the dish.
- 20x20cm (8×8 inch) baking dish: Shape and set the squares.
- Parchment paper: Prevent sticking and make removal easier.
- Sharp knife: Cut the chilled mixture into squares.
Step-by-step guide to no-bake oat squares
- Gather all ingredients and equipment. Line a 20x20cm (8×8 inch) baking dish with parchment paper. Have a spatula ready.
- In a large mixing bowl, combine 2 cups old-fashioned oats, 1/2 cup honey, and 1/2 cup nut butter. Stir until well coated and sticky.
- Add 1/2 cup chopped nuts, 1/3 cup dried fruit, and a teaspoon vanilla extract. Mix thoroughly to distribute evenly.
- Transfer the mixture to the prepared dish. Using a spatula or the back of a spoon, press down firmly and evenly to compact the mixture. Aim for a smooth, flat surface.
- Place the dish in the fridge. Chill for at least 2 hours, or until the mixture is firm and holds together when pressed.
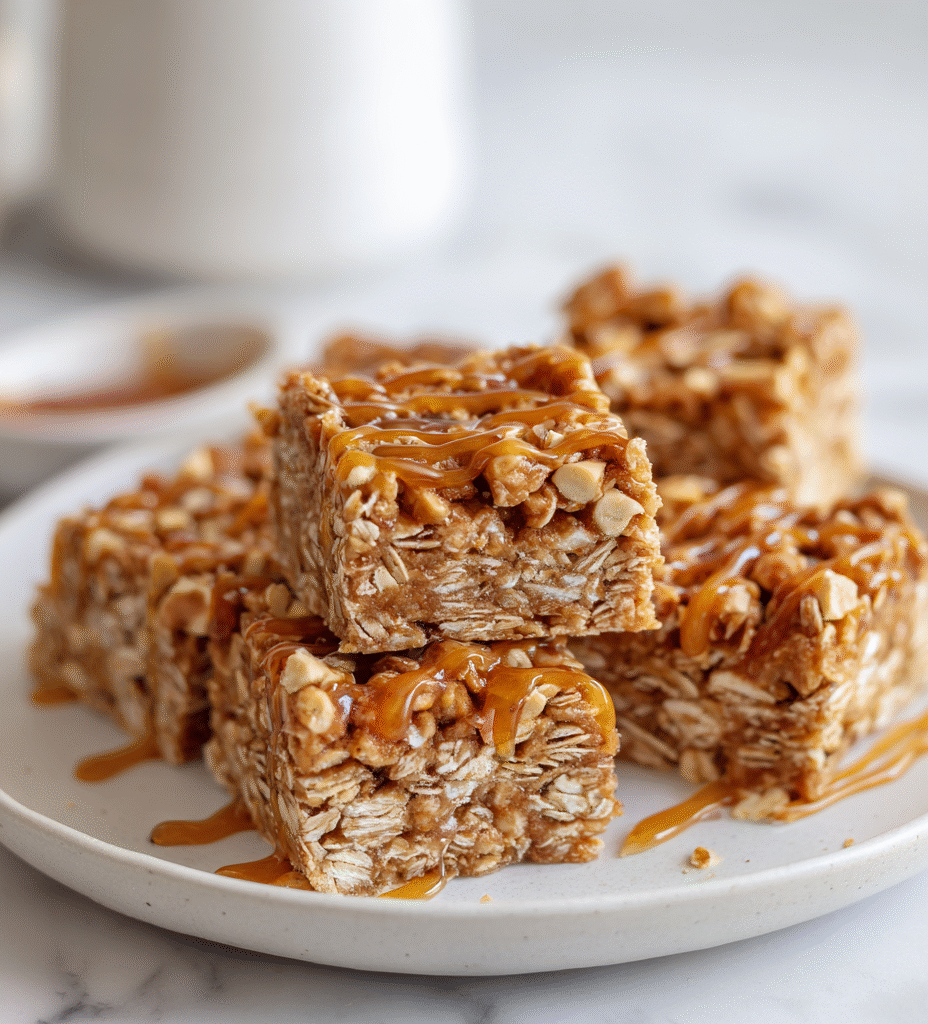
- Once chilled, lift out the entire block using the parchment edges. Cut into 12 squares with a sharp knife. Wipe the knife clean between cuts for smooth edges.
- Serve immediately or store in an airtight container in the fridge for up to 5 days. For longer storage, freeze and thaw as needed.
Chill the assembled mixture for at least 2 hours until firm. Cut into squares and serve or store in an airtight container in the fridge or freezer.
How to Know It’s Done
- Mixture holds together when pressed, not crumbling apart (test after mixing).
- Squares are firm and set after chilling, with a slight bounce when pressed gently.
- Edges are clean and sharp when cut, not jagged or sticky.
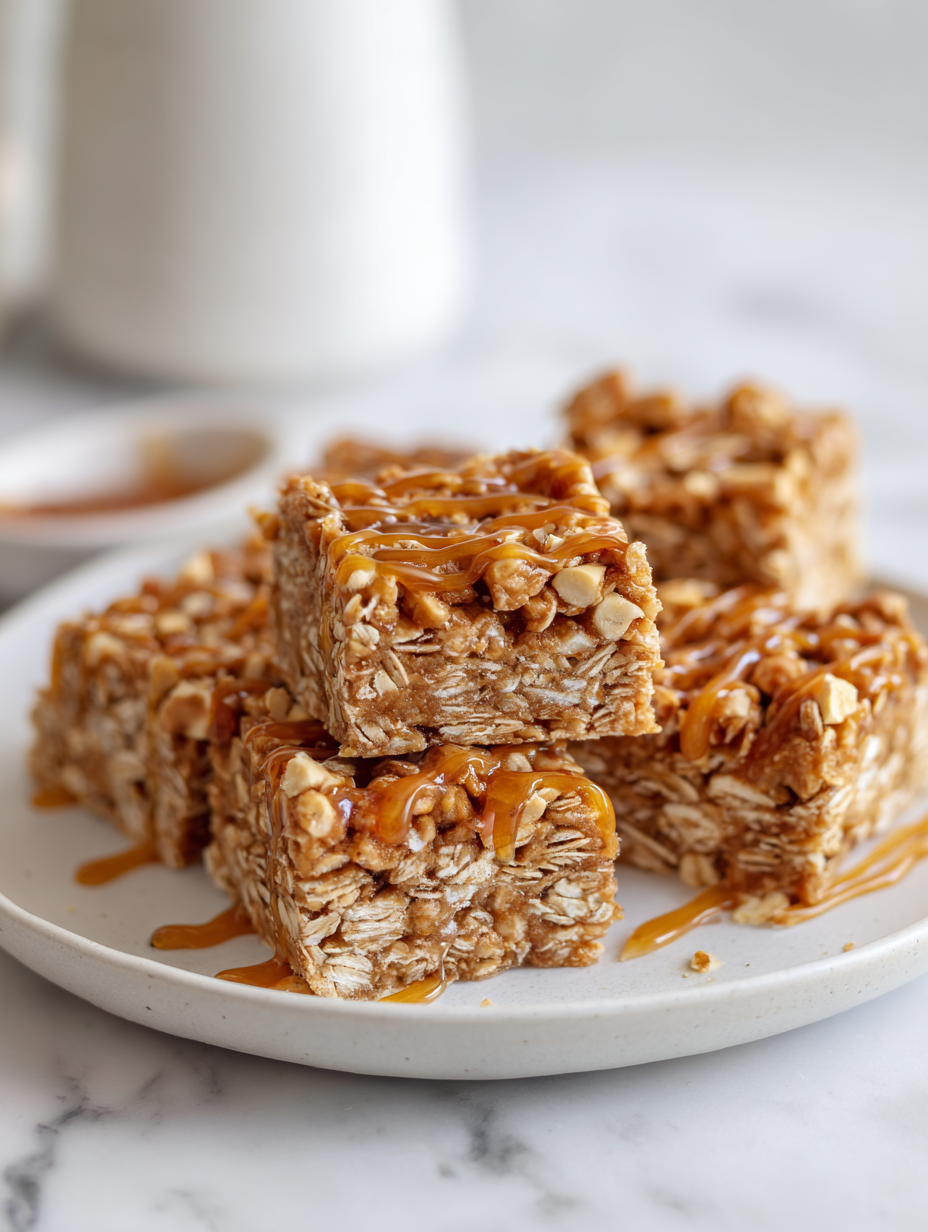
No-Bake Oat Squares
Ingredients
Equipment
Method
- Line your 20x20cm (8x8 inch) baking dish with parchment paper for easy removal later.
- In a large mixing bowl, pour in the oats, chopped nuts, and dried fruit.
- Warm the honey slightly in the microwave for about 10 seconds until it's runny, then add it to the bowl along with the nut butter and vanilla extract.
- Using a spatula, fold everything together until the mixture is sticky, well-coated, and starts to clump.
- Transfer the mixture into your prepared dish and press down firmly with the spatula or your hands to create an even, compact layer.
- Place the dish in the fridge and chill for at least 2 hours until the mixture is firm and set.
- Once chilled, lift out the block using the parchment paper and cut into 12 even squares with a sharp knife.
- Serve immediately or store in an airtight container in the fridge for up to 5 days, or freeze for longer storage.
Notes
Pro tips for perfect no-bake squares
- Bolded mini-head: Use a silicone spatula to fold ingredients gently—keeps oats intact and prevents crushing.
- Bolded mini-head: Warm honey slightly before mixing—it becomes more fluid, making the binding process smoother.
- Bolded mini-head: Press mixture firmly into the dish—this compacts everything for cleaner, easier cuts after chilling.
- Bolded mini-head: Chill for at least 2 hours—this helps the squares set fully, avoiding crumbly bites.
- Bolded mini-head: Wipe your knife between cuts—keeps edges clean and prevents squishing the squares.
- Bolded mini-head: For a crunchier texture, toast nuts lightly before chopping—brings out their aromatic oils.
- Bolded mini-head: If mixture feels too sticky, sprinkle a little extra oats—helps control stickiness without dryness.
Common mistakes and how to fix them
- FORGOT to pack mixture tightly → press firmly for even set.
- DUMPED ingredients too quickly → fold gently to avoid uneven texture.
- OVER-TORCHED the edges → lower heat or reduce baking time.
- MISSED chilling time → ensure two hours for proper firmness.
Quick fixes and pantry swaps
- When mixture feels too sticky → splash in a little extra oats to help it hold together.
- If squares crumble when cutting → chill longer or press more firmly into the dish.
- Splash a tiny bit of hot water on knife blade → cleanly slice through sticky squares.
- Dumped in too much honey → balance with a handful of oats or nuts for texture.
- When oats look dull or dry → add a drizzle of honey or nut butter for shine and stickiness.
Prep, store, and reheat tips
- Prep the mixture ahead of time by combining oats, honey, and nut butter; it firms up better if chilled overnight.
- Store the cut squares in an airtight container in the fridge for up to 5 days; the coolness keeps them firm and fresh.
- For longer storage, freeze the squares for up to 3 months; wrap individually for easy grab-and-go portions.
- Reheat in a microwave for 10-15 seconds if you prefer a slightly softer texture; they warm quickly and smell invitingly nutty.
- Let refrigerated or frozen squares come to room temperature for 5-10 minutes before serving to regain softness and aroma.
Top questions about no-bake oat squares
1. Can I use quick oats instead of rolled oats?
Use rolled oats for the best chewy texture. Quick oats soften too much and can make the squares crumbly.
2. Can I skip vanilla or salt in the recipe?
Yes, adding a splash of vanilla or a pinch of salt enhances the flavor, making the squares more vibrant and well-rounded.
3. How long should I chill the mixture?
Chill the mixture for at least 2 hours until firm. If you skip this, the squares might be too soft and fall apart.
4. How do I cut the squares without them crumbling?
Use a sharp knife wiped clean between cuts for neat, clean edges. If you don’t, the squares can get squished and uneven.
5. How should I store the oat squares?
Store leftovers in an airtight container in the fridge for up to 5 days. For longer, freeze the squares for up to 3 months.
6. What if the mixture is too sticky to shape?
If the mixture feels too sticky, sprinkle in a little more oats to help it hold together without drying out.
7. Can I substitute honey with something else?
Replace honey with maple syrup if you want a different flavor, but expect a slightly different texture and sweetness.
8. Is this recipe dairy-free?
To make it dairy-free, use nut butters like almond or cashew, and choose maple syrup instead of honey for sweetness.
9. My squares are dry—how can I fix them?
If your squares are too dry, add a tiny splash of honey or nut butter to bring back moisture and chewiness.
10. Should I toast the nuts before adding?
For a richer flavor, toast your nuts lightly before chopping. It brings out their aromatic oils and adds depth.
These no-bake oat squares are a quiet reminder that simple ingredients and honest effort create something truly satisfying. They’re perfect for those moments when I need a quick treat that’s also wholesome, with a crunch that brings a little joy. Sometimes, the best recipes are the ones that come together with no fuss and deliver pure comfort in a bite.
Whenever I reach for one, I think about how they’re a small act of kindness—easy to make, easy to share, and always dependable. No matter how hectic the day, these squares bring a moment of calm and a little sweetness to keep going. That’s enough reason to keep this recipe on hand, no matter the season.

Hi, I’m Ruby Thorn, the home cook behind The Tender Mess. Join me on the journey of Embracing the mess, fearlessly create —because in the kitchen, the mess sometimes leads to magic.