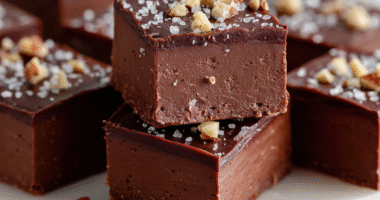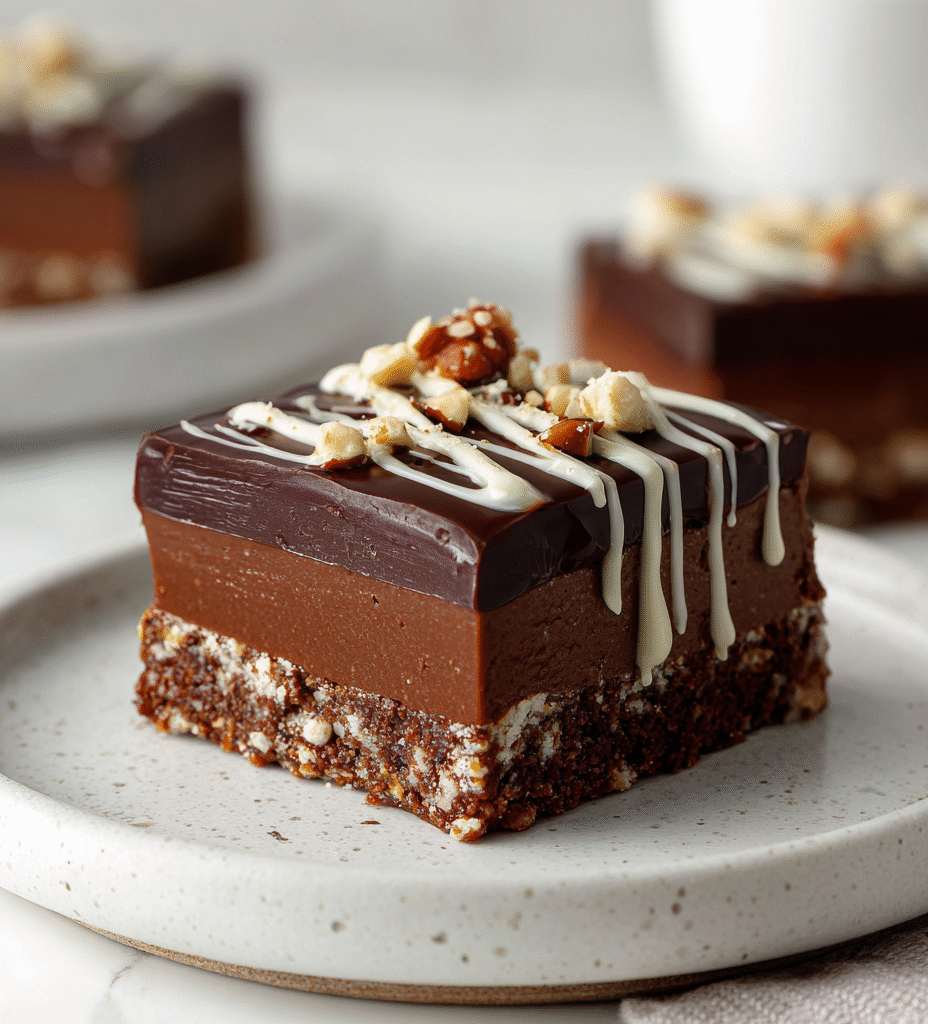
This no-bake chocolate slice is my go-to when the heat is relentless and the oven feels like a sauna. It’s the kind of dessert that comes together in minutes, no fuss, no mess, just pure chocolate bliss that cuts through the chaos of a busy day. I love how it’s almost like a treat I can make with whatever’s lurking in the pantry—no special ingredients needed.
There’s something deeply satisfying about the simplicity of this recipe. It’s a bit nostalgic, reminding me of childhood afternoons when my mom would whip up a quick sweet after school, only now I’ve tweaked it to suit my tastes. It’s perfect for those moments when I crave something rich and chocolaty but don’t want to wait around for a cake to bake or dirty half the kitchen.
This recipe is a secret weapon for those nights when I need a quick, satisfying treat without turning on the oven, especially when the weather is too hot or I’m short on time. It’s a no-fuss, no-mess way to get that rich, chocolaty fix while still feeling like I’ve baked something special. Plus, the simplicity makes it perfect for sharing with friends or kids who want a sweet snack without the fuss.
The story behind this recipe
- This recipe was born out of those frantic afternoons when I needed a sweet fix, fast. I’d rummage through the pantry, find some chocolate, and a few simple ingredients, and somehow, the no-bake slice was born. It’s become a bit of a family secret, a quick way to satisfy that chocolate craving without any fuss.
- I remember making it for friends during a summer picnic when the oven was just too hot, and everyone kept asking for the recipe. Over the years, I’ve tweaked it, adding in nuts or switching to dark chocolate, but the core remains the same—fast, honest, and deeply satisfying.
- heading
- story_type
Ingredient breakdown
- Dark chocolate: I love the richness of a good dark chocolate, it melts smoothly and gives that intense cocoa punch. Swap for milk chocolate if you prefer a sweeter, creamier slice—just expect a milder flavor.
- Butter: I use salted butter for a subtle savory note, but unsalted works fine. If you’re dairy-free, try coconut oil for a hint of tropical aroma and a softer texture.
- Honey: Adds a touch of natural sweetness and helps everything bind together. Maple syrup can be a good substitute, giving a slightly different, more earthy sweetness.
- Oats: Rolled oats give structure and a bit of chew. If you’re gluten-sensitive, use certified gluten-free oats—just watch out for a slightly softer bite.
- Vanilla extract: It boosts the overall flavor, making the chocolate taste even more vibrant. Skip if you want a purer, more intense chocolate hit, but don’t skip the vanilla if you can.
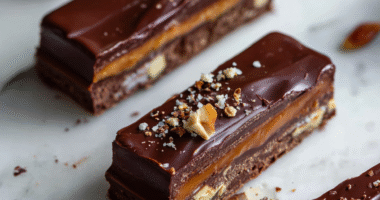
- Optional nuts or dried fruit: I toss in chopped almonds for crunch, but walnuts or dried cranberries are nice swaps. Use sparingly—they can overwhelm the delicate chocolate flavor.
- Salt: Just a pinch enhances all the flavors. Sea salt flakes add a lovely shimmer and crunch, but regular table salt works if that’s what you have.
Spotlight on key ingredients
Dark chocolate:
- I love the richness of a good dark chocolate, it melts smoothly and gives that intense cocoa punch. Swap for milk chocolate if you prefer a sweeter, creamier slice—just expect a milder flavor.
- Butter: I use salted butter for a subtle savory note, but unsalted works fine. If you’re dairy-free, try coconut oil for a hint of tropical aroma and a softer texture.
Oats:
- Honey: Adds a touch of natural sweetness and helps everything bind together. Maple syrup can be a good substitute, giving a slightly different, more earthy sweetness.
- Rolled oats give structure and a bit of chew. If you’re gluten-sensitive, use certified gluten-free oats—just watch out for a slightly softer bite.
Notes for ingredient swaps
- Dairy-Free: Swap butter for coconut oil or vegan margarine. Expect a slightly softer, more tropical flavor.
- Sweetener Alternatives: Use maple syrup or agave instead of honey for a different sweetness profile, with a hint of caramel or floral notes.
- Chocolate: Replace dark chocolate with milk chocolate for a creamier, sweeter taste; or try a dairy-free dark chocolate for vegan options.
- Oats: Gluten-free rolled oats work well if you’re sensitive; they might make the slice slightly softer, but still chewy.
- Add-ins: Nuts or dried fruit can be swapped—try chopped pecans or dried apricots for different textures and flavors.
- Salt: Sea salt flakes add a crunchy shimmer and enhance chocolate, but regular table salt works in a pinch if you prefer a milder finish.
Equipment & Tools
- Baking tin: Holds the mixture and shapes the slice.
- Heatproof bowl: Melts chocolate and butter evenly.
- Spatula: Mixes ingredients and presses mixture into the tin.
- Knife: Cuts the set slice into pieces.
- Parchment paper: Prevents sticking and makes removal easy.
Step-by-step guide to no bake chocolate slice
- Equipment & Tools: Line a 20cm (8-inch) square baking tin with parchment paper for easy removal. Prepare a heatproof bowl for melting, a spatula for mixing, and a knife for slicing.
- Melt the chocolate and butter: Place chopped dark chocolate and butter in the heatproof bowl. Set over a pot of simmering water (about 60°C/140°F). Stir gently until smooth and shiny, about 3-4 minutes. Be careful not to overheat or let water touch the chocolate.
- Add sweetness and flavor: Remove from heat. Stir in honey and vanilla extract until well combined. The mixture should smell rich and cocoa-y, with a glossy sheen.
- Mix in dry ingredients: Add rolled oats and a pinch of sea salt. Use the spatula to fold everything together until evenly coated and sticky. The oats should glisten and feel slightly chewy.
- Transfer and level: Pour the mixture into the prepared tin. Use the back of the spatula to spread and press down firmly to create an even surface. Smooth out the top with gentle pressure.
- Chill and set: Place in the fridge for at least 2 hours, or until firm. For quicker setting, about 1 hour in the freezer can work, but avoid freezing for too long to prevent cracking.
- Cut into slices: Remove from fridge. Use a sharp knife to cut into squares or rectangles. Wipe the knife clean between cuts to maintain sharp edges. The slice should crack slightly on the edges and feel firm to the touch.
- Resting & Finishing: Serve directly from the fridge for a firm, fudgy texture. For a softer bite, leave at room temperature for 10 minutes before slicing. Store leftovers in an airtight container in the fridge for up to a week. For longer storage, freeze for up to 3 months, thaw in the fridge overnight before serving.
Chill the slice in the fridge until firm, at least 2 hours. Slice with a sharp knife, wipe clean between cuts. Serve cold for a fudgy texture or leave at room temperature for a softer bite.
How to Know It’s Done
- Chocolate mixture is smooth, shiny, and well combined after melting.
- Mixture is firm but still slightly pliable before slicing.
- Edges crack slightly when cut, indicating proper setting.
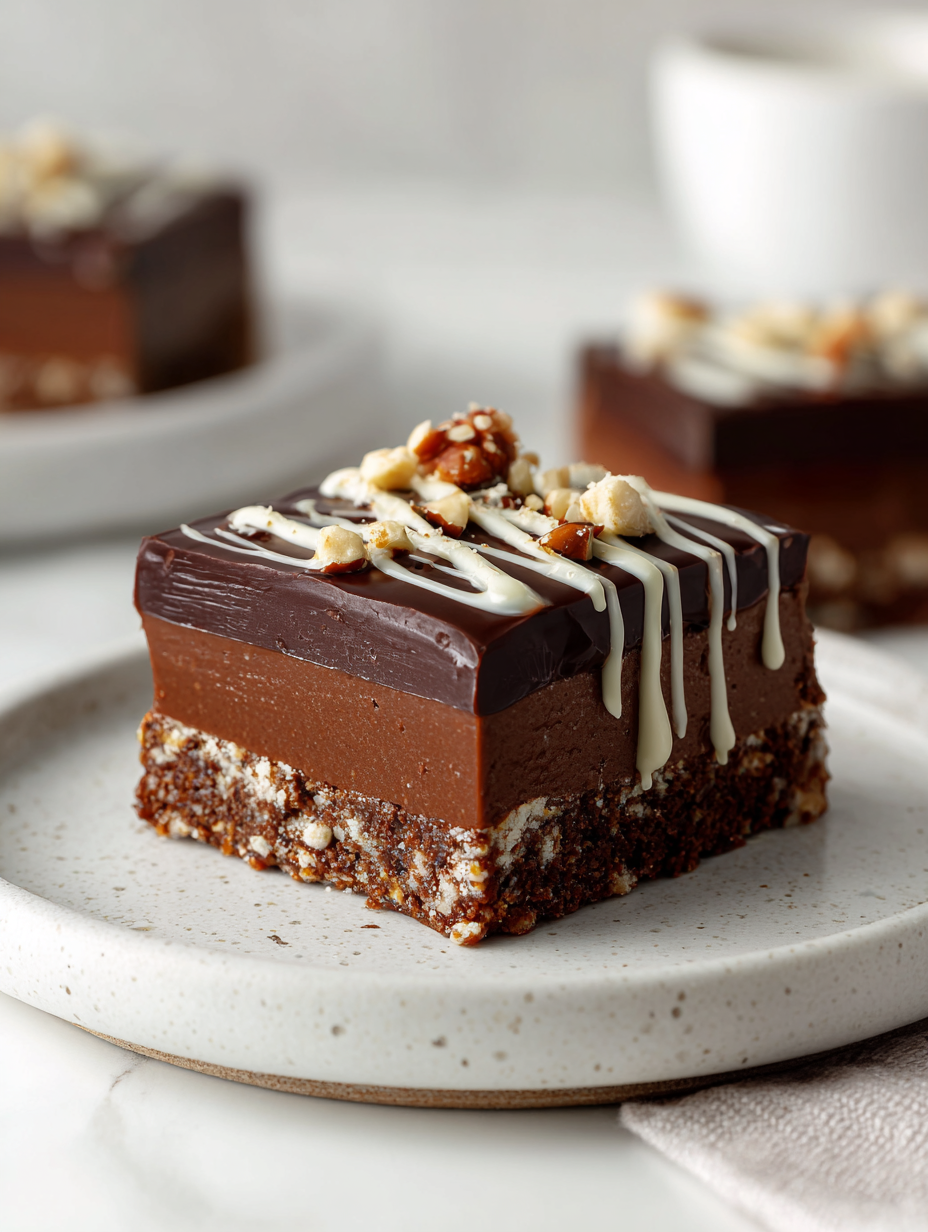
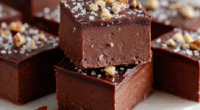
No-Bake Chocolate Slice
Ingredients
Equipment
Method
- Line your baking tin with parchment paper, creating an overhang for easy removal. Gather your ingredients and prepare a heatproof bowl for melting.
- Chop the dark chocolate into small pieces and place them in the heatproof bowl. Add the butter on top, ready for melting.
- Set the bowl over a pot of simmering water, making sure the bottom doesn’t touch the water, and stir gently until the mixture is smooth, shiny, and completely melted. This takes about 3-4 minutes, and you’ll notice it smells rich and cocoa-y.
- Remove the bowl from heat and stir in the honey and vanilla extract until well combined. The mixture should be glossy and fragrant.
- Add the rolled oats and a pinch of sea salt to the chocolate mixture. Fold everything together with your spatula until the oats are evenly coated and the mixture is thick and sticky.
- Pour the mixture into your prepared tin and use the back of the spatula to press it down firmly and evenly. Tap the tin gently on the counter to settle the mixture and create a smooth surface.
- Place the tin in the fridge and chill for at least 2 hours, or until the slice is firm and set. For quicker results, pop it in the freezer for about an hour, but avoid freezing too long to prevent cracking.
- Once set, remove the tin from the fridge and lift the slice out using the overhang. Use a sharp knife to cut into squares or rectangles, wiping the blade clean between cuts for neat edges.
- Serve the slices chilled for a fudgy, glossy finish or leave at room temperature for a softer, melt-in-your-mouth texture. Enjoy this rich, no-fuss chocolate treat!
Tips and tricks for perfect slices
- Gentle melting: Use a double boiler to melt chocolate slowly, avoiding any bitter, scorched notes.
- Quick chill: Place the slice in the freezer for 30 minutes to speed up setting without risking cracking.
- Press firmly: Use the back of a spatula or a flat cup to press the mixture into the tin — it helps create a firm, even base.
- Wipe the knife: Clean your knife between cuts for clean, sharp edges and a more polished look.
- Check firmness: Gently press the top; it should feel firm but slightly springy, not soft or crumbly.
- Sound test: A slight crackle when slicing indicates it’s properly set and ready to serve.
- Room temp finish: For softer slices, leave in a warm spot for 10 minutes before slicing—watch for a delicate, melt-in-your-mouth bite.
Common mistakes and how to fix them
- FORGOT to check chocolate melting temperature → Use gentle heat, avoid water contact.
- DUMPED in too much butter → Reduce fat or add more oats for balance.
- OVER-TORCHED the mixture → Remove from heat immediately, stir until smooth.
- MISSED chilling time → Chill at least 2 hours for proper set, or slice too soft.
Quick Fixes and Pantry Swaps
- When mixture is too thick, splash in a teaspoon of hot water to loosen.
- If chocolate isn’t melting smoothly, patch with gentle heat and stirring.
- DUMPED in too much butter? Add extra oats to balance the fat.
- Over-torched mixture? Remove from heat immediately, stir until smooth and glossy.
- Splash cold water on the bottom of your pan if chocolate seizes; stir quickly to recover.
Prep, store, and reheat tips
- Prepare the slice up to 24 hours in advance; it tastes even better after chilling overnight, with a firm, fudgy texture.
- Store in an airtight container in the fridge for up to a week; the cool temperature keeps the chocolate shiny and fresh.
- For longer storage, freeze slices for up to 3 months; wrap tightly to prevent freezer burn and preserve flavor.
- Reheat slightly in the fridge for 10 minutes before serving to soften, or enjoy chilled for a denser, more indulgent bite. Sensory note: the chocolate should feel firm but not rock-hard, with a slight shine when ready to serve.
Top questions about no bake chocolate slice
1. How do I slice the set slice neatly?
Use a sharp serrated knife for clean cuts, pressing down gently to avoid crumbling.
2. How long does it take to set?
Chill the slice in the fridge for at least 2 hours, or freeze for a faster set.
3. Can I make this dairy-free?
Yes, you can substitute coconut oil for butter, which will give a softer, slightly coconut-flavored slice.
4. How can I boost the flavor?
Add a pinch more salt or vanilla if the flavor feels flat; taste and adjust before setting.
5. Can I customize the ingredients?
Stir in chopped nuts or dried fruit right after mixing the oats for added texture and flavor.
6. My mixture is too stiff—what should I do?
If the mixture is too thick, add a teaspoon of hot water to loosen it up before pressing into the tin.
7. What’s the best chocolate to use?
Use high-quality dark chocolate for a rich, velvety finish. Cheaper brands may make it grainy.
8. How should I store the slices?
Store leftovers in an airtight container in the fridge for up to a week, or freeze for longer.
9. How do I serve it for best texture?
For a softer, more melt-in-your-mouth texture, leave the slice at room temperature for about 10 minutes before serving.
10. My chocolate is seized—what now?
If the chocolate seizes during melting, add a teaspoon of hot water and stir until smooth.
This no-bake chocolate slice is a reminder that sometimes, the simplest ingredients come together to create something truly satisfying. It’s honest, unpretentious, and perfect for those moments when you need a quick sweet fix that doesn’t require turning on the oven.
In a way, making this slice feels like a small act of rebellion against the fuss of baking. It’s a little indulgence that’s easy to share, and honestly, it’s become a bit of a comfort for me during busy weeks or when friends drop by unexpectedly.

Hi, I’m Ruby Thorn, the home cook behind The Tender Mess. Join me on the journey of Embracing the mess, fearlessly create —because in the kitchen, the mess sometimes leads to magic.