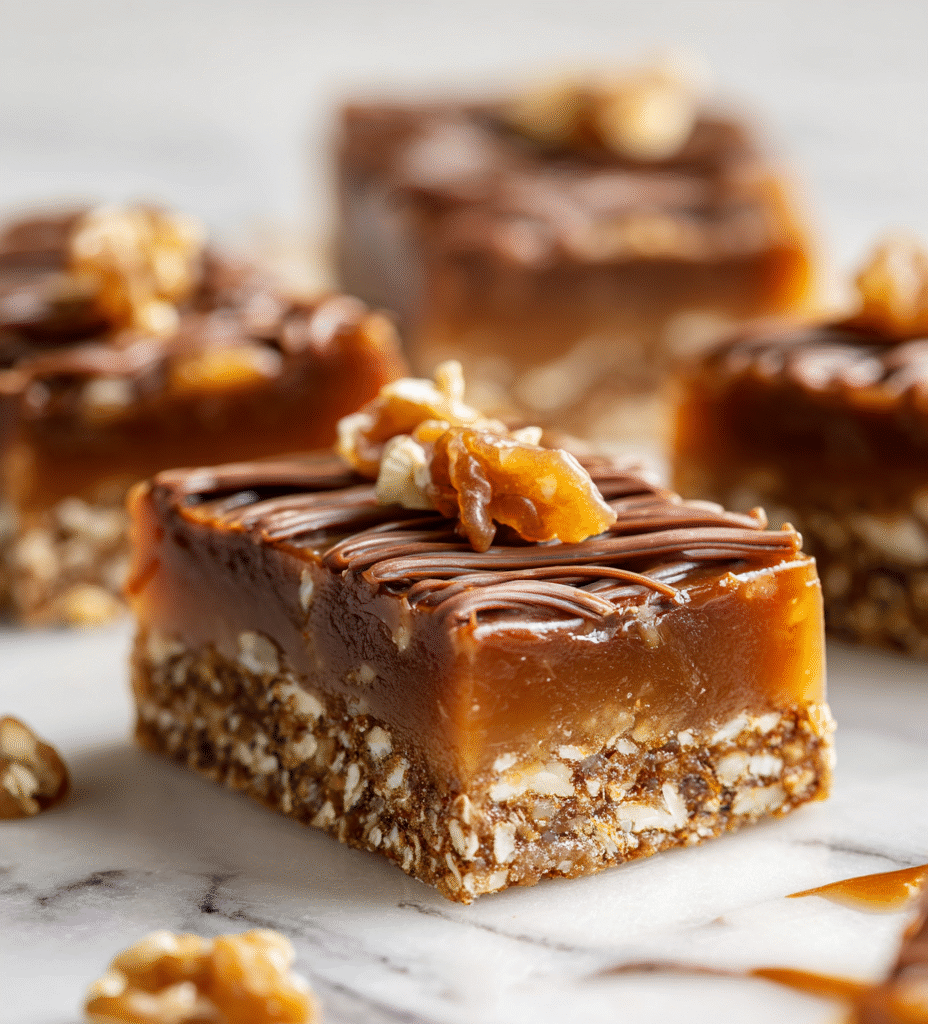

These no bake date bars are like a quick escape to childhood afternoons, where the simplest ingredients could turn into something sweet and satisfying. I love how they come together with minimal fuss—just a handful of dates, nuts, and a dash of cocoa—and still feel indulgent enough to satisfy that unexpected craving. It’s honest comfort, no oven needed, perfect for when time is tight or the mood calls for something real and straightforward.
What makes these bars special is how adaptable they are—once you’ve got the base down, you can tweak the nuts or add a pinch of sea salt or a swirl of honey. They’re a no-fuss treat that feels like a little bit of nostalgia, wrapped up in a chewy, fudgy bite. Every time I make them, I’m reminded that sometimes, the simplest ingredients can be the most satisfying—no pretenses, just honest, good flavors.
Focusing on the nostalgic comfort of childhood afternoons, these no bake date bars are a quick, honest remedy for sweet cravings that hit unexpectedly. I love how they come together in under 15 minutes, no fuss, just honest ingredients that remind me of simpler times and lazy weekends. It’s about reclaiming those moments when a treat feels more like a warm hug than just dessert.
The story behind this recipe
- This recipe was born out of a lazy afternoon when I realized I had a stash of dates and a craving for something sweet but wholesome. I wanted something that didn’t require turning on the oven, just pure, honest ingredients that could come together quickly. It’s my go-to when I need a little burst of energy or a treat that feels like a small act of kindness.
- I remember making these bars after a long day, the kitchen filled with the rich aroma of toasted nuts and melting dates. Each bite takes me back to simpler times—those afternoons spent in my grandmother’s kitchen, where the best desserts were often no-bake and made with love and a pinch of improvisation.
- heading
- story_type
Ingredient breakdown: key components
- Medjool dates: They’re naturally sticky and intensely sweet, almost caramel-like. If yours are dry, soak them for 10 minutes to loosen up.
- Nuts (almonds or walnuts): I prefer toasted nuts for extra flavor—just toast in a dry pan until golden and fragrant, then chop coarsely. Skip if allergies are a concern.
- Cocoa powder: Unsweetened and vibrant, it gives that rich, slightly bitter punch. If you want more chocolate depth, add a few dark chocolate chips.
- Salt: Just a pinch enhances everything—try flaky sea salt on top for a salty-sweet contrast that makes the flavors pop.
- Vanilla extract: A splash adds warmth and complexity. If you’re out, a tiny bit of maple syrup can boost sweetness with a subtle depth.
- Coconut oil (optional): Makes the mixture glossier and easier to press into the pan. Use unrefined for a hint of coconut aroma or skip for a more neutral bar.
- Optional add-ins: Dried fruit or seeds can add texture and surprise bites—think chia, sesame, or a sprinkle of flaky sea salt for a finishing touch.
Spotlight on key ingredients
Medjool dates:
- Naturally sticky and intensely sweet, almost caramel-like. If yours are dry, soak them for 10 minutes to loosen up.
- Nuts (almonds or walnuts): I prefer toasted nuts for extra flavor—just toast in a dry pan until golden and fragrant, then chop coarsely. Skip if allergies are a concern.
Cocoa powder:
- Unsweetened and vibrant, it gives that rich, slightly bitter punch. If you want more chocolate depth, add a few dark chocolate chips.
- Salt: Just a pinch enhances everything—try flaky sea salt on top for a salty-sweet contrast that makes the flavors pop.
Notes for ingredient swaps
- Medjool dates: I prefer these for their natural caramel sweetness and moist texture. If yours are dry, soak them for 10 minutes to soften.
- Nuts (almonds or walnuts): Toasted nuts add flavor; skip if allergies or prefer raw. Cashews can work too, offering a milder, buttery bite.
- Cocoa powder: Unsweetened, vibrant, adding rich depth. For a sweeter touch, mix in a few dark chocolate chips or cocoa nibs.
- Salt: Flaky sea salt enhances sweetness and provides a subtle crunch. Regular table salt works, but use less to avoid over-salting.
- Vanilla extract: Deepens flavor with warmth. If out, a splash of maple syrup can add a gentle sweetness and aroma.
- Coconut oil (optional): Makes the mixture glossy and easier to press. Use unrefined for coconut aroma or omit for a neutral flavor.
- Add-ins: Dried fruits or seeds like chia or sesame can add texture. Flaky sea salt on top adds a savory contrast, if you like.
Equipment & Tools
- 20cm (8-inch) square pan: Holds the mixture for setting and easy removal.
- Spatula: Pressing the mixture evenly into the pan.
- Sharp knife: Cutting clean bars after chilling.
- Parchment paper: Preventing sticking and easing removal.
- Skillet: To toast the nuts for added flavor.
Step-by-step guide to no bake date bars
- Gather your equipment: a 20cm (8-inch) square baking pan, a spatula, and a sharp knife. Line the pan with parchment paper for easy removal.
- Pit your Medjool dates if they have pits. Chop them into small pieces, about 1cm, to help them melt faster.
- Toast your nuts in a dry skillet over medium heat, about 3-5 minutes, until golden and fragrant. Let cool slightly, then chop coarsely.
- In a microwave-safe bowl, melt the chopped dates and coconut oil (if using) in 30-second bursts, stirring between each, until smooth and oozy. About 1-2 minutes total.
- Add the cocoa powder, vanilla extract, and a pinch of salt to the melted dates. Mix well until the mixture is dark, glossy, and uniform.
- Stir in the toasted nuts until evenly distributed. If the mixture feels too sticky, sprinkle in a little more chopped nuts or a tiny splash of water.
- Transfer the mixture to your prepared pan. Use a spatula to press it evenly into the corners and smooth the top. Press firmly to compact.
- Chill in the fridge for at least 2 hours, or until firm. The mixture should be solid and hold together when pressed.
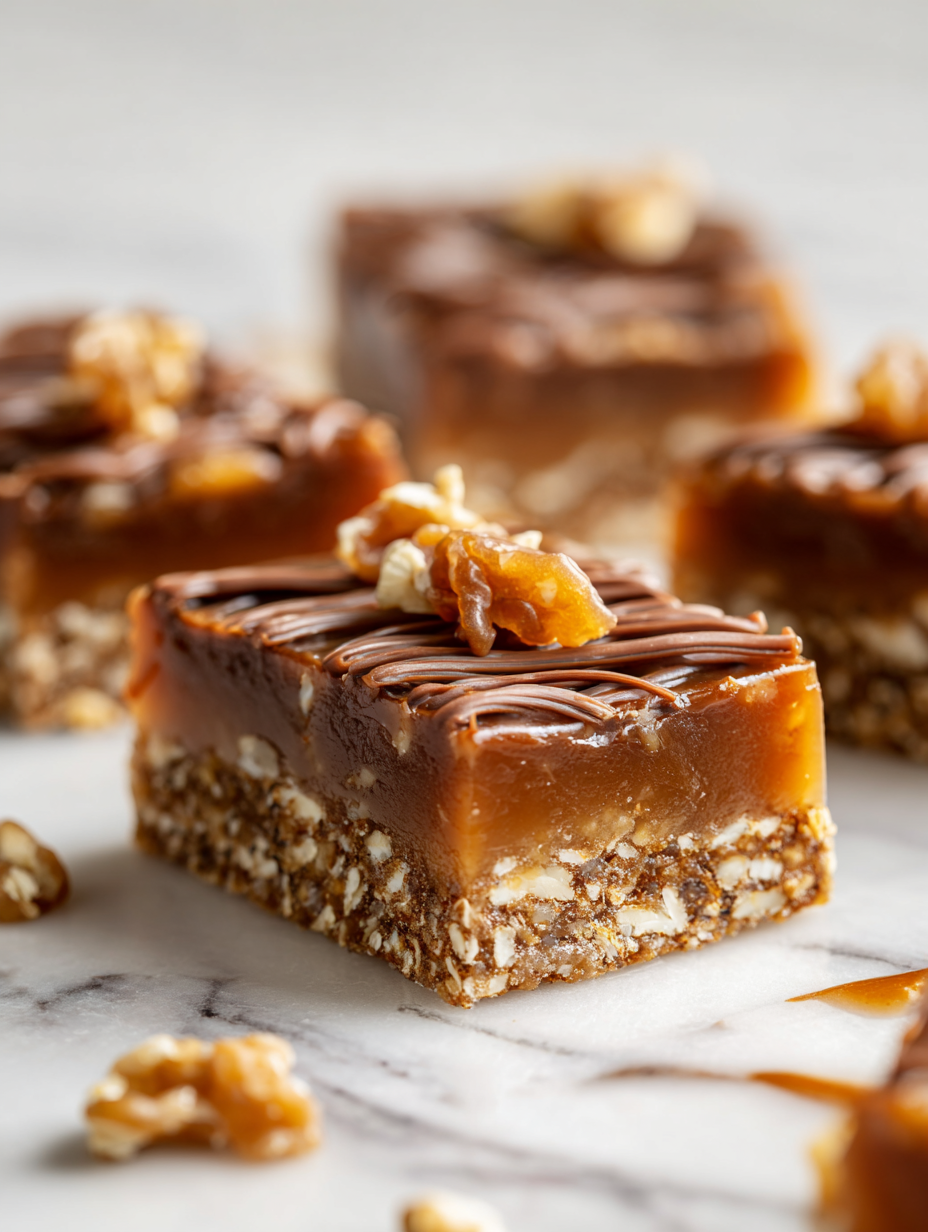
- Once set, lift the parchment paper to remove the bars from the pan. Use a sharp knife to cut into rectangular bars, about 2.5cm (1 inch) thick.
- Serve immediately or store in an airtight container in the fridge. Wrap individually with parchment for grab-and-go snacks.
Chill the bars in the fridge for at least 2 hours until firm. Slice into bars and serve or store in an airtight container in the fridge for up to a week. For longer storage, freeze and thaw slightly before serving.
How to Know It’s Done
- The mixture is dark and glossy, with no sticky or wet patches.
- Bars are firm but not hard, with a slight give when pressed.
- Edges are clean and smooth when cut, without crumbling.
No Bake Date Bars
Ingredients
Equipment
Method
- Line your square pan with parchment paper, leaving some overhang for easy removal.
- Chop the pitted Medjool dates into small pieces, about 1cm each, to help them melt quickly and evenly.
- Toast your nuts in a dry skillet over medium heat for 3-5 minutes until fragrant and golden, then let them cool slightly before chopping coarsely.
- In a microwave-safe bowl, melt the chopped dates and coconut oil in 30-second bursts, stirring in between, until the mixture is smooth and sticky, about 1-2 minutes.
- Add the cocoa powder, vanilla extract, and a pinch of sea salt to the melted mixture, then stir well until everything is combined into a dark, glossy paste.
- Fold in the toasted nuts until evenly distributed throughout the mixture.
- Transfer the mixture to your prepared pan and press it firmly with a spatula or your fingers to create an even layer, smoothing out the top.
- Place the pan in the fridge and chill for at least 2 hours, or until the mixture is firm and set.
- Once firm, lift the parchment paper to remove the set mixture from the pan, then use a sharp knife to cut into rectangular bars, about 2.5cm wide.
- Serve immediately or store the bars in an airtight container in the fridge for up to a week. For longer storage, freeze and thaw before enjoying.
Notes
Pro tips for perfect no bake bars
- Use softened dates—warm them slightly to release more caramel aroma and make blending easier.
- Toast nuts until fragrant—this amplifies flavor and adds a satisfying crunch to your bars.
- Mix cocoa powder thoroughly—ensure no lumps for a rich, uniform chocolate flavor throughout.
- Press mixture firmly—use the back of a spatula or your hands to compact the bars for clean slices.
- Chill until firm—give the bars at least 2 hours in the fridge for optimal texture and sliceability.
- Use parchment paper—line your pan for easy removal and to prevent sticking during chilling.
- Add a pinch of sea salt—sprinkle on top before chilling to enhance sweetness and add contrast.
Common mistakes and how to fix them
- FORGOT to chill: Bars may be crumbly; chill longer or press more firmly.
- DUMPED too much: Excessive nuts cause uneven texture; chop coarsely and measure accurately.
- OVER-TORCHED nuts: Burnt flavor ruins bars; toast nuts over low heat, watch closely.
- MISSED the consistency: Mixture should be sticky but manageable; if dry, add a splash of water or oil.
Quick fixes and pantry swaps
- If mixture is too sticky, splash in a tiny bit of warm water to loosen it.
- When bars crumble, chill longer or press mixture more firmly in the pan.
- Splash extra coconut oil if mixture isn’t glossy enough before setting.
- Patch over cracks by pressing extra chopped nuts into the surface after slicing.
- Shield delicate edges with a light dusting of cocoa powder if they crack during cutting.
Prep, store, and reheat tips
- Prep the date mixture ahead: soak dates and toast nuts the night before for quicker assembly.
- Store the chopped nuts in an airtight container at room temperature for up to 3 days; they’ll stay crunchy.
- Keep the assembled but uncut bars wrapped tightly in plastic wrap or in an airtight container for up to a week in the fridge.
- Refrigerate to keep the bars firm and fresh; bring to room temperature for about 10 minutes before serving for softer bites.
- For longer storage, freeze the bars wrapped well for up to a month; thaw in fridge or at room temp and check for aroma and texture.
Top questions about no bake date bars
1. Can I use other types of dates?
Use soft, pitted Medjool dates for best results. If they’re dry, soak them in warm water for 10 minutes to soften and make blending easier.
2. Can I substitute other dried fruits for dates?
Absolutely. You can swap in dried figs or dried apricots, but expect a different flavor and slightly different texture.
3. My mixture is too dry, what can I do?
Yes, but the mixture might be less sticky. If it’s too dry, add a small splash of water or a bit more coconut oil to help it come together.
4. How long should I chill the bars?
Chill the bars in the fridge for at least 2 hours until firm. If they’re still soft, additional chilling will help them set properly.
5. How should I store the bars?
To keep the bars fresh, store them in an airtight container in the fridge for up to a week. For longer storage, freeze and thaw as needed.
6. Can I change the nuts?
You can swap walnuts or almonds for other nuts like pecans or cashews. Toast them first for extra flavor and crunch.
7. Can I add chocolate chips?
Use unsweetened cocoa powder for a rich, bitter chocolate flavor. You can add a few dark chocolate chips if you want extra sweetness.
8. My bars crumble when I cut them, what do I do?
If your bars are crumbly, try pressing them more firmly into the pan and chilling longer before slicing.
9. How do I get clean cuts?
Use a sharp knife and smooth, even pressure when cutting. Warming the blade slightly can also help for cleaner slices.
10. Can I add toppings or salt?
These bars are quite forgiving. You can add a pinch of sea salt on top before chilling for a contrast that enhances the chocolate flavor.
These no bake date bars are a reminder that sometimes, the simplest ingredients deliver the most honest moments of sweetness. They’re quick to whip up and carry a nostalgic punch that feels both comforting and honest. On busy days or when that craving hits unexpectedly, they’re my go-to for a little honest indulgence.
And honestly, there’s something satisfying about knowing how easy they are to make and how adaptable they can be. No fuss, no oven, just good ingredients and a moment of mindful sweetness. That’s why I keep coming back to this recipe—it’s honest, straightforward, and just right for right now.

Hi, I’m Ruby Thorn, the home cook behind The Tender Mess. Join me on the journey of Embracing the mess, fearlessly create —because in the kitchen, the mess sometimes leads to magic.