
Sometimes, the most impressive desserts are the simplest ones. This no-bake vegan cheesecake proves that you don’t need a fancy oven or a long list of ingredients to create something truly special. It’s a treat that feels indulgent but is totally accessible, even on busy weeknights or last-minute gatherings.
What I love most is how the raw, wholesome ingredients come together into a silky, creamy texture that’s surprisingly rich. It’s a dessert that invites curiosity—people often assume it’s loaded with dairy or eggs, only to be delighted by its light, fresh feel and bright lemon notes. Plus, it’s a relief to whip up without heating up the kitchen.
Focusing on the surprising elegance of a no-bake vegan cheesecake that even non-vegans will admire, highlighting how simplicity and raw ingredients can come together into a decadent dessert without turning on the oven.
Surprising Simplicity of Raw Indulgence
- This recipe feels like an act of culinary rebellion—no oven, no fuss, just pure, creamy joy.
- I love how the simple ingredients remind me of childhood summers, light and tangy with that hint of lemon zest.
- There’s a strange satisfaction in knowing I can make something so luxe without turning on the stove or stressing over perfect crusts.
- Every time I serve this, I see surprised smiles—people don’t expect vegan to taste this rich and smooth.
- This cheesecake has become my go-to comfort dessert, especially when I crave something sweet but want to keep it real.
The story behind this recipe
- This recipe was born out of a chaotic summer picnic when I realized I forgot to pack dessert. Instead of stressing, I grabbed some coconut, cashews, and a lemon, throwing them together in my blender. That creamy, tangy slice turned out to be the highlight of the day, and I’ve been making it ever since whenever I need a quick, impressive treat.
- It’s a reminder that some of the best desserts come from improvisation—simple, raw ingredients, no oven needed, just a little bit of patience and a lot of tasting as you go.
- heading
- The story behind this recipe
Historical & Cultural Roots
- This vegan cheesecake has roots in raw food movements from the 1970s, emphasizing unprocessed, plant-based ingredients.
- Its no-bake approach echoes traditional cheesecakes from the 1800s, but modern vegan versions adapt to plant-based fats and flavors.
- Creative cooks have long used cashews and coconut to mimic dairy textures, making this recipe a delicious evolution of those ideas.
Ingredient breakdown: key components
- Cashews: I love how their creaminess transforms into a velvety filling, but if you want a lighter texture, try soaking longer or blending more thoroughly.
- Coconut oil: It adds a subtle richness and helps set the cheesecake; if you prefer a firmer result, increase the amount slightly or chill longer.
- Lemon juice: Brightens everything with a zingy freshness—use fresh lemon for the brightest flavor, or swap with lime for a tangy twist.
- Maple syrup: I find it balances the nuttiness; if you want it less sweet, cut back a bit, but beware—without it, the filling might taste dull.
- Crust ingredients (nuts, dates): The natural sweetness and chewiness make or break the base; for a crunchier crust,asting longer in the fridge, or try adding a pinch of sea salt for depth.
- Vanilla extract: It rounds out the flavors with a warm, aromatic note—use good quality vanilla, or a splash of almond extract for a different aroma.
- Salt: Just a pinch enhances all the flavors—don’t skip it, even if it seems small, it makes a noticeable difference.
Spotlight on Key Ingredients
Cashews:
- I love how their creaminess transforms into a velvety filling, but if you want a lighter texture, try soaking longer or blending more thoroughly.
- Coconut oil: It adds a subtle richness and helps set the cheesecake; if you prefer a firmer result, increase the amount slightly or chill longer.
- Lemon juice: Brightens everything with a zingy freshness—use fresh lemon for the brightest flavor, or swap with lime for a tangy twist.
Coconut oil:
- It’s the secret to that silky, firm texture—melt it gently and don’t skip chilling for best results.
- Lemon juice: Adds a lively, citrusy punch that balances the richness—use freshly squeezed for the brightest impact.
- Dates: The natural sweetness and sticky chewiness form the base of the crust—soaking helps achieve a smoother blend.
Notes for ingredient swaps
- Dairy-Free: Cashew cream is creamy and neutral, but you can swap with coconut cream for a more coconut-forward flavor or silken tofu for a firmer texture.
- Sweetener: Maple syrup adds a warm, caramel note; agave nectar is milder and more neutral, while coconut nectar offers a slight caramel undertone.
- Coconut Oil: Provides richness and helps set the cheesecake; avocado oil can be used for a similar fat content, but it has a more subtle flavor.
- Lemon Juice: Brightens the filling; lime juice gives a slightly different citrus note, and bottled lemon juice works in a pinch but lacks freshness.
- Crust Nuts: Walnuts add earthy flavor, but almonds or pecans can be used for different nuttiness; sunflower seeds work for nut allergies with a milder taste.
- Dates: Natural sweetness and stickiness; dried apricots or figs can be used but may alter the flavor and texture slightly.
- Vanilla: Enhances sweetness and aroma; vanilla bean paste for more intense flavor, or almond extract for a different aromatic twist.
Equipment & Tools
- Springform pan: Shaping and holding the cheesecake as it sets.
- High-speed blender: Achieving a silky, smooth filling free of chunks.
- Spatula: Smoothing the top of the filling and transferring ingredients.
- Parchment paper: Preventing sticking and easy removal of the cheesecake.
- Knife: Loosening the edges and for serving.
Step-by-step guide to no-bake cheesecake
- Prepare your equipment: get a 20cm (8-inch) springform pan, a high-speed blender, a spatula, and a parchment paper-lined tray. The blender is for achieving that ultra-smooth filling, while the pan shapes your cheesecake.
- Make the crust: in a food processor, pulse 1 cup of medjool dates (pitted), 1.5 cups of toasted walnuts, and a pinch of sea salt until crumbly but sticky. Press this mixture evenly into the bottom of your pan. Chill in the fridge for 15 minutes to firm up.
- Rinse and drain 1.5 cups of raw cashews. Soak them in hot water for 20 minutes if you have time, to boost creaminess. Drain well and pat dry. This step helps your filling turn silky smooth.
- In the blender, combine the soaked cashews, 1/4 cup melted coconut oil, 1/3 cup fresh lemon juice, 1/4 cup maple syrup, 1 teaspoon vanilla extract, and a pinch of salt. Blend on high for 2-3 minutes, scraping down sides, until completely smooth and silky. The smell should be bright and citrusy, and the texture velvety.
- Pour the filling over the crust. Smooth the top with a spatula. Tap the pan gently on the counter to settle the filling and remove air bubbles.
- Cover loosely with plastic wrap and set in the fridge for at least 4 hours, preferably overnight. During this time, the cheesecake will firm up and flavors meld. The surface should be firm to the touch, and the edges slightly pulling away from the pan.
- Before serving, run a knife around the edge of the pan to loosen the cheesecake. Carefully remove the springform ring, and transfer to a serving plate. Garnish with fresh berries or a drizzle of compote if desired.
Let the cheesecake chill uncovered for the last hour in the fridge to develop a firm, clean texture. Slice with a sharp knife dipped in hot water for clean cuts. Serve directly from the fridge, garnished as desired.
How to Know It’s Done
- The filling should be completely smooth, with no graininess, when blended.
- The cheesecake should be firm but creamy, with a gentle jiggle when gently shaken.
- The crust should be set and slightly sticky, holding together when pressed.
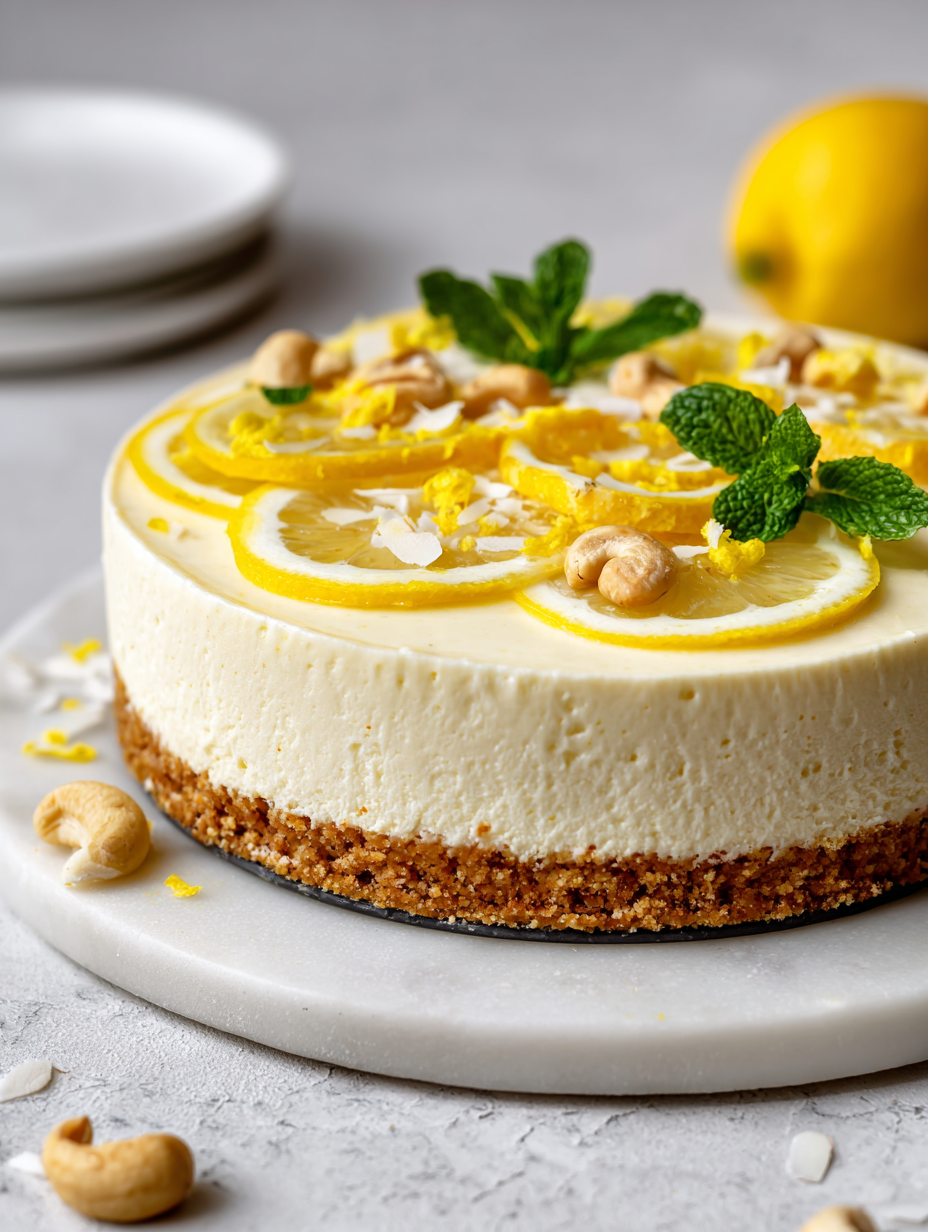
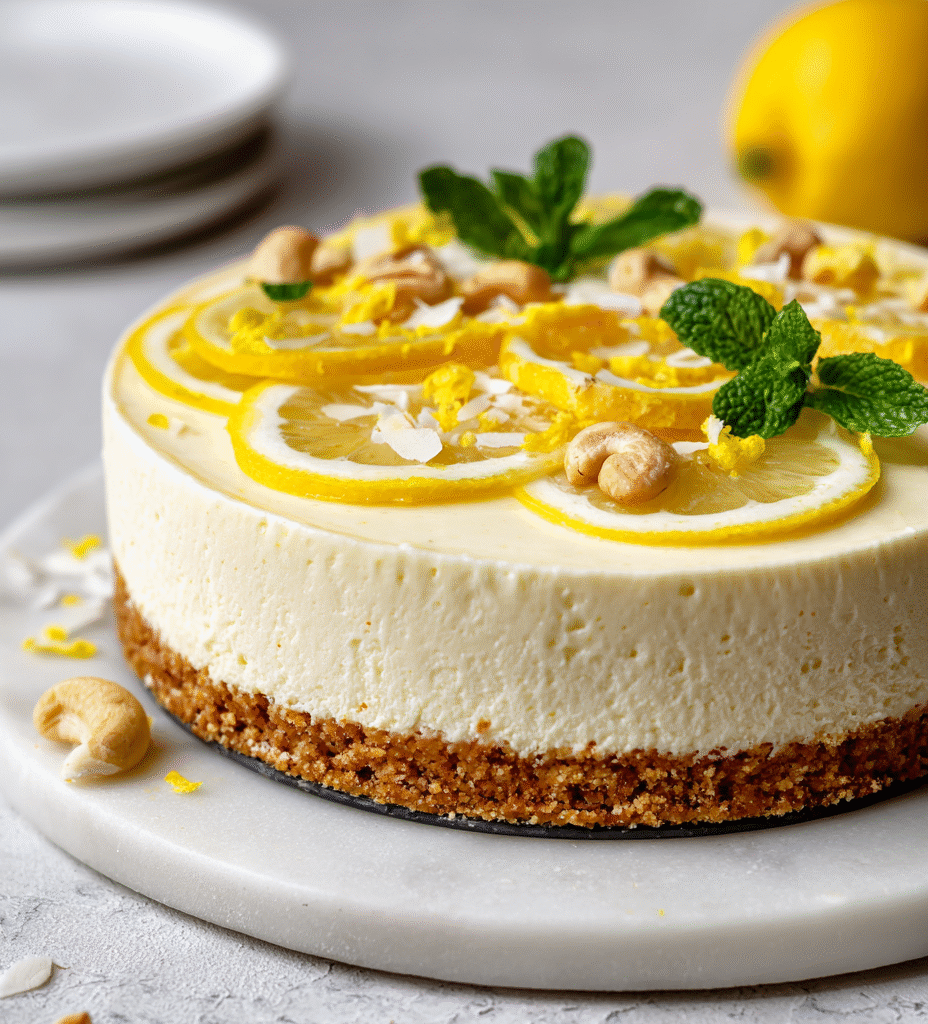
No-Bake Vegan Lemon Cheesecake
Ingredients
Equipment
Method
- Start by lining your springform pan with parchment paper to prevent sticking. In a food processor, pulse the dates, toasted walnuts, and a pinch of sea salt until the mixture is crumbly but sticky when pressed together.
- Press this crumbly mixture evenly into the bottom of your prepared pan, using the back of a spatula or your fingers to compact it firmly. Place in the fridge to chill while you prepare the filling.
- Drain and rinse the soaked cashews well. In a high-speed blender, combine the cashews, melted coconut oil, fresh lemon juice, maple syrup, vanilla extract, and a pinch of sea salt.
- Blend on high for 2-3 minutes, stopping occasionally to scrape down the sides, until the mixture is completely smooth, velvety, and bright lemon in scent. The texture should be glossy and free of graininess.
- Pour the creamy filling over the chilled crust, using a spatula to spread it evenly across the surface. Gently tap the pan on the counter to eliminate any air bubbles and ensure the filling settles smoothly.
- Cover the pan loosely with plastic wrap and place it in the fridge to set for at least 4 hours, or overnight if possible. The filling will firm up and develop a silky, sliceable texture.
- When ready to serve, run a hot knife around the edges of the cheesecake to loosen it. Carefully remove the springform ring and transfer the cheesecake to a serving plate.
- Garnish with fresh berries, lemon zest, or a drizzle of syrup if desired. Slice with a hot, sharp knife dipped in hot water for clean cuts. Enjoy this bright, creamy vegan treat!
Pro tips for perfect cheesecake
- Bold crust base: Blend dates and nuts until sticky but still crumbly, then press firmly into the pan for even coverage.
- Silky filling: Blend cashews and liquids on high until completely smooth—look for a bright, velvety texture with no graininess.
- Chill to firm: Let the cheesecake rest in the fridge at least 4 hours, or ideally overnight, to achieve a clean slice and firm texture.
- Avoid over-blending: Stop blending once the mixture is glossy and smooth—over-blending can make the filling too airy or warm, affecting set.
- Hot water bath: Dipping your knife in hot water before slicing helps make clean, smooth cuts without cracks.
- Taste and adjust: Before setting, taste the filling—add more lemon for brightness or maple for sweetness, then blend briefly to incorporate.
- Use quality vanilla: A splash of good vanilla extract deepens flavor and adds warmth—don’t skimp on this small but mighty ingredient.
Common mistakes and how to fix them
- FORGOT to chill the crust before adding the filling → Chill crust for at least 15 minutes.
- DUMPED the filling into an unprepared pan → Always line or grease your pan first.
- OVER-TORCHED the crust in the oven → Keep an eye, and don’t bake; it’s no-bake.
- MISJUDGED the setting time → Chill for at least 4 hours, preferably overnight, for firm texture.
Quick fixes and pantry swaps
- When mixture looks grainy, splash in a bit more coconut milk and blend briefly.
- If crust crumbles when pressed, patch with a small amount of warm water or melted coconut oil.
- Splash hot water on your knife before slicing for cleaner cuts and fewer cracks.
- DUMPED too much lemon juice? Fix by blending in a teaspoon of coconut oil for balance.
- When cheesecake jiggles excessively, shield with plastic wrap and extend chilling time by an hour.
Prep, store, and reheat tips
- Prepare the crust and press it into the pan a day before; it firms up nicely in the fridge and makes assembly easier.
- The cheesecake filling can be made up to 24 hours in advance; store covered in the fridge to keep it fresh and prevent absorbing fridge odors.
- Chill the assembled cheesecake in the fridge for at least 4 hours, ideally overnight, to let it set fully and develop a creamy texture.
- Refrigerated cheesecake keeps well for up to 3 days—flavors deepen slightly, and the texture remains smooth and firm.
- To reheat, serve cold straight from the fridge. If needed, briefly warm the slices in a low oven (around 90°C/194°F) for a minute or two to soften the texture, but note it’s best enjoyed chilled for the optimal creamy experience.
Top questions about vegan cheesecake
1. Can I make this without cashews?
Use soaked cashews blended until smooth; they create that rich, creamy texture similar to dairy-based cheesecakes.
2. How long should I chill the cheesecake?
Chill it for at least 4 hours, ideally overnight, until it’s firm and slices cleanly without cracking.
3. Can I substitute coconut milk for cashews?
Yes, swap with coconut milk, but it might be a bit less rich and slightly more coconut-flavored.
4. Can I omit vanilla?
Use a good quality vanilla extract for the best aroma; vanilla bean paste offers a richer, more intense flavor.
5. How long can I store it?
Keep it covered in the fridge for up to 3 days. The flavor deepens, but the texture remains smooth and creamy.
6. Can I freeze this cheesecake?
Yes, you can freeze slices for up to a month; thaw in the fridge before serving to keep it creamy.
7. How do I adjust the sweetness?
Adjust sweetness by adding more maple syrup or lemon juice to suit your taste and balance the flavors.
8. How do I cut it neatly?
Use a hot, sharp knife dipped in hot water to get clean, crack-free slices.
9. My filling is grainy—what do I do?
If the filling is grainy, blend longer or add a splash of coconut milk to smooth it out.
10. Why does my crust fall apart?
Ensure the crust is pressed firmly and chilled before pouring in the filling to prevent crumbling.
This no-bake vegan cheesecake feels like a little act of rebellion—no oven, no fuss, just pure, creamy joy. It’s a reminder that sometimes the simplest ingredients can surprise you with their elegance, especially when you’re craving something sweet and fresh without heating up the kitchen.
Sharing this dessert brings a quiet satisfaction, knowing it’s wholesome, straightforward, and just a bit indulgent. It’s not about perfection, but about enjoying the process and the honest, bright flavors that come together effortlessly.

Hi, I’m Ruby Thorn, the home cook behind The Tender Mess. Join me on the journey of Embracing the mess, fearlessly create —because in the kitchen, the mess sometimes leads to magic.