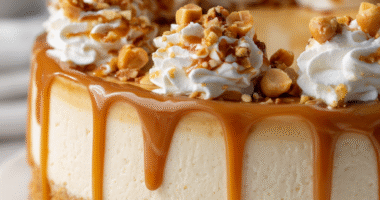

This no-bake Greek yogurt cheesecake is a revelation for anyone who wants a dessert that’s both light and satisfying. I love how it comes together with just a handful of simple ingredients, no oven required, which is a relief on hot summer days or when I’m short on time. It’s a perfect blend of creamy tang and just enough sweetness, all with that fresh, zingy burst from the Greek yogurt.
What makes this cheesecake stand out is how adaptable it is — I’ve played around with different toppings and crusts, but honestly, the simplest version often feels the most honest. It’s a kind of dessert that reminds me how minimal can be more, especially when you focus on quality ingredients. Plus, it’s a go-to for last-minute get-togethers or when I want something sweet but don’t want to heat up the kitchen.
Focusing on the simplicity and freshness of a no-bake Greek yogurt cheesecake, this recipe emphasizes how minimal ingredients and a few strategic techniques can create a dessert that feels both indulgent and wholesome without turning on the oven.
Freshness in Every Bite
- This cheesecake reminds me of summer afternoons at my grandmother’s house, where the air was filled with the scent of fresh herbs and lemon zest.
- I love how a simple spoonful can bring back lazy weekend mornings, cozy and quietly indulgent without any fuss.
- There’s a quiet pride in making something so straightforward that still feels special, especially when I serve it at friends’ gatherings.
- I get a little thrill watching the Greek yogurt set perfectly, its tangy aroma promising a creamy, satisfying bite.
- Honestly, it’s a relief to have a dessert that’s both wholesome and indulgent—no guilt, just pure, honest flavor.
The story behind this recipe
- This recipe sprouted from a lazy Sunday afternoon, when I realized I had a few cups of Greek yogurt that needed using up. Instead of the usual baked cheesecake, I wanted something cool, quick, and less fussy. The idea of skipping the oven and still having a creamy, tangy dessert felt like a small victory, especially in the heat.
- It’s become a go-to for me when I want something satisfying but not overly heavy. I love how just a handful of ingredients can turn into something so refreshing, almost like a fancy snack. Plus, it’s a kind of dessert that feels honest — no tricks, just good ingredients doing their thing.
- heading: The story behind this recipe
Trivia and History
- This recipe draws inspiration from traditional Greek desserts, where yogurt and honey often meet in cool, simple treats.
- The idea of a no-bake cheesecake became popular during post-war periods when oven access was limited, but the craving for creamy sweets persisted.
- Greek yogurt’s rise in international markets in the early 2000s sparked many modern, health-conscious dessert ideas like this one.
Ingredient breakdown: key components
- Greek yogurt: I use full-fat, creamy Greek yogurt for that rich tang; if you want it lighter, low-fat works, but the texture might be a tad less luscious. The tang really shines through, making every bite zingy.
- Cream cheese: I prefer softened, room-temperature cream cheese; it mixes smoothly without lumps. Skip this, and you risk a grainy texture—try warming it slightly if needed, to keep things seamless.
- Honey: I love drizzling honey over the crust for a sweet, floral aroma that’s almost intoxicating. If you want less sweetness, reduce it or swap with agave—just keep in mind it’ll be less fragrant.
- Graham cracker crust: I crush my graham crackers finely and mix with melted butter until it feels like damp sand. For a gluten-free version, try almond flour—just adjust the butter until it’s firm but not greasy.
- Lemon zest: I add a bit of lemon zest for brightness that cuts through the richness. If you don’t have fresh, a splash of lemon extract works but won’t have the same vibrant zing.
- Gelatin (if using): I dissolve a small amount in warm water to help set the cheesecake. If you skip it, the texture will be softer, more like a mousse—less firm but equally delicious.
- Vanilla extract: I use pure vanilla for depth. If you’re out, a dash of vanilla bean paste adds lovely specks and richness, but skip the artificial stuff—it’s just not the same.
Spotlight on Key Ingredients
Greek yogurt:
- I love its thick, velvety texture and tangy flavor—adds that signature zing. If you want it creamier, go full-fat; lighter versions lose some richness.
- It behaves like a thick, oozy cream during mixing—watch for lumps if not softened properly. It’s the backbone of this cheesecake’s creamy bite, so quality really shows.
Cream cheese:
- I soften it until it’s silky smooth—no lumps, no stress. It’s the key to that rich, stable texture that holds the whole cheesecake together.
- It can be quite sticky and firm when cold, so giving it a quick soften at room temp makes mixing effortless and ensures a velvety final product.
Notes for ingredient swaps
- Dairy-Free: Swap Greek yogurt for coconut yogurt—less tangy, creamier, and a slight coconut aroma.
- Sugar-Free: Use honey or maple syrup instead of sugar in the crust—adds a richer, floral sweetness.
- Gluten-Free: Replace graham crackers with almond flour or gluten-free cookies—offers a nutty flavor and crumbly texture.
- Vegan: Use vegan cream cheese and plant-based yogurt—still creamy, but with a different, subtler tang.
- Lemon Zest: Skip or replace with lime zest for a different citrus punch—brighter or more mellow, depending on the fruit.
- Sweetener: Use agave or stevia instead of honey—watch sweetness levels, as some are more concentrated.
- Crust Base: Try digestive biscuits or cookies like speculoos—adds a spiced note or different crunch.
Equipment & Tools
- Springform pan: Holds the crust and filling, easy to release the cheesecake.
- Mixing bowl: Combines ingredients smoothly.
- Spatula: Folds ingredients and smooths the surface.
- Food processor or zip-top bag + rolling pin: Crushes and mixes the crust.
- Small saucepan: Dissolves gelatin and warms ingredients if needed.
Step-by-step guide to no bake cheesecake
- Equipment & Tools: Prepare a 20cm (8-inch) springform pan, a mixing bowl, a spatula, a food processor or zip-top bag and rolling pin for crust, and a small saucepan.
- Make the crust: Crush graham crackers finely using a food processor or by sealing in a bag and smashing with a rolling pin. Mix with melted butter until evenly coated. Press into the bottom of the springform pan, smoothing with the back of a spoon. Chill in the fridge for 15 minutes.
- Mix the filling: In a large bowl, combine Greek yogurt, softened cream cheese, honey, lemon zest, and vanilla extract. Use a spatula or hand mixer on low speed until smooth and creamy, about 2–3 minutes. If using gelatin, dissolve it in 2 tablespoons of warm water, then fold into the mixture.
- Pour the filling: Remove crust from fridge and pour the filling over it, smoothing the top with a spatula. Tap the pan gently on the counter to remove air bubbles.
- Set the cheesecake: Cover with plastic wrap and refrigerate for at least 4 hours, preferably overnight. The filling should be firm to the touch and slightly jiggle in the center when ready.
- Check for doneness: The surface should look smooth and matte, not shiny or wet. The edges may slightly pull away from the sides of the pan. The texture should be creamy but hold shape when sliced.
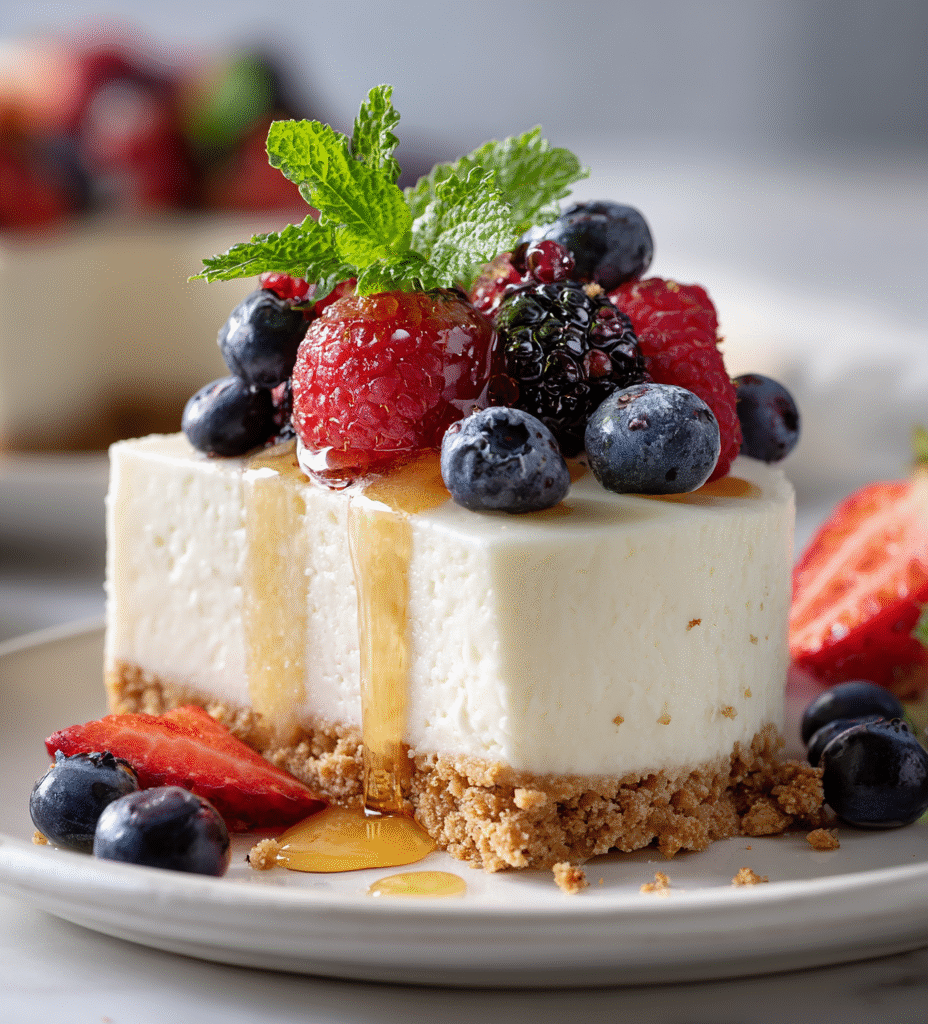
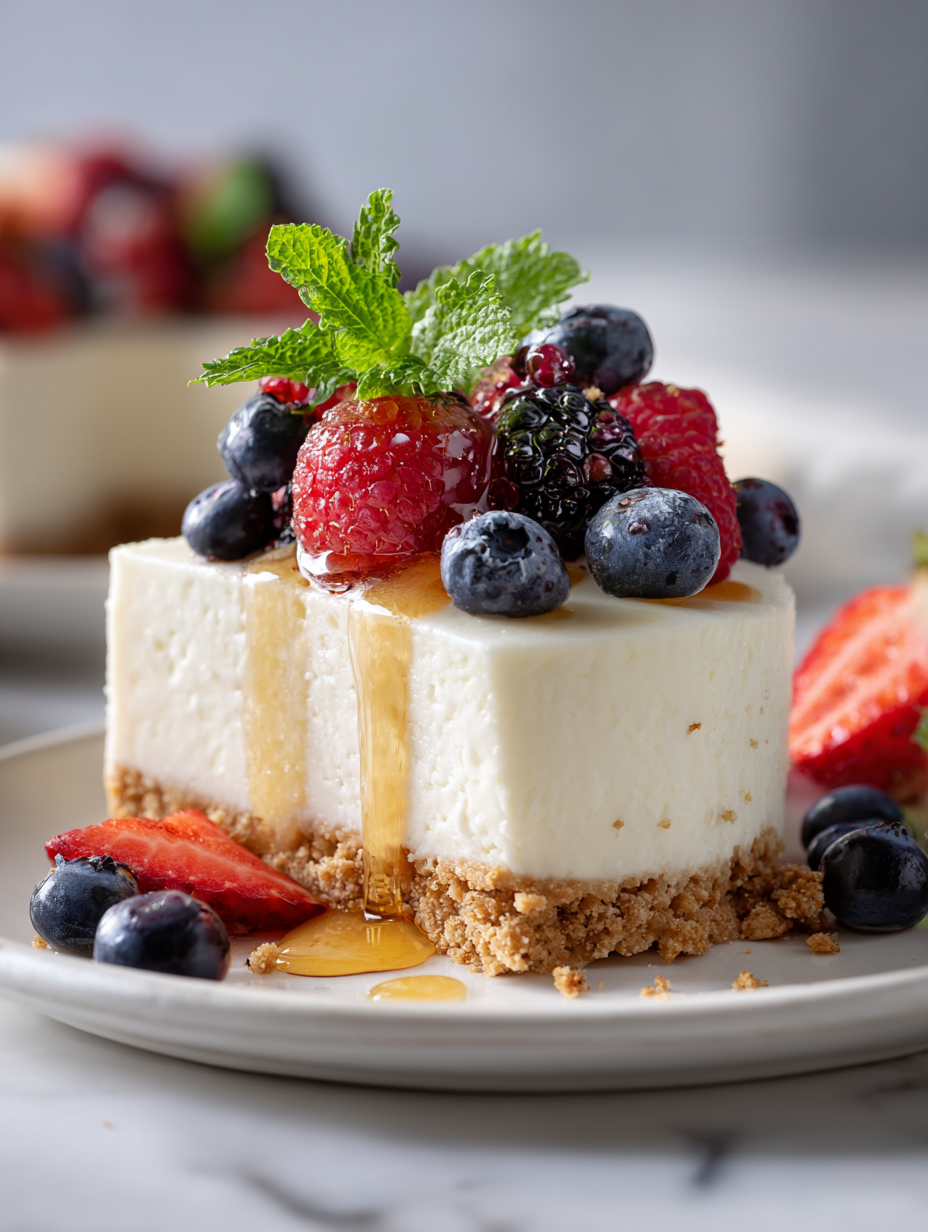
- Serve: Release the sides of the springform pan carefully. Slice with a sharp knife, wiping between cuts for clean edges. Garnish with fresh fruit or a drizzle of honey if desired.
- Finishing tips: For extra flavor, add a dollop of Greek yogurt or a sprinkle of zest on top before serving.
Refrigerate the cheesecake uncovered for the first hour to prevent condensation, then cover loosely with plastic wrap. Before serving, garnish with fresh fruit or herbs for added color and flavor. Slice with a sharp knife dipped in hot water for clean cuts.
How to Know It’s Done
- The cheesecake is firm but not hard, with a smooth top and no jiggle in the center.
- Edges have slightly pulled away from the pan, indicating proper setting.
- Filling is creamy, with no liquid or separation, and has a vibrant, tangy aroma.
No-Bake Greek Yogurt Cheesecake
Ingredients
Equipment
Method
- Start by crushing the graham crackers into fine crumbs using a food processor or sealing them in a zip-top bag and smashing with a rolling pin. Mix the crumbs with melted butter until the texture resembles damp sand, then press this mixture firmly into the bottom of a springform pan. Chill in the fridge for at least 15 minutes to set the crust.
- In a large bowl, combine the softened cream cheese, Greek yogurt, honey, lemon zest, and vanilla extract. Use a spatula or hand mixer on low speed to blend everything until smooth, creamy, and well incorporated. If using gelatin, dissolve it in warm water in a small saucepan over low heat, stirring until fully melted, then fold into the mixture.
- Pour the filling over the chilled crust, smoothing the top with a spatula for an even surface. Gently tap the pan on the counter to release any air bubbles trapped in the filling.
- Cover the cheesecake with plastic wrap and refrigerate for at least 4 hours, preferably overnight, until the filling is firm and set. The surface should look matte and smooth, with no jiggle in the center when gently shaken.
- Once set, carefully release the sides of the springform pan. Slice the cheesecake with a sharp knife dipped in hot water for clean cuts, and garnish with fresh fruit or herbs if desired. Serve chilled and enjoy the creamy, tangy flavor with a crisp crust.
Pro tips for perfect cheesecake
- Bolded tip: Use cold Greek yogurt straight from the fridge to keep the filling thick and creamy.
- Bolded tip: Press the crust firmly; a solid base prevents cracks when slicing.
- Bolded tip: Mix the filling gently; over-mixing can incorporate too much air, leading to cracks.
- Bolded tip: Chill the cheesecake long enough—at least 4 hours—for a firm set that slices cleanly.
- Bolded tip: Run your knife under hot water before slicing for smooth, even cuts.
- Bolded tip: Lightly tap the pan on the counter after pouring to eliminate air bubbles on the surface.
- Bolded tip: Add a bit of lemon zest to the crust for an unexpected bright contrast that elevates the flavor.
Common mistakes and how to fix them
- FORGOT to chill the crust? Fix by pressing firmly and refrigerating for 15 minutes.
- DUMPED the gelatin mixture? Rewarm gently and stir thoroughly to incorporate.
- OVER-TORCHED the crust? Cover with foil and lower oven temp to prevent burning.
- MISSED the final check? Gently shake the cheesecake—if it jiggles softly, it’s ready.
Fast fixes for common cheesecake hiccups
- When batter is too thick, splash in a bit of milk for a smoother pour.
- If crust crumbles, patch with a little melted butter and press firmly again.
- Splash cold water on a cracked cheesecake to tighten the surface.
- Dumped the filling before it set? Restore by gently folding in a little whipped cream.
- When the crust is soggy, shield with a layer of fresh crumbs and chill to firm up.
Prep, store, and reheat tips
- Prepare the crust and press it into the pan at least 1 hour before serving; it firms up and makes slicing easier.
- The cheesecake can be made up to 24 hours in advance; keep it covered tightly in the fridge for optimal freshness.
- Shelf life is about 2-3 days; after that, the texture may soften and flavors diminish, so plan accordingly.
- Refrigerate the cheesecake uncovered initially, then cover loosely with plastic wrap to prevent it from drying out.
- To reheat slices, briefly warm in the microwave for 10-15 seconds until just slightly softened, revealing a creamy texture and a tangy aroma.
Top questions about this cheesecake
1. Can I use regular yogurt instead of Greek yogurt?
Yes, you can use Greek-style yogurt instead of regular Greek yogurt, but it might be slightly thinner and less tangy.
2. Is full-fat Greek yogurt necessary?
Absolutely, using full-fat Greek yogurt will give you a creamier, richer texture; low-fat versions might be a bit runnier.
3. Can I eat it right after making?
Yes, the cheesecake needs to chill in the fridge for at least 4 hours, preferably overnight, to set properly.
4. Can I substitute honey with other sweeteners?
You can swap honey for maple syrup or agave, but expect a slightly different flavor profile and sweetness level.
5. Can I use a different pan?
If you don’t have a springform pan, a regular cake pan lined with parchment paper works, but removing the cheesecake might be trickier.
6. Can I add toppings?
Adding fresh berries or a fruit compote on top enhances flavor and adds a splash of color; it’s totally optional but recommended.
7. Is it freezer-friendly?
Yes, you can freeze the cheesecake for up to 2 months. Wrap it tightly to prevent freezer burn and thaw in the fridge before serving.
8. How do I crush the graham crackers?
Using a food processor makes crushing the crackers easier and more uniform, but you can also crush them with a rolling pin in a zip-top bag.
9. Can I adjust the tanginess?
For a tangier flavor, add a little lemon juice or extra zest; for a milder taste, reduce the lemon zest slightly.
10. How do I prevent lumps in the filling?
Ensure the cream cheese is softened to avoid lumps in the filling; take it out of the fridge about 30 minutes before mixing.
This no-bake Greek yogurt cheesecake is a reminder that sometimes, simple ingredients and minimal effort can yield the most satisfying desserts. It’s perfect for summer, last-minute cravings, or when I want something tangy and creamy without turning on the oven.
Whenever I serve it, I’m always struck by how honest and fresh it feels. It’s a little moment of cool, bright comfort that makes me appreciate the beauty of straightforward cooking.

Hi, I’m Ruby Thorn, the home cook behind The Tender Mess. Join me on the journey of Embracing the mess, fearlessly create —because in the kitchen, the mess sometimes leads to magic.