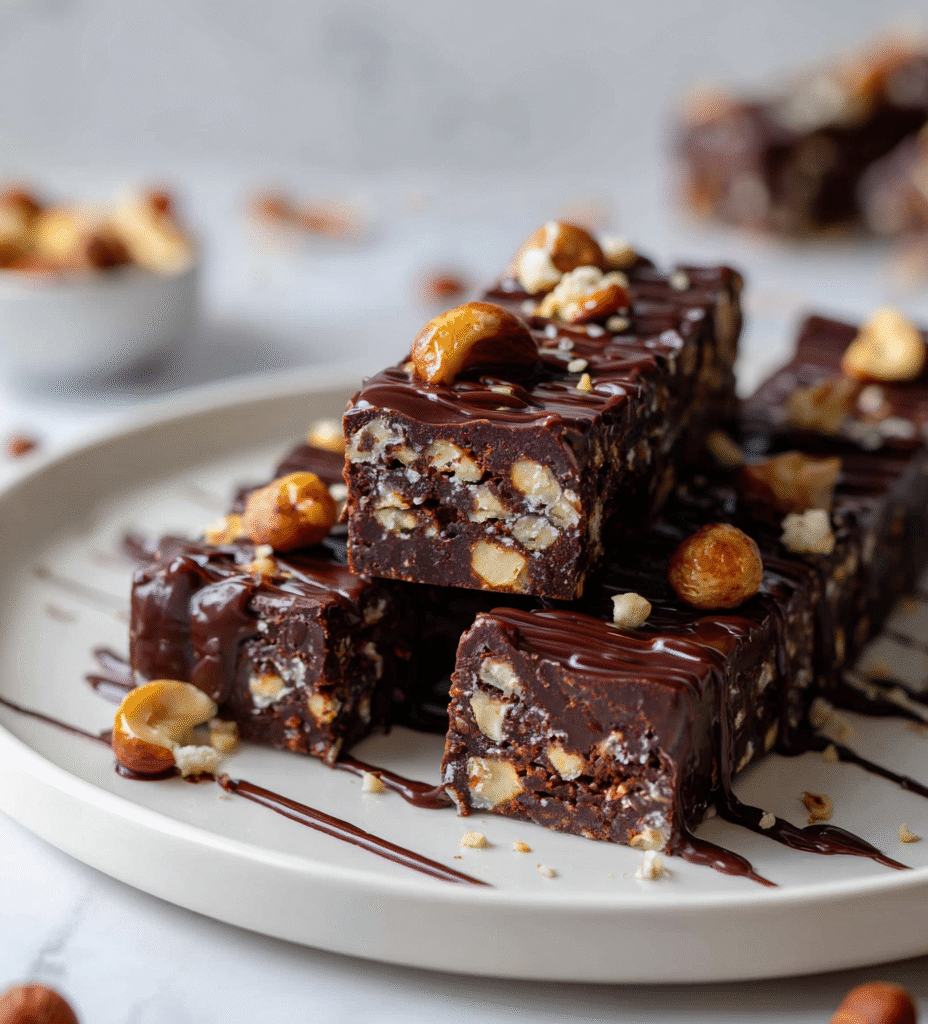

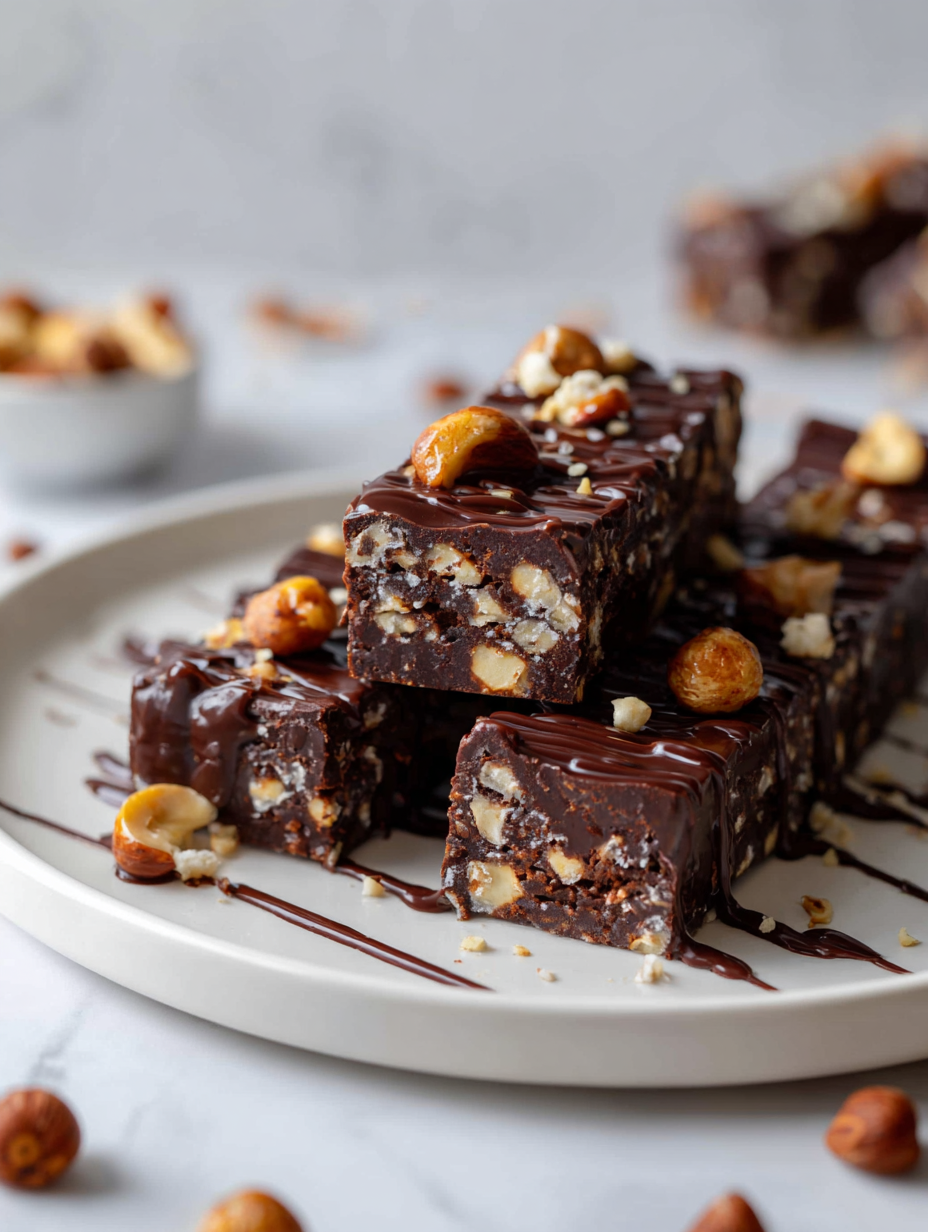
This no-bake chocolate biscuit bars recipe is my go-to when I want something sweet but don’t want to fuss over the stove. It’s a bit like creating a chocolatey, crunchy mosaic—each bite has that satisfying snap and gooey richness that hits just right. Honestly, it’s the kind of treat I turn to on chaotic weekends when I need a quick fix but still crave something homemade.
What makes this recipe special isn’t just how easy it is, but the way it brings back childhood memories of helping my grandma in the kitchen. She’d let me spread the melted chocolate and press the biscuits into a pan, all while the smell of cocoa and toasted crumbs filled the air. It’s that nostalgic glow, mixed with the simple joy of creating something delicious with minimal fuss.
This recipe taps into my childhood nostalgia, but with a twist—adding a hint of sea salt to elevate the rich chocolate flavor, making it a perfect balance between sweet and savory in every bite.
The story behind this recipe
- This recipe came from a lazy afternoon in my childhood kitchen, where my mom and I would whip up these bars with whatever biscuits and chocolate we had. It’s funny how a simple process of melting, mixing, and pressing can turn into such a comforting ritual. Now, I still keep a stash in my fridge, especially when I need a quick burst of nostalgia and chocolate.
- What I love most is how it’s become my go-to in moments of chaos—no oven, no fuss, just a handful of ingredients and a bit of patience while it sets. Sometimes I add a sprinkle of sea salt on top, a tiny rebel move that amplifies the chocolate’s richness and keeps me coming back for more. It’s a messy, imperfect joy that reminds me that good things don’t have to be complicated.
- heading: The story behind this recipe
Key ingredients and tips
- Digestive biscuits: I love how their slightly sweet, wheaty crunch forms the base; you can swap in graham crackers for a softer, sweeter bite.
- Butter: I use melted unsalted butter to bind everything together and add richness; for a dairy-free version, coconut oil works but will add a subtle coconut aroma.
- Dark chocolate: I prefer a good 70% cocoa for depth, but milk chocolate gives a creamier, sweeter finish—adjust based on your mood.
- Sweetener: I usually rely on condensed milk for that gooey sweetness; if you want less sugar, try thickened coconut milk, though it’s less sweet.
- Sea salt: Just a pinch on top amplifies the chocolate’s richness and balances the sweetness; skip if you’re avoiding salt, but it’s worth the extra minute.
- Optional nuts or dried fruit: I toss in chopped hazelnuts or cranberries for texture and surprise bursts of flavor; feel free to leave out for a smoother bar.
- Vanilla extract: A splash adds depth and warmth, but you can skip it if you want pure chocolate focus or add a dash of cinnamon for a twist.
Spotlight on key ingredients
Digestive biscuits:
- I love how their slightly sweet, wheaty crunch forms the base; you can swap in graham crackers for a softer, sweeter bite.
- Butter: I use melted unsalted butter to bind everything together and add richness; for a dairy-free version, coconut oil works but will add a subtle coconut aroma.
- Dark chocolate: I prefer a good 70% cocoa for depth, but milk chocolate gives a creamier, sweeter finish—adjust based on your mood.
Dark chocolate:
- It melts into a glossy, velvety pool, and if over-heated, it can seize up and become grainy—keep an eye on the microwave.
- Butter: It’s the glue that makes everything stick and gives the bars a tender richness—watch it melt into a fragrant, silky pool that’s hard to resist.
Notes for ingredient swaps
- Dairy-Free: Swap butter for coconut oil or margarine. It might add a slight coconut aroma and slightly alter the richness, but the bars will still set well.
- Gluten-Free: Use gluten-free digestives or graham cracker crumbs. The texture remains crumbly but can be just as satisfying.
- Vegan: Replace butter with coconut oil or vegan margarine, and choose dairy-free chocolate. Expect a slightly different melt and flavor profile.
- Sweetener: Condensed milk can be swapped for thick coconut milk or a homemade syrup for a less sweet, more nuanced taste.
- Chocolate: Use milk chocolate for a creamier, sweeter result or dark chocolate with 85% cocoa for a more intense, bitter edge.
- Add-ins: Nuts or dried fruit can be omitted or replaced with seeds or coconut flakes for a different texture and flavor burst.
- Salt: Omit sea salt if you prefer a less salty finish, but a pinch really helps balance the chocolate’s richness.
Equipment & Tools
- 20cm (8-inch) square pan: To hold the mixture as it sets.
- Parchment paper: Prevents sticking and makes removal easier.
- Microwave-safe bowl: For melting chocolate and butter evenly.
- Spatula: To mix and press ingredients smoothly.
- Sharp knife: To slice cleanly through set bars.
Step-by-step guide to no bake bars
- Equipment & Tools: Line a 20cm (8-inch) square pan with parchment paper—easy to lift out later. Use a microwave-safe bowl for melting chocolate and butter. A spatula helps spread and press. Have a sharp knife ready for slicing.
- Crush biscuits: Place about 200g (7oz) of digestive biscuits in a zip-top bag. Use a rolling pin or the bottom of a heavy pan to crush into small bits—aim for chunky but not powdery, about 1-2 cm pieces.
- Melt chocolate & butter: In a microwave-safe bowl, microwave 150g (5oz) dark chocolate and 100g (7 tbsp) butter in 30-second bursts, stirring after each. It should be smooth, shiny, and fragrant—about 1-2 mins total. If it’s scorched or lumpy, start over.
- Combine ingredients: Pour melted chocolate and butter over crushed biscuits. Add 1 tsp vanilla extract and a pinch of sea salt. Mix well with a spatula until coated and sticky but not greasy.
- Transfer & press: Pour mixture into the prepared pan. Use the spatula or the back of a spoon to spread evenly. Press down firmly—your fingers or the bottom of a glass work well—to compact everything and create a flat surface.
- Chill & set: Cover with plastic wrap. Refrigerate for at least 2 hours, ideally overnight. The bars should be firm, with a slight crack when pressed, and no sticky bits on the surface.
- Slice & serve: Use a sharp knife to cut into squares. For clean edges, wipe the knife between cuts. They should hold together firmly, with a glossy, crackly top and a dense, fudgy interior.
- Resting & finishing: Keep refrigerated until ready to serve. For best texture, let sit at room temp for 10 minutes before slicing if chilled too long. Store leftovers in an airtight container in the fridge for up to a week.
Refrigerate uncovered for a minimum of 2 hours. Slice into squares, serve directly from the fridge or at room temperature. Keep leftovers refrigerated in an airtight container for up to a week.
How to Know It’s Done
- Chocolate mixture is glossy and smooth after melting.
- Biscuits are well coated and mixture is sticky but not runny.
- Bars are firm and hold their shape when sliced.
No-Bake Chocolate Biscuit Bars
Ingredients
Equipment
Method
- Line your square pan with parchment paper, leaving some overhang for easy removal. Gather all your ingredients and tools ready for assembly.
- Place the digestive biscuits in a zip-top bag and crush them with a rolling pin or the bottom of a heavy pan until they break into chunky, irregular pieces—aim for about 1-2 cm sizes.
- In a microwave-safe bowl, melt the dark chocolate and butter together in short 30-second bursts, stirring well after each until the mixture is smooth, glossy, and fragrant. This should take about 1-2 minutes in total.
- Pour the melted chocolate and butter over the crushed biscuits, then add the vanilla extract and a pinch of sea salt. Mix thoroughly with a spatula until all the crumbs are evenly coated and sticky.
- Transfer the mixture into the prepared pan and use the back of a spoon or spatula to spread it out evenly. Press down firmly to compact the mixture and create a flat, even surface—this helps the bars hold together nicely.
- Cover the pan with plastic wrap and place it in the fridge. Let it chill for at least 2 hours or overnight until set and firm.
- Once chilled and firm, lift the block out of the pan using the parchment overhang. Place it on a cutting board and use a sharp knife warmed under hot water to cut into neat squares.
- Arrange the bars on a plate, sprinkle a tiny pinch of sea salt on top if desired, and serve. These bars are best enjoyed slightly chilled or at room temperature for a gooey, crunchy bite.
Notes
Pro tips for perfect bars
- & Cool: Chill melted chocolate slightly—around 30°C (86°F)—for a smoother pour without seizing.
- Texture Check: When pressing biscuits into the pan, aim for a firm, even layer—avoid gaps for cleaner slices.
- Melting Magic: Use short bursts in the microwave, stirring in between—this prevents overheating and scorched chocolate.
- Flavor Balance: Add a pinch of sea salt on top before chilling—this elevates the chocolate depth and adds a subtle crunch.
- Layer Pressing: Use the back of a spoon or a small glass to press the mixture firmly—this prevents air pockets and improves texture.
- Chilling Time: Let the bars set fully in the fridge—at least 2 hours, or overnight for cleaner cuts and better flavor melding.
- Cutting Tips: Warm your knife under hot water before slicing—this makes for cleaner, neater squares with less cracking.
Common mistakes and how to fix them
- FORGOT to check chocolate temperature → Use a thermometer to prevent overheating.
- DUMPED all ingredients at once → Add ingredients gradually for better control.
- OVER-TORCHED the chocolate → Melt in short bursts, stirring often to avoid burning.
- FAILED to line pan properly → Use parchment paper generously for easy removal.
Quick fixes and pantry swaps
- When chocolate seizes, splash in a teaspoon of vegetable oil and stir gently.
- If bars stick to the pan, patch with a warm damp cloth on the edges before lifting.
- Dumped too much salt? Rinse the surface quickly with cold water to remove excess.
- Over-torched chocolate? Rescue with a splash of warm milk and stir until smooth.
- When in doubt, swap digestive biscuits for graham crackers for a softer, more caramelized crunch.
Prep, store, and reheat tips
- Prepare the mixture and crush the biscuits ahead of time; keep in an airtight container in the pantry for up to 2 days. The smell of cocoa and toasted crumbs is comforting and inviting.
- Once set, these bars can be stored in the fridge for up to a week. Wrap tightly to prevent them from absorbing other fridge odors. The chocolate will firm up and develop a glossy surface that’s tempting to touch.
- For longer storage, freeze the bars for up to 1 month. Wrap in plastic wrap and then foil. Thaw at room temperature for 10-15 minutes for a fresh, fudgy texture.
- Refrigerate or freeze the bars briefly before slicing to keep them neat. When reheating, let them sit at room temperature for a few minutes—notice the rich aroma and slightly softened texture as they warm.
Top questions about no bake bars
1. Can I make these bars dairy-free?
Yes, using vegan chocolate and plant-based butter makes the bars dairy-free without sacrificing flavor or texture.
2. Can I use gluten-free ingredients?
Absolutely. You can swap digestive biscuits with gluten-free graham crackers or rice cereal for a different crunch.
3. How long do these bars last in the fridge?
Yes, refrigerate the bars in an airtight container for up to a week. They become firmer and more chocolatey overnight.
4. What if my chocolate seizes during melting?
If your chocolate seizes, add a teaspoon of vegetable oil and stir gently until smooth again.
5. How do I get clean cuts?
Use a sharp, warm knife to cut the bars—wiping it clean between slices for neat edges.
6. Can I add toppings or sea salt?
For extra flavor, sprinkle a tiny pinch of sea salt on top before chilling—this enhances the chocolate’s richness.
7. Can I freeze these bars?
Yes, you can freeze the bars in an airtight container for up to a month. Thaw at room temperature for best texture.
8. Which type of chocolate is best?
Use a mix of dark and milk chocolate for a balanced sweetness and depth of flavor.
9. How do I prevent the bars from crumbling?
Ensure the mixture is well pressed into the pan for even slices. Use the back of a spoon or glass to firm it up.
10. Can I customize the mix-ins?
Yes, adding chopped nuts or dried fruit introduces texture and bursts of flavor—they’re optional but fun to experiment with.
These no bake chocolate biscuit bars are a reminder that sometimes the simplest treats are the most satisfying. They come together quickly, but the rich cocoa aroma and crunchy texture make them feel indulgent, even with minimal effort.
In times when I need a sweet escape without the fuss, I turn to these bars. They hold memories of childhood and moments of quiet, homemade comfort—perfect for sharing or keeping all to myself when the craving hits.

Hi, I’m Ruby Thorn, the home cook behind The Tender Mess. Join me on the journey of Embracing the mess, fearlessly create —because in the kitchen, the mess sometimes leads to magic.