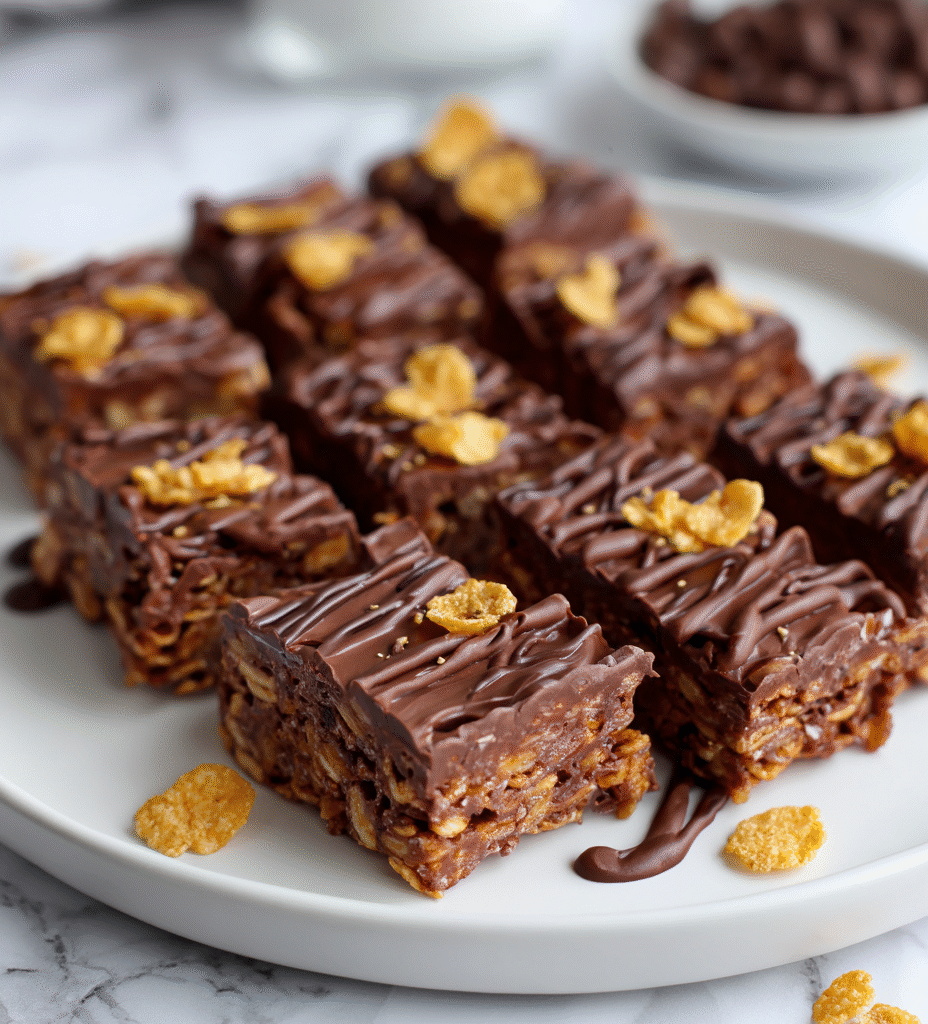
Sometimes, the simplest recipes pack the biggest nostalgic punch. These no bake chocolate cornflake bars take me right back to childhood afternoons—messy hands, sticky fingers, and that sweet, smoky smell of melted chocolate mingling with crispy cereal. It’s the kind of treat that demands no finesse, just a bit of patience while everything comes together in the fridge.
What I love most is how forgiving and adaptable this snack is. No oven, no fuss—just a bowl, some good chocolate, and a handful of cornflakes. It’s perfect for those times when you want a quick sweet fix without the cleanup, and honestly, it’s a wonderful way to reclaim a bit of carefree joy in a busy adult life.
This recipe is about reclaiming childhood joy during busy adult days, turning a simple snack into a nostalgic escape. It’s a reminder that sometimes, the best comfort comes from quick, humble ingredients we often overlook.
The story behind this recipe
This recipe comes from a time when I needed a quick fix for a sweet craving, but didn’t want to turn on the oven or fuss too much. I remember making these bars with my grandma on lazy Sunday afternoons—her way of turning simple ingredients into something magical, almost like a secret code for happiness. It’s funny how a handful of cornflakes and melted chocolate can unlock so many childhood memories, and still feel just right in the chaos of today’s busy life.
Key Ingredients Breakdown
- Chocolate: I use good quality dark chocolate—melts smoothly and gives that rich, bittersweet flavor. You can swap with semi-sweet if you prefer less intense chocolate, but skip the overly sweet milk variety for this one.
- Cornflakes: The crunch is everything here. I like the plain, unsweetened kind—makes the bars less cloying. If you want a touch more sweetness, toss in a handful of crushed cookies or a sprinkle of brown sugar.
- Butter: I rely on unsalted for control—makes the chocolate richer and prevents over-salting. If you’re dairy-free, a neutral vegetable oil works, but it won’t add that lovely silky sheen or depth.
- Sweetener: Sometimes I add a dash of honey or golden syrup for a sticky, glossy finish. If you’re avoiding sugar, try maple syrup—just keep in mind it’s a bit more runny and can slightly alter texture.
- Optional add-ins: Nuts, dried fruit, or even a pinch of sea salt can elevate these bars. I love a handful of toasted almonds for that smoky crunch—go wild or keep it simple.
- Extras for flavor: A splash of vanilla or a pinch of cinnamon can add warmth. I tend to keep it classic, but don’t hesitate to experiment with spices for a cozy twist.
- Pan liner: I always line my pan with parchment—easy to lift the bars out and prevents sticking. For a cleaner look, a quick spray of non-stick spray works too.
Spotlight on key ingredients
Chocolate:
- I use good quality dark chocolate—melts smoothly and gives that rich, bittersweet flavor. You can swap with semi-sweet if you prefer less intense chocolate, but skip the overly sweet milk variety for this one.
- Cornflakes: The crunch is everything here. I like the plain, unsweetened kind—makes the bars less cloying. If you want a touch more sweetness, toss in a handful of crushed cookies or a sprinkle of brown sugar.
- Butter: I rely on unsalted for control—makes the chocolate richer and prevents over-salting. If you’re dairy-free, a neutral vegetable oil works, but it won’t add that lovely silky sheen or depth.
Cornflakes:
- They have a fragile crunch that softens slightly over time, but they hold their shape well. Toasting enhances their aroma and adds a smoky note that balances the sweetness.
- Chocolate: It melts into a glossy, smooth pool when warmed, then sets to a firm, snap-worthy finish. Watch for a faint shimmer—if it looks dull, it might need a bit more stirring or a slightly lower heat.
- Butter: It acts as a binder and adds a silky mouthfeel. During melting, keep the heat gentle to avoid seizing or burning, and you’ll get a smooth, oozy texture that coats the cereal perfectly.
Notes for ingredient swaps
- Dairy-Free: Swap regular butter for coconut oil or vegan butter. The texture remains rich, but the flavor gets a subtle tropical note.
- Chocolate: Use dairy-free dark chocolate or 70% cacao for a less sweet, more intense cocoa flavor. White chocolate can be substituted for a creamier, sweeter taste.
- Cornflakes: Rice Krispies or gluten-free crisped rice make decent substitutes. They add a lighter crunch but might alter the classic cornflake flavor.
- Sweetener: Honey or agave syrup can replace sugar and corn syrup for a sticky, fragrant sweetness. Keep in mind they can make the mixture slightly runnier.
- Add-ins: Nuts like chopped almonds or walnuts, dried fruit, or seeds can be mixed in. Toasted nuts add smoky depth, while dried fruit brings a chewy burst.
- Pan liner: Use aluminum foil or grease the pan well if you don’t have parchment. Expect a slightly messier removal and less clean edges.
Equipment & Tools
- 20×20 cm (8×8 inch) square pan: Holds the mixture and shapes the bars.
- Heatproof bowl: Melts chocolate evenly over simmering water.
- Saucepan: Creates a gentle simmer for melting chocolate.
- Spatula or large spoon: Folds ingredients and presses mixture into the pan.
- Parchment paper: Prevents sticking and aids removal of set bars.
- Knife: Cuts the set bars into portions.
Step-by-step guide to no bake bars
- Equip yourself with a 20×20 cm (8×8 inch) square pan, lined with parchment paper—this makes lifting out the set easier.
- Melt 200g (7 oz) of good-quality dark chocolate in a heatproof bowl over a pan of simmering water (bain-marie). Keep the heat gentle, just enough to melt, with a faint shimmer and no bubbling.
- While the chocolate melts, toast 50g (1.75 oz) of cornflakes lightly in a dry skillet over low heat, stirring until just fragrant—about 2 minutes. Cool slightly.
- Pour the toasted cornflakes into a large mixing bowl. Add the melted chocolate and 25g (1 oz) of unsalted butter. Gently fold until evenly coated, avoiding breaking the cereal.
- Transfer the mixture into your prepared pan. Use a spatula or the back of a spoon to press down firmly and evenly, ensuring no air pockets. The surface should be smooth and slightly shiny.
- Place the pan in the fridge for at least 2 hours, or until the mixture is firm and set—check for a clean crack when gently pressing in the center.
- Once set, lift the block out using the parchment paper. Use a sharp knife to cut into squares or rectangles. For cleaner cuts, wipe the knife with hot water between slices.
- Let the bars sit at room temperature for 10 minutes before serving to soften the chocolate slightly and bring out full flavor. Serve and enjoy!
Chill the bars in the fridge until firm, then lift out using parchment. Slice into even pieces, serve directly from the fridge or at room temperature. Store leftovers in an airtight container in the fridge for up to a week.
How to Know It’s Done
- Chocolate is fully melted and glossy, with no lumps.
- Cornflakes are toasted and fragrant, not burnt or soggy.
- Bars are firm and hold shape when lifted and cut.
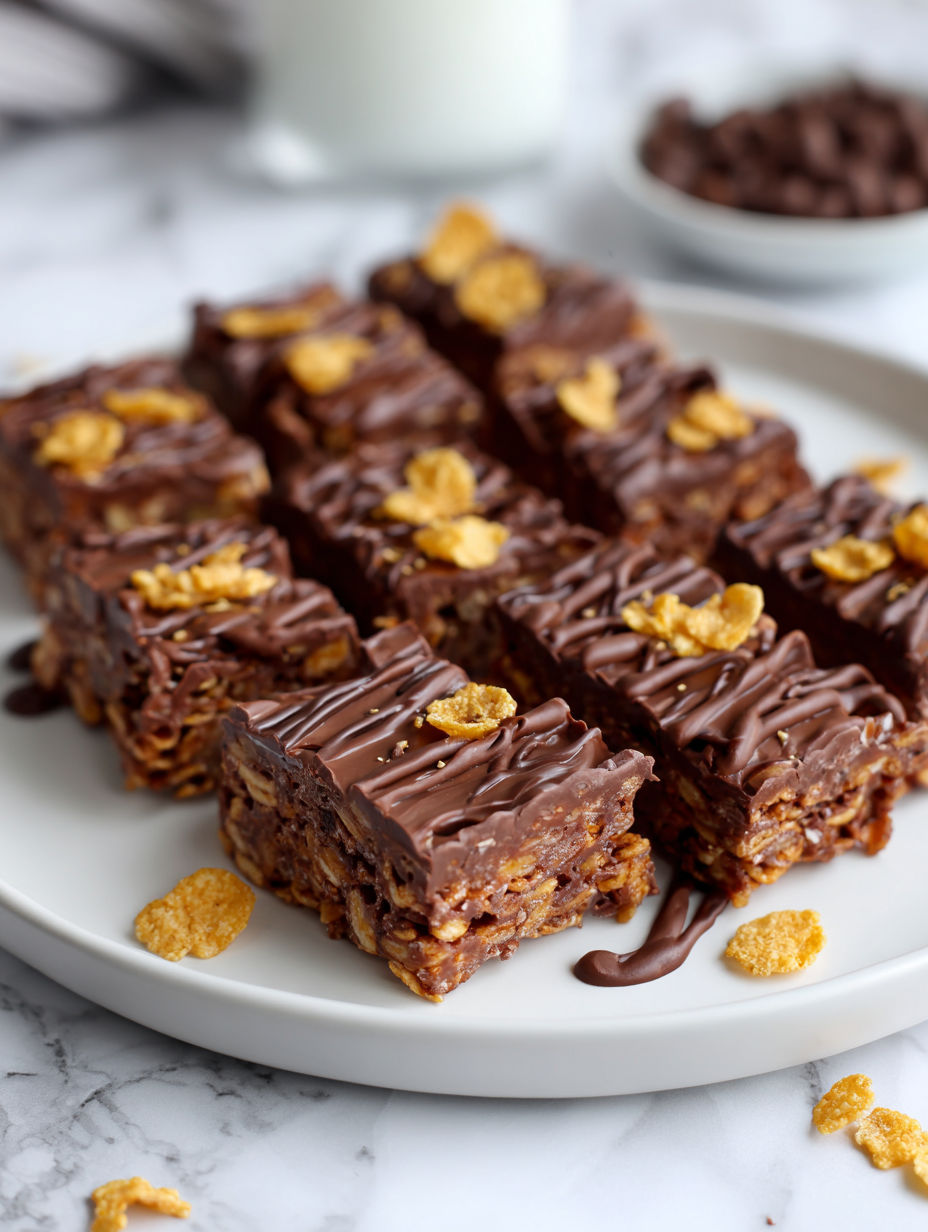
No Bake Chocolate Cornflake Bars
Ingredients
Equipment
Method
- Line your square pan with parchment paper, leaving some overhang for easy removal.
- Break the dark chocolate into small pieces and place them in a heatproof bowl.
- Set the bowl over a saucepan of gently simmering water, making sure the bottom doesn’t touch the water, and melt the chocolate slowly until glossy and smooth.
- While the chocolate melts, toast the cornflakes lightly in a dry skillet over low heat for about 2 minutes until fragrant—this adds a smoky aroma and enhances their crunch.
- Remove the melted chocolate from heat and stir in the butter until completely melted and the mixture is smooth.
- Gently fold the toasted cornflakes into the melted chocolate mixture, ensuring all the cereal is evenly coated with the glossy chocolate.
- Pour the mixture into your prepared pan and use a spatula or the back of a spoon to press it down firmly and evenly, smoothing the surface.
- Place the pan in the fridge and chill for at least 2 hours until the bars are set and firm.
- Once firm, lift the block out of the pan using the parchment overhang and transfer to a cutting board.
- Use a sharp knife dipped in hot water to cut the bars into even squares or rectangles for serving.
- Serve immediately or store in an airtight container in the fridge for up to a week. Enjoy these crunchy, chocolatey treats anytime!
Pro tips for perfect bars
- Bolded mini-head: Use a gentle heat → Melt chocolate slowly over bain-marie to prevent burning and achieve a glossy finish.
- Bolded mini-head: Toast cornflakes lightly → Enhance flavor with a quick dry toast until fragrant, about 2 minutes, for a smoky crunch.
- Bolded mini-head: Press firmly → Use the back of a spatula to evenly pack mixture into the pan, ensuring tidy edges and compact bars.
- Bolded mini-head: Chill thoroughly → Refrigerate for at least 2 hours until the bars are firm and break with a clean snap.
- Bolded mini-head: Wipe your knife → For clean cuts, dip the knife in hot water between slices to prevent sticking and uneven edges.
- Bolded mini-head: Add a pinch of salt → Sprinkle a tiny bit of sea salt flakes on melted chocolate for a flavor boost and contrast.
- Bolded mini-head: Don’t rush cooling → Let the bars sit at room temperature for 10 minutes after chilling to soften slightly and elevate flavor.
Common mistakes and how to fix them
- FORGOT to line the pan → Use parchment to prevent sticking and easy removal.
- DUMPED in cold chocolate → Melt slowly over gentle heat to avoid seizing.
- OVER-TORCHED chocolate → Remove from heat once melted and glossy, no bubbling.
- MISSED the cooling step → Chill until firm for clean, neat bars.
Quick Fixes and Pantry Swaps
- When chocolate seizes → Splash in a teaspoon of vegetable oil and gently stir.
- If mixture is too thick → Patch with a drizzle of warm honey or maple syrup.
- Dumped in too much cereal → Shield with a little extra melted chocolate to bind.
- Overcooked cornflakes → Rescue by adding a few fresh, toasted flakes for crunch.
- When bars stick to parchment → Swap with a lightly greased pan for easier release.
Prep, store, and reheat tips
- Prep the mixture ahead by melting the chocolate and preparing the cereal—this speeds up assembly later and keeps ingredients fresh and fragrant.
- Store the uncut, set bars in an airtight container in the fridge for up to a week. The chocolate will develop a slight sheen and firm texture.
- For longer storage, wrap the bars tightly in plastic wrap and freeze for up to a month. Thaw at room temperature for about 10 minutes before serving.
- Reheat slightly in the fridge or at room temperature to soften the chocolate just enough to enhance flavor and texture. Watch for a shiny, gooey surface.
- Avoid leaving the bars out in warm, humid environments; the chocolate can soften or bloom, losing its glossy finish.
Top questions about no bake bars
1. Can I use different types of chocolate?
Use good quality dark chocolate for a smooth melt and rich flavor. Semi-sweet works too, but avoid milk chocolate if you want that deep cocoa taste.
2. Can I substitute the cornflakes?
Yes, you can swap cornflakes with Rice Krispies or gluten-free crisped rice. They give a lighter crunch but alter the classic flavor slightly.
3. Is there a dairy-free alternative?
Dairy-free options like coconut oil or vegan butter work well. They keep the texture rich, but expect a slight coconut aroma.
4. How long should I refrigerate the bars?
Chill the bars for at least 2 hours until firm. If you press gently, they should crackle and hold their shape when cut.
5. How do I get clean slices?
Use a sharp knife dipped in hot water for clean cuts. Wipe it dry between slices to prevent sticking and uneven edges.
6. Can I add salt or other seasonings?
Add a pinch of sea salt flakes on the melted chocolate for a flavor contrast and a slight shimmer.
7. How should I store these bars?
Store leftovers in an airtight container in the fridge for up to a week. For longer storage, freeze and thaw at room temperature before serving.
8. What if the mixture is too stiff?
If the mixture is too thick, add a splash of warm honey or maple syrup to loosen it up before pressing into the pan.
9. What if the chocolate burns or seizes?
When chocolate seizes or burns, remove from heat immediately and add a teaspoon of vegetable oil to smooth it out.
10. How do I prevent sticking?
For a quick fix if bars stick, line the pan with parchment or lightly grease it for easy removal.
Making these no bake chocolate cornflake bars is a nostalgic act that reconnects me with simple joys. The smell of melting chocolate, the crunch of toasted cereal—it’s like a small, sweet rebellion against busy days.
They’re a reminder that sometimes, the best moments are those quick, unpolished treats that bring a little chaos and a lot of comfort. No matter how hectic life gets, these bars are my go-to for a quick, honest indulgence.

Hi, I’m Ruby Thorn, the home cook behind The Tender Mess. Join me on the journey of Embracing the mess, fearlessly create —because in the kitchen, the mess sometimes leads to magic.