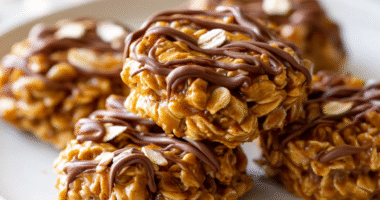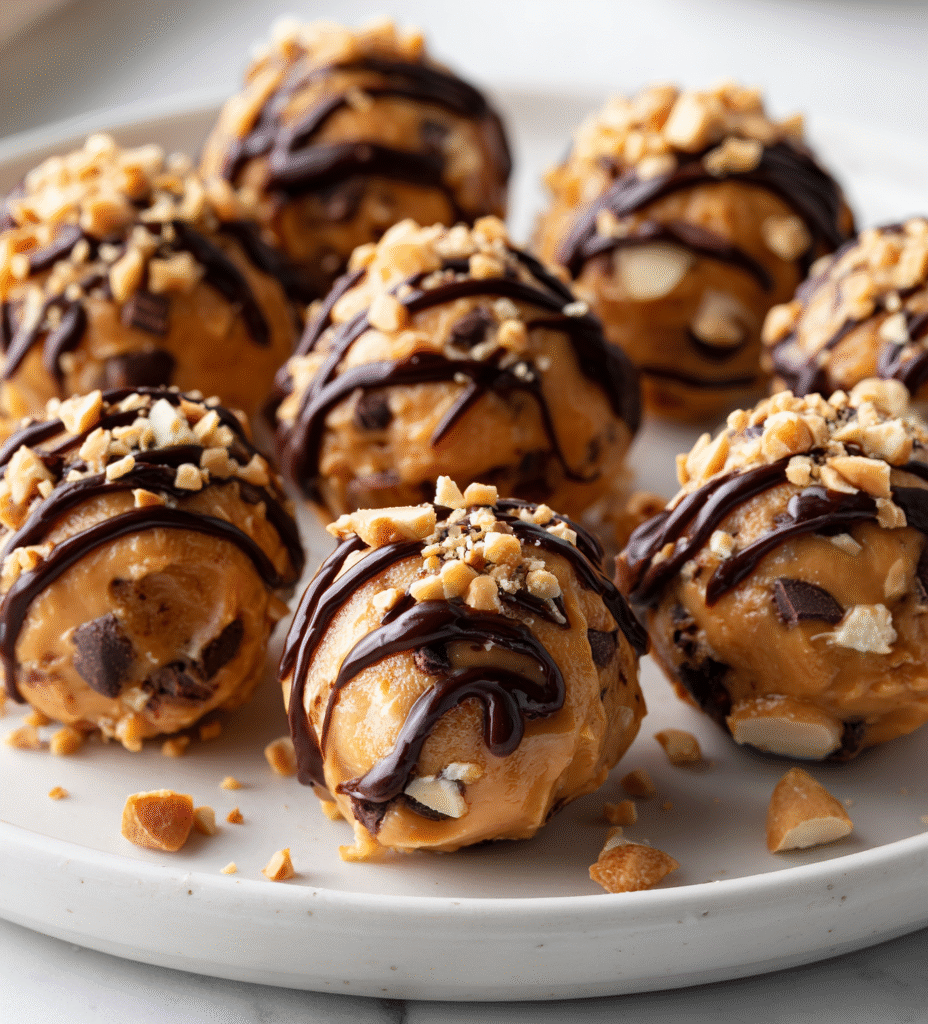
On those days when the kitchen feels like too much effort but I still crave something sweet, these no bake peanut butter balls come through. They’re a messy little victory, packed with peanutty richness and just enough sweetness to satisfy without fussing with oven time.
I love how they come together in minutes, using ingredients I always have on hand—peanut butter, a bit of honey, and some oats. It’s a treat that feels like a small rebellion against the chaos of the day, a quick fix that’s honestly more satisfying than many baked desserts.
There’s something about the texture—crunchy, chewy, and smooth all at once—that keeps me coming back. Plus, they’re a no-brainer for making with kids or for last-minute sharing, which makes them a staple in my snack rotation.
This recipe is inspired by those hectic afternoons when I need a sweet fix but have no energy for baking, so I turn to these no bake peanut butter balls for a quick, satisfying treat that feels like a little victory in my busy day.
A Quick Fix for Busy Days
- These peanut butter balls remind me of childhood afternoons, simple and honest, with a nostalgic rush of peanut and honey.
- I feel a quiet pride every time I whip up a batch—they’re so forgiving and quick, I almost forget how satisfying homemade treats can be.
- When I need a moment of calm, pinching these together gives me that tiny sense of accomplishment amid a chaotic day.
- There’s a little chaos in the mixing—clumsy hands, sticky fingers—but that’s part of the charm, right?
- Sharing these makes me feel connected, like passing around a secret just sweet enough to brighten someone’s day.
The story behind this recipe
- This recipe was born out of a moment of chaos in my kitchen. I needed something sweet, fast, and reliable—no oven required. It’s the sort of treat that’s perfect for those days when I don’t want to fuss but still crave a little something special.
- One afternoon, I tossed together what I had: peanut butter, a handful of oats, a drizzle of honey. The result was so satisfying I kept making it, tweaking the ingredients until it felt just right. Now, it’s become my go-to for quick, honest comfort.
- heading
- story_type
Trivia and Historical Tidbits
- These no bake peanut butter balls trace back to the mid-20th century when quick, no-fuss desserts gained popularity in home kitchens.
- They likely evolved from simple energy bites made by early snack enthusiasts who wanted something portable and satisfying.
- Peanut butter became a staple in such recipes during the 1950s, thanks to its rise as an affordable protein source in American households.
Key Ingredients Breakdown
- Peanut butter: I use creamy, natural peanut butter for that rich, smooth flavor. Swap for almond or sunflower seed butter if you want different nutty notes or a nut-free option, but expect a slightly different texture.
- Honey: Adds a sticky sweetness and helps everything stick together. Maple syrup can be a good substitute if you prefer a deeper, more caramel-like flavor, but it might change the consistency slightly.
- Oats: Rolled oats give the structure and a satisfying chew. Steel-cut oats are too tough; quick oats work fine but make sure they’re not too finely processed.
- Chocolate chips: I love semi-sweet chips for balance, but dark chocolate or even white chocolate can switch up the flavor. Use mini chips if you want more chocolate in every bite.
- Coconut flakes: Optional but nice for texture and aroma. Toasted coconut adds a smoky sweetness, so skip if you’re not a fan or want to keep it simple.
- Vanilla extract: Just a splash enhances the overall flavor. You can skip it if your peanut butter is already quite flavorful, but it brightens everything up.
- Salt: A pinch enhances sweetness and balances flavors. If your peanut butter is salted, you might want to skip or reduce extra salt.
Spotlight on key ingredients
Peanut butter:
- I use creamy, natural peanut butter for that rich, smooth flavor. Swap for almond or sunflower seed butter if you want different nutty notes or a nut-free option, but expect a slightly different texture.
- Honey: Adds a sticky sweetness and helps everything stick together. Maple syrup can be a good substitute if you prefer a deeper, more caramel-like flavor, but it might change the consistency slightly.
- Oats: Rolled oats give the structure and a satisfying chew. Steel-cut oats are too tough; quick oats work fine but make sure they’re not too finely processed.
Chocolate chips and coconut flakes:
- Chocolate chips: I love semi-sweet chips for balance, but dark chocolate or even white chocolate can switch up the flavor. Use mini chips if you want more chocolate in every bite.
- Coconut flakes: Optional but nice for texture and aroma. Toasted coconut adds a smoky sweetness, so skip if you’re not a fan or want to keep it simple.
Notes for ingredient swaps
- Dairy-Free: Swap regular chocolate chips for dairy-free or omit altogether—your balls will stay just as sweet and satisfying.
- Nut Butter: Almond or cashew butter can replace peanut butter for a different nutty flavor, but expect a slightly different texture and richness.
- Sweetener: Maple syrup or agave nectar can replace honey if you want a different flavor profile—keep in mind they might make the mixture a bit softer.
- Oats: Use quick oats for a finer texture that blends more easily, or try crushed graham crackers for a different crunch and flavor.
- Add-ins: Dried cranberries, chopped nuts, or coconut flakes can be swapped or added to customize texture and flavor—just keep an eye on moisture levels.
- Chocolate: White or dark chocolate chips can replace semi-sweet for a different kind of sweetness and appearance, depending on your mood.
- Flavor Boost: A pinch of cinnamon or a dash of sea salt can enhance the overall flavor—add sparingly, then taste before mixing.
Equipment & Tools
- Large mixing bowl: To combine and mix all ingredients.
- Measuring cups and spoons: To measure ingredients accurately.
- Small cookie scoop or tablespoon: For portioning uniform-sized balls.
- Parchment paper: To prevent sticking and make cleanup easier.
- Refrigerator: To set and firm up the balls.
Step-by-step guide to no bake peanut butter balls
- Gather all your ingredients and equipment before starting. Chill the baking sheet or tray in the fridge for 10 minutes if possible, to help the balls set faster.
- In a large mixing bowl, combine 1 cup of creamy peanut butter, 1/4 cup of honey, and 1 teaspoon of vanilla extract. Mix well until smooth and sticky.
- Add 1 1/2 cups of rolled oats and 1/2 cup of mini chocolate chips to the peanut butter mixture. Stir thoroughly until all ingredients are evenly coated. The mixture should be soft but hold together when pressed.
- Using a tablespoon or small cookie scoop, portion out the mixture and roll into balls about 1 inch in diameter. If the mixture is too sticky, wet your hands slightly or refrigerate for 10 minutes.
- Place the formed peanut butter balls on a parchment-lined baking sheet or tray. Keep them spaced apart for even setting. For a crunchier exterior, gently press some toasted coconut flakes onto each ball now, if desired.
- Refrigerate the tray for at least 30 minutes to allow the balls to firm up. For best results, cover loosely with plastic wrap or a clean towel during chilling.
- Once set, serve immediately or store in an airtight container in the fridge. They can be kept for up to 1 week, or frozen for 1 month. Bring to room temperature before serving for optimal flavor and texture.
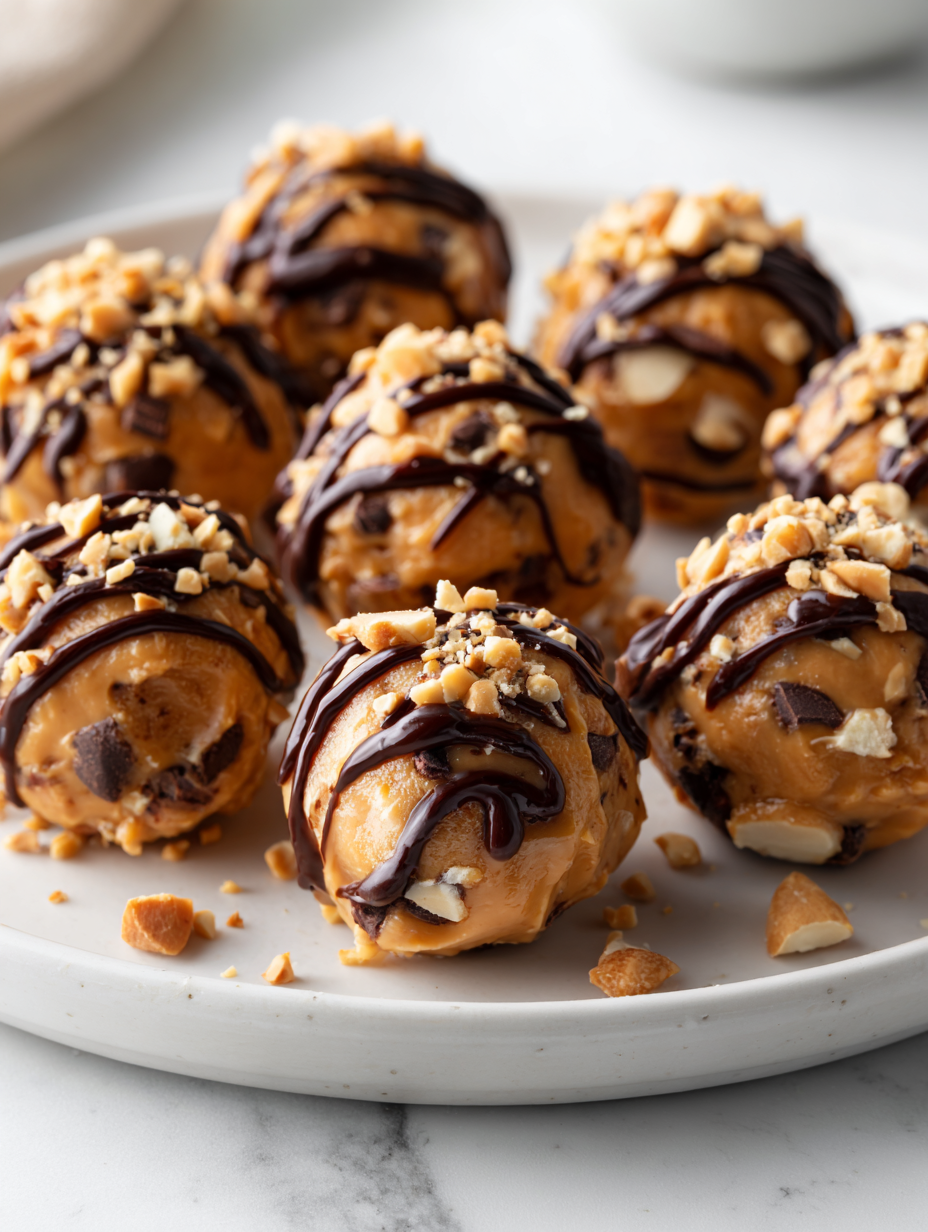
Let the peanut butter balls rest in the fridge for at least 30 minutes before serving. Serve directly from the fridge for a firm bite or let sit at room temperature for 5 minutes if you prefer a softer texture. Plate on a nice dish or serve in mini paper cups for a casual snack.
How to Know It’s Done
- The mixture should hold together when pressed without being overly sticky.
- Balls are firm but not hard, with a slight jiggle when gently shaken.
- They smell rich and peanutty, with a hint of vanilla and chocolate aroma.
No Bake Peanut Butter Balls
Ingredients
Equipment
Method
- Place a large mixing bowl nearby and gather your measuring spoons and cups. In the bowl, combine the creamy peanut butter, honey, and vanilla extract, stirring until smooth and glossy, filling the air with a rich, peanutty aroma.
- Add the rolled oats to the mixture and fold them in thoroughly, ensuring they’re evenly coated and the mixture starts to come together into a thick, chewy dough.
- Stir in the mini chocolate chips, distributing them evenly throughout the mixture. The chips will add pockets of melty sweetness and a delightful crunch.
- Use a small cookie scoop or tablespoon to portion out the mixture. With dampened hands, gently roll each portion into a compact ball, about 1 inch in diameter, feeling the sticky mixture hold together nicely.
- Place each formed ball on a parchment-lined tray, spacing them apart. If desired, press a few toasted coconut flakes onto the tops for extra texture and aroma.
- Refrigerate the tray for at least 30 minutes, allowing the peanut butter balls to firm up and set their shape, with a satisfying crunch on the outside and chewy center.
- Once chilled, serve the peanut butter balls straight from the fridge for a firm, chewy bite, or let them sit at room temperature for 5 minutes for a softer, more decadent experience. Enjoy these rustic, no fuss treats whenever craving something sweet!
Notes
Pro tips for perfect peanut butter balls
- Chill your mixture for 10 minutes—makes rolling easier and cleaner.
- Use a small cookie scoop—keeps balls uniform and saves time.
- Slightly dampen your hands—prevents sticking and helps shape the balls smoothly.
- Gently press toasted coconut flakes onto the balls—adds crunch and aroma.
- Refrigerate for at least 30 minutes—sets the texture and enhances flavor.
- Don’t over-melt chocolate—use low heat or short bursts to avoid burning or seizing.
- Serve straight from the fridge—maintains firmness, or let sit 5 minutes for softer bite.
Common mistakes and how to fix them
- FORGOT to chill ingredients → Ensure ingredients are at room temperature for better mixing.
- DUMPED too much honey → Use a measured tablespoon to avoid overly sticky mixture.
- OVER-TORCHED chocolate → Melt chocolate gently over low heat or in short bursts in the microwave.
- MISSED mixing thoroughly → Stir until ingredients are fully combined for even flavor.
Quick Fixes for Smooth Results
- If mixture is too sticky → Splash in a little cold water and knead gently.
- When balls crack during shaping → Chill mixture 10 minutes before rolling.
- DUMPED too much honey → Use a tablespoon measure for precise pouring.
- OVER-TORCHED chocolate → Melt gently over low heat or in short microwave bursts.
- SHIMMERING oil from peanut butter → Pat with a paper towel before mixing for less mess.
Prep, store, and reheat tips
- You can prepare the mixture a day in advance; keep it covered in the fridge to prevent drying out, and the flavors will meld nicely, making the balls easier to roll later.
- Store the finished peanut butter balls in an airtight container lined with parchment paper. They stay fresh for up to a week in the fridge, maintaining their chewy texture and rich aroma.
- For longer storage, freeze the balls on a tray until firm, then transfer to a zip-top bag. They can last up to a month and only need a few minutes at room temperature to soften.
- Reheating isn’t necessary—serve them straight from the fridge for a firmer bite, or let them sit at room temp for 5 minutes to restore a softer, more decadent texture. The smell of peanut butter and chocolate will intensify as they warm slightly.
Top questions about peanut butter balls
1. Can I use a different nut butter?
Use natural, creamy peanut butter for smoothness and rich flavor, but you can swap in almond or sunflower seed butter for a different nutty taste or for nut allergies. Expect slight texture changes.
2. Can I substitute honey?
Yes, honey is classic, but maple syrup or agave nectar work well too. They add sweetness and stickiness, but can alter the final texture slightly.
3. Can I use different oats or add-ins?
Absolutely. Use quick oats for a finer, softer texture that blends easily, or crushed graham crackers for a different crunch. Keep moisture in mind with additions.
4. My mixture is too sticky, what now?
Chill the mixture for about 10 minutes in the fridge if it’s too sticky to handle. This firms it up for easier rolling and shape forming.
5. How long can I store these?
Refrigerate the balls for at least 30 minutes to set their shape. For a firmer bite, keep them in the fridge. They can last a week or be frozen for longer storage.
6. Chocolate doesn’t melt right, what do I do?
If the chocolate seizes or doesn’t melt smoothly, melt it gently over low heat or in short bursts in the microwave. Stir regularly and avoid overheating.
7. Can I customize the mix-ins?
Use mini chocolate chips for more even distribution, or swap with chopped dark or white chocolate for variety. Toasted coconut adds aroma and crunch if you like extra texture.
8. How do I prevent sticking while rolling?
When shaping, wet your hands slightly to prevent sticking and make smooth, round balls. Keep hands damp for best results.
9. Should I serve them cold or at room temp?
Serve straight from the fridge for a firm, chewy bite. Let sit at room temperature for 5 minutes if you prefer a softer, more melty texture.
10. Can I prepare these in advance?
Yes, you can make the mixture ahead of time and keep it in the fridge overnight. Just scoop, shape, and chill before serving for best texture and flavor.
These no bake peanut butter balls are more than just a quick treat—they’re a reminder that simple ingredients can come together into something unexpectedly satisfying. Each bite offers a perfect balance of creamy, chewy, and crunchy textures that keep me coming back, especially when I need a moment of calm amid chaos.
In a world that often rushes by, these little bites slow things down just enough to savor the moment. They’re a tiny act of kindness, a break in the day that’s honest, unpolished, and full of flavor—just like the best comfort food should be.

Hi, I’m Ruby Thorn, the home cook behind The Tender Mess. Join me on the journey of Embracing the mess, fearlessly create —because in the kitchen, the mess sometimes leads to magic.