Holiday parties are the wild cards of the season—loud, chaotic, yet full of warmth. This snack idea came from a desire to bring something unexpected to the table, a little twist on traditional cheese balls and crackers. It’s quick, easy, and a bit rustic, perfect for when you’re juggling decorations and guest arrivals.
Why This Snack Is Going to Keep Coming Back
It’s imperfect, cheesy, and so easy to tweak, I keep making it every holiday. The aroma of baked pastry and herbs is the first thing guests comment on. Plus, it’s forgiving—whatever you add or skip, it still comes out delicious. A simple joy that makes the chaos of the season feel a little more manageable.
Breaking Down the Key Ingredients
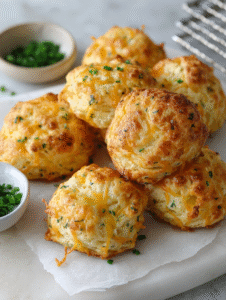
- Cream cheese: Creamy, tangy base that binds everything together; use full-fat for richness.
- Herbs (parsley, chives): Fresh herbs add brightness and color; substitute with dried if fresh isn’t available.
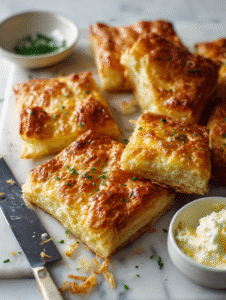
- Puff pastry: Buttery, flaky, and crispy; store-bought saves time but homemade is a treat.
- Smoked paprika: Adds a smoky depth; swap with chili powder for heat or omit for milder flavor.
- Egg wash: Gives a shiny, golden finish; mix with water if eggs are unavailable.
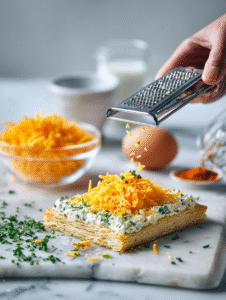
- Cheddar cheese: Sharp, melty, and slightly oozy; swap with Gruyère for nuttiness.
- Hot sauce (optional): For a spicy kick that wakes up the palate; adjust to taste.
Tools and Equipment for Holiday Snack Success
- Baking sheet: To hold your puff pastry and ensure even baking.
- Parchment paper: Prevents sticking and makes cleanup easier.
- Mixing bowl: Combine cheese, herbs, and seasonings smoothly.
- Pastry brush: Lightly coat pastry with egg wash for golden color.
- Knife or pizza cutter: Slice baked pastry into perfect squares or triangles.
Step-by-Step Guide to Crafting Unforgettable Holiday Bites
Step 1: Gather your ingredients and tools before starting to keep things flowing smoothly.
Step 2: Preheat your oven to 200°C (390°F) and line a baking sheet with parchment paper.
Step 3: Mix your cheese and herbs, then spread the mixture onto puff pastry sheets.
Step 4: Bake for about 15-20 minutes until golden and bubbly, watching for a crispy edge.
Step 5: Let cool slightly before slicing into squares or triangles for serving.
Cooking Checkpoints to Nail the Perfect Snack
- Cheese should be melted and bubbly, with a slight golden edge.
- Puff pastry edges should be crisp and flaky, not soggy.
- Herbs should be fragrant, not burnt, indicating proper baking.
- The cheese filling should hold together but be soft enough to bite through smoothly.
Common Mistakes and How to Fix Them
- Soggy edges from over-accumulated filling.? Use a sharp knife to cut; dull blades crush the pastry.
- Cheese oozing out too much.? Bake until edges are golden, not pale.
- Burnt herbs or cheese.? Ensure oven is preheated for even cooking.
- Filling falling apart when cut.? Let the snack rest for 5 minutes before slicing.
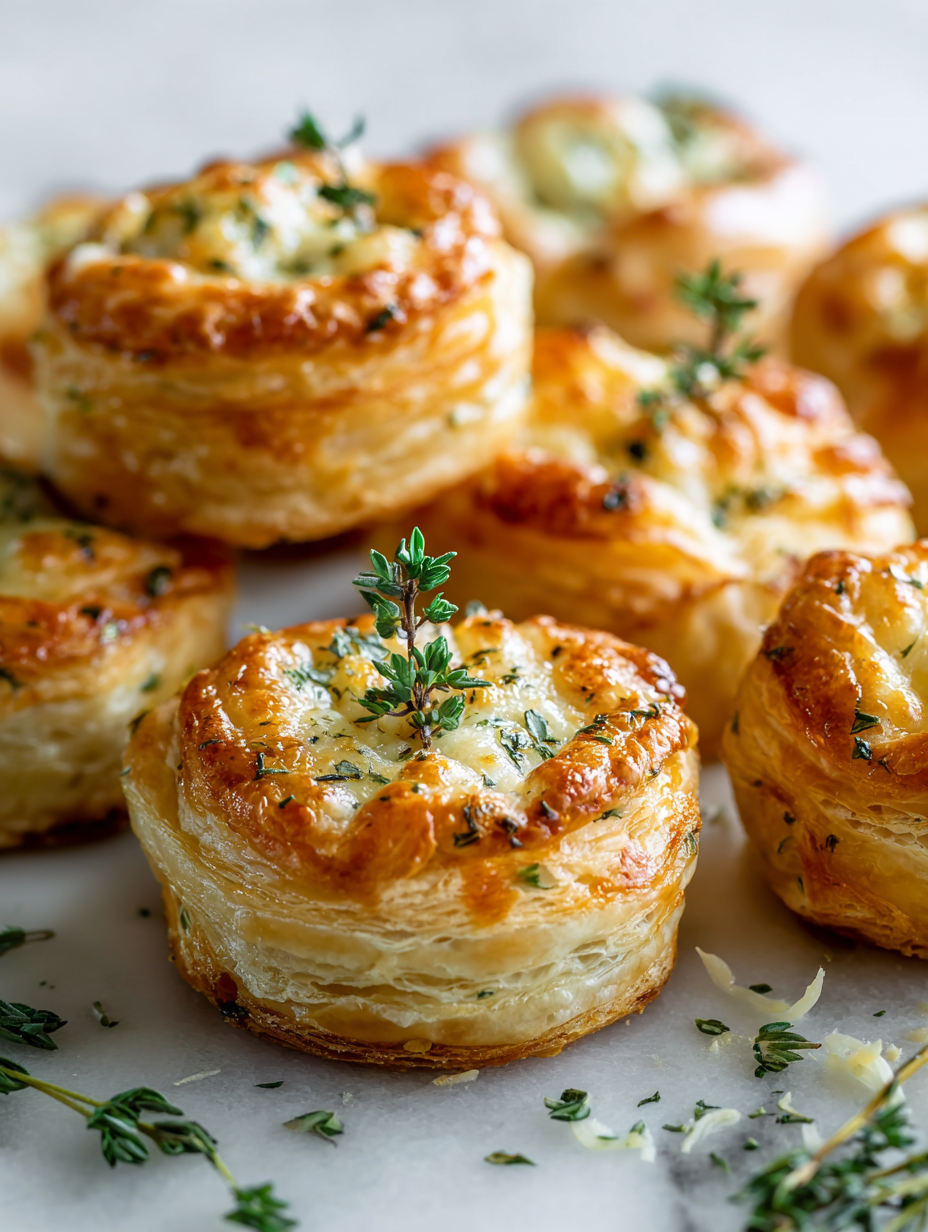
Herbed Cheesy Puff Pastry Bites
Ingredients
Equipment
Method
- Preheat your oven to 200°C (390°F) and line a baking sheet with parchment paper to keep things tidy.
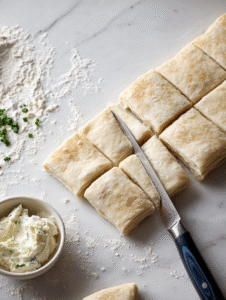
- Unroll the puff pastry sheets on a lightly floured surface and cut them into equal squares or rectangles using a knife or pizza cutter for clean edges.
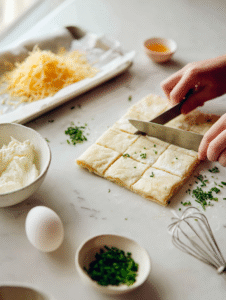
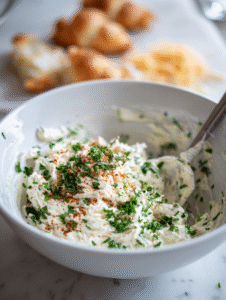
- In a mixing bowl, combine the softened cream cheese, chopped herbs, smoked paprika, and hot sauce if using, mixing until smooth and fragrant.
- Spread a generous layer of the herbed cheese mixture onto each puff pastry square, leaving a small border around the edges.
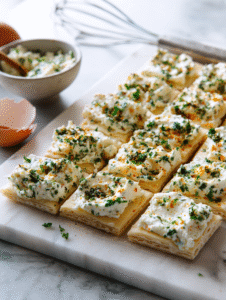
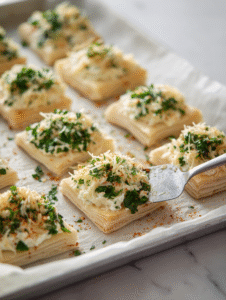
- Sprinkle shredded cheddar cheese evenly over the cheese-filled pastry squares to add a melty, crispy topping.
- Beat the egg in a small bowl and brush it lightly over the exposed pastry edges to promote golden browning.

- Place the prepared pastry squares onto the lined baking sheet, spacing them slightly apart for even baking.
- Bake in the preheated oven for 15-20 minutes, or until the edges are puffed, golden, and crispy, with bubbling cheese visible.
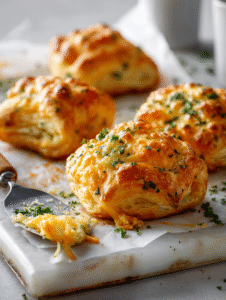
- Once baked, remove from the oven and let the bites cool for a few minutes until the cheese sets slightly, making them easier to handle.
- Slice into smaller squares or triangles if desired, and serve warm or at room temperature, enjoying the crispy exterior with a cheesy, herb-filled interior.
Notes

Hi, I’m Ruby Thorn, the home cook behind The Tender Mess. Join me on the journey of Embracing the mess, fearlessly create —because in the kitchen, the mess sometimes leads to magic.