This no-bake chocolate cheesecake is my go-to when I need something rich and satisfying, but I don’t want to heat up the kitchen. It’s a simple remedy for those moments when dessert feels like too much fuss—just a few ingredients, a little patience, and you’re set. The best part? It’s ready in no time, which really saves my sanity on busy nights.
I love how this recipe turns basic pantry staples into a silky, indulgent treat. No oven, no water bath, just a quick mix and a chill. It’s perfect for spontaneous gatherings or when a sudden chocolate craving hits hard, and I need something impressive without the effort. Honestly, it’s a foolproof way to satisfy sweet tooths without breaking a sweat.
This recipe is inspired by those times when I need a decadent dessert fast, without turning on the oven or fussing with complicated steps. It’s perfect for unexpected guests, last-minute cravings, or when I want something rich but don’t want the kitchen to turn into a sauna. I love how it transforms simple ingredients into a silky, chocolatey heaven with minimal effort, making dessert feel approachable even on hectic days.
A No-Oven Chocolate Escape
- Sometimes I just need a quick chocolate fix, and this recipe never lets me down.
- I love how it feels like a little indulgence I can whip up on a busy weeknight.
- There’s a strange comfort in knowing I don’t have to turn on the oven to enjoy something so rich.
- It reminds me of childhood, those moments when dessert was just a spoon away and made with love.
- Honestly, sharing this with friends feels like giving a small piece of happiness in a slice.
A Personal Chocolate Revelation
One rainy afternoon, I was rummaging through my pantry, craving something sweet but with zero energy to turn on the oven. I remembered a slice I had at a small bakery years ago, where the crust was unexpectedly crunchy and the filling impossibly smooth. That memory stuck with me, and I started experimenting with no-bake options, trying to capture that texture and richness. This recipe is my honest attempt at recreating that moment—simple ingredients, big flavor, and a bit of nostalgia in every slice.
Historical and Cultural Tidbits
- This no-bake cheesecake has roots in post-war convenience cooking, where simplicity and preservation mattered.
- It gained popularity in the 1960s when refrigeration became common in households, making chilled desserts trendy.
- Many variations exist globally, with some cultures adding spices or local ingredients for unique twists.
- The idea of skipping the oven for desserts was a game-changer during hot summer months, especially in tropical regions.
- Modern versions often incorporate healthier swaps, reflecting current trends toward lighter, fuss-free treats.
Key Ingredients Breakdown
- Cream cheese: I love how it becomes silky and smooth as it melts, giving the filling its rich, velvety texture. If yours is too soft, chill it before mixing.
- Dark chocolate: I prefer a good quality, slightly bitter bar that melts easily and leaves that deep, smoky cocoa aroma. Swap for milk chocolate if you want more sweetness, but it loses some depth.
- Heavy cream: The key to that lush, mousse-like consistency. If you want a lighter feel, use half-and-half—but don’t expect the same richness.
- Graham cracker crust: I like how the crunch contrasts with the creamy filling. For a nutty twist, try digestive biscuits or gingersnap cookies—just crush more finely.
- Sugar: I use a bit less than traditional recipes because the chocolate already adds sweetness. Adjust to taste if you prefer it sweeter or less sweet.
- Vanilla extract: It brightens up the chocolate and adds depth. Use genuine vanilla for the best aroma—imitation can make it feel flat.
- Lemon zest (optional): Adds a fresh, bright note that cuts through the richness. Skip if you want pure chocolate indulgence, but I highly recommend it for balance.
Spotlight on Key Ingredients
Cream cheese:
- I notice how it becomes irresistibly silky and velvety as it warms slightly during mixing. If yours is too soft, chill it first to maintain structure.
- Dark chocolate: I love the way it melts smoothly, releasing a deep, smoky cocoa aroma. Swap for milk chocolate if you prefer a sweeter, creamier experience, but it loses some richness.
Dark chocolate:
- It’s the backbone of flavor, oozy and intense when melted, with a hint of bitterness that balances sweetness. Use a high-quality bar for best flavor and smooth melting.
- Heavy cream: It transforms the filling into a luscious, mousse-like texture. When whipped just right, it adds a lightness that contrasts the dense crust—if over-whipped, it can become grainy, so watch the texture.
Ingredient Swaps and Variations
- Dairy-Free: Use coconut cream instead of heavy cream for a rich, dairy-free alternative, but expect a slightly coconutty flavor.
- Vegan: Swap cream cheese for cashew-based vegan cream cheese, and dark chocolate with a dairy-free, plant-based variety—still rich, just a bit different in texture.
- Sugar Alternatives: Substitute honey or maple syrup for white sugar to add a natural sweetness, but reduce other liquids slightly to compensate.
- Crust Base: Replace graham crackers with crushed digestive biscuits or gingersnap cookies for different flavor profiles and textures.
- Chocolate Type: Use milk chocolate instead of dark for a sweeter, creamier taste; dark offers more depth and less sweetness.
- Add-Ins: Mix in chopped nuts, dried fruits, or a dash of espresso powder to customize flavor and texture with your favorites.
- Lemon Zest: Incorporate lemon zest or orange zest instead of vanilla for a citrus twist that brightens the rich chocolate.
Equipment & Tools
- Springform pan: Holds the crust and filling, easy to remove the cheesecake.
- Mixing bowl: Combines ingredients smoothly.
- Spatula: Spreads and smooths the filling evenly.
- Saucepan or microwave: Melts the chocolate gently without burning.
Step-by-step guide to no-bake cheesecake
- Gather your equipment: a 20cm (8-inch) springform pan, a mixing bowl, a spatula, and a saucepan for melting chocolate.
- Crush the graham crackers: place them in a zip-top bag and crush until fine. Mix with melted butter (about 5 min, 50°C/122°F, until just combined).
- Press the crust: evenly spread the mixture into the bottom of the pan. Use the back of a spoon or your fingers to press down firmly. Chill in the fridge for 15 minutes to set.
- Make the filling: soften the cream cheese in a bowl until smooth (about 2 min, room temp). Melt the dark chocolate in a heatproof bowl over simmering water or in 30-second bursts in the microwave, stirring each time (total 2 min, 45°C/113°F).
- Combine: fold the melted chocolate into the cream cheese, then whisk in the heavy cream, sugar, and vanilla until smooth and slightly thickened (about 3 min).
- Pour the filling: over the chilled crust, smoothing the top with a spatula. Tap the pan gently on the counter to remove air bubbles.
- Chill the cheesecake: cover loosely and refrigerate for at least 4 hours, preferably overnight, until firm and set. It should jiggle slightly when gently shaken.
- Final check: the edges should be firm and slightly crackled; the center should hold when nudged but still have some give. The top should be glossy and smooth.
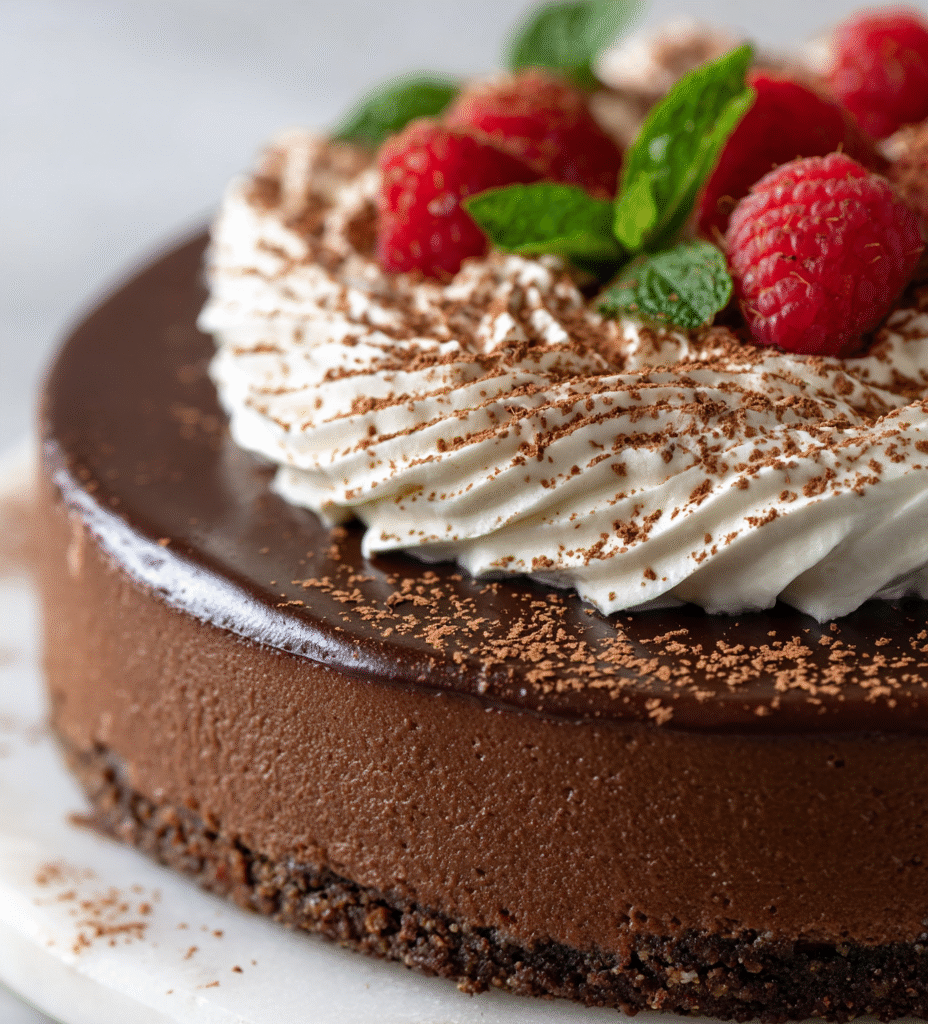
- Remove from fridge: carefully release the springform side and transfer to a serving plate. Optional: garnish with whipped cream, chocolate shavings, or fresh berries.
Chill the cheesecake at least 4 hours or overnight. When ready to serve, carefully remove the sides of the springform pan. Slice with a warm knife for clean cuts. Garnish as desired and enjoy.
How to Know It’s Done
- Crust is firm and holds shape when pressed; edges are slightly crisp.
- Filling is fully set with a slight jiggle in the center when gently shaken.
- Top is glossy, smooth, and crack-free, indicating proper setting.

No-Bake Chocolate Cheesecake
Ingredients
Equipment
Method
- Place the graham crackers in a zip-top bag and crush them into fine crumbs using a rolling pin or your hands. Transfer to a bowl, then pour in the melted butter and mix until the crumbs are evenly coated and resemble wet sand.
- Press the crumb mixture firmly into the bottom of a springform pan, spreading it out evenly with the back of a spoon or your fingers. Chill the crust in the fridge for 15 minutes to set.
- In a heatproof bowl, melt the chopped dark chocolate over a saucepan of simmering water or in short bursts in the microwave, stirring until smooth and glossy. Let it cool slightly so it doesn’t seize the cream cheese.
- In a mixing bowl, beat the softened cream cheese until smooth and creamy, about 2 minutes. Gently fold in the cooled melted chocolate until fully combined.
- In a chilled bowl, whip the heavy cream, sugar, vanilla extract, and lemon zest (if using) until soft peaks form, about 3-4 minutes. Be careful not to over-whip to prevent graininess.
- Gently fold the whipped cream into the cream cheese and chocolate mixture in three additions, combining carefully to keep the mixture light and airy.
- Pour the smooth filling over the chilled crust, spreading it evenly with a spatula. Tap the pan lightly on the counter to release any air bubbles and create a flat surface.
- Cover the pan loosely with plastic wrap and refrigerate for at least 4 hours, preferably overnight, until the filling is firm and set with a glossy finish.
- Once set, carefully remove the sides of the springform pan. Use a sharp, warm knife to slice cleanly through the cheesecake, wiping the blade between cuts for the neatest slices.
- Garnish as desired with whipped cream, chocolate shavings, or fresh berries. Serve and enjoy this rich, silky, no-bake chocolate cheesecake!
Tips & Tricks for Perfect Results
- Chill the crust: Ensure the crust is cold and firm before adding filling to prevent cracking during setting.
- Temperature control: Let melted chocolate cool slightly before mixing to avoid seizing or curdling the cream cheese.
- Whip the cream: For a fluffier texture, whip the heavy cream until soft peaks form, then fold gently into the mixture.
- Use room temp ingredients: Softened cream cheese mixes more smoothly, reducing lumps and ensuring a silky filling.
- Smooth the top: Tap the filled pan on the counter to release air bubbles and achieve an even, glossy surface.
- Patience is key: Give the cheesecake at least 4 hours (preferably overnight) to fully set and develop flavor.
- Warm knife trick: Dip your knife in hot water and wipe dry before slicing for clean, neat slices.
Common Mistakes and How to Fix Them
- FORGOT to chill the crust base before filling? Chill for at least 15 minutes to prevent cracks.
- DUMPED the melted chocolate into hot cream? Let the chocolate cool slightly before mixing to avoid curdling.
- OVER-TORCHED the chocolate? Use a double boiler or microwave in short bursts, stirring often.
- MISSED the setting time? Be patient — refrigerate at least 4 hours for firm, sliceable cheesecake.
Quick Fixes and Pantry Swaps
- When the crust cracks, splash a little hot water over the edges and smooth with a spoon.
- If the filling is too runny, dump it back in the fridge for 15 minutes before pouring again.
- Over-melted chocolate? Patch with a teaspoon of hot cream and stir until glossy.
- When slices are messy, shield the edges with a warm, damp cloth for cleaner cuts.
- If the cheesecake isn’t firm enough, rescue with an extra hour in the freezer for quick setting.
Prep, store, and reheat tips
- Prepare the crust and press it into the pan up to 24 hours in advance; keep covered in the fridge for a crisp texture.
- Make the filling a day ahead, then cover and store in an airtight container in the fridge; stir gently before pouring.
- The cheesecake can be stored in the fridge for up to 3 days; the longer it sits, the more the flavors meld, but it may lose a bit of firmness.
- Refrigerate at least 4 hours, preferably overnight, to let it fully set; the texture should be firm with a slight jiggle when gently nudged.
- To reheat or soften slightly, let it sit at room temperature for about 10-15 minutes until it feels pleasantly soft to the touch, with a rich aroma.
Top questions about no bake cheesecake
1. Can I use cold cream cheese?
Use room temperature cream cheese for a smoother, silkier filling that mixes easily and avoids lumps.
2. How long should I chill it?
Chill the cheesecake for at least 4 hours, preferably overnight, so it’s firm and slices cleanly.
3. Can I substitute dark chocolate with milk chocolate?
Yes, switching to milk chocolate will make it sweeter and creamier but less intense than dark chocolate.
4. What’s the best pan for this recipe?
Use a springform pan for easy removal and cleaner edges, especially if you plan to decorate the top.
5. My crust is soggy, what do I do?
If your crust is soggy, bake it lightly at 180°C (356°F) for 8-10 minutes or chill longer before filling.
6. Can I make this dairy-free?
You can replace heavy cream with coconut cream for a dairy-free version, but it adds a subtle coconut flavor.
7. Should I add lemon or other flavoring?
Adding a teaspoon of lemon zest brightens the richness with a fresh, zesty note that balances the chocolate.
8. How do I avoid over-whipping the cream?
Over-whipping the cream can make it grainy; whip just until soft peaks form and gently fold in the rest.
9. The filling is too soft, what now?
If the filling is too runny, refrigerate it for 15-20 minutes before pouring into the crust.
10. How do I get clean slices?
Use a sharp, warm knife to cut slices for clean, neat edges without cracking or crumbling.
This no-bake chocolate cheesecake feels like a little secret kept in the fridge—rich, smooth, and surprisingly quick to pull together. It’s one of those desserts I turn to when I want something satisfying without the fuss of baking or fussing over textures. Honestly, it’s become a small ritual to whip it up and indulge in that glossy, chocolatey slice.
In a world that often moves too fast, this recipe offers a moment of calm and pure pleasure. Whether it’s for last-minute guests or a spontaneous treat, it’s a reminder that sometimes, simple ingredients are all you need for a moment of genuine comfort. No matter how often I make it, I still get a little excited when I see that perfect, crackled top come together.

Hi, I’m Ruby Thorn, the home cook behind The Tender Mess. Join me on the journey of Embracing the mess, fearlessly create —because in the kitchen, the mess sometimes leads to magic.