
This recipe was born from a chaotic morning when I needed a quick, satisfying snack that wouldn’t compromise on flavor or texture. It’s a no-fuss, no-bake solution that’s perfect for busy mornings or when you’re just craving something sweet and wholesome without turning on the stove.
I love how these chocolate oat bites come together with simple ingredients, yet deliver a rich, fudgy bite that feels indulgent but is honestly kind of healthy. They’re a practical treat that you can make in advance and keep tucked away for those moments when a little chocolate call is hard to ignore.
Every time I make these, I think about how they’re a bit like a homemade energy boost—comforting, familiar, and surprisingly versatile. No baking means fewer dishes, less stress, and more time to enjoy the simple pleasure of a good snack whenever you need it.
This recipe was born from a chaotic morning when I needed a quick, satisfying snack that wouldn’t compromise on flavor or texture. It’s a no-fuss, no-bake solution that’s perfect for busy mornings or when you’re just craving something sweet and wholesome without turning on the stove.
A No-Bake Chocolate Adventure
- These bites remind me of lazy Sunday mornings with a cup of coffee and a good book.
- I still get a thrill when I see how quickly the mixture comes together—no fuss, just simple joy.
- There’s a quiet pride in how these tiny balls can satisfy a sweet craving without feeling heavy.
- Whenever I make these, I think of how a handful of ingredients can turn into something so comforting and nourishing.
- They’re the kind of treat that makes me feel like I’ve got my act together, even on the busiest days.
A personal touch in every bite
- This recipe started as a way to use up a bag of oats and a stash of chocolate chips during a particularly hectic week. I needed something quick, no-bake, and satisfying—an antidote to the chaos of multitasking and missed meals. It’s funny how a simple idea can turn into a small ritual that I keep coming back to, especially when I need a moment of calm with a little sweet boost.
- Making these bites feels a bit like a mini therapy session—measuring, mixing, feeling the sticky texture come together. They’re not fancy, just honest, straightforward comfort. Every batch reminds me that sometimes, the simplest ingredients create the most dependable treats, especially when you’re short on time but still crave something homemade and genuine.
- heading: ‘A Sweet, No-Fuss Creation’
Historical and Cultural Tidbits
- This recipe has roots in resourcefulness—using pantry staples during wartime shortages, where sweet, filling snacks had to be simple and accessible.
- Historically, no-bake bites like these gained popularity in the 20th century as quick, energy-boosting treats for busy families and outdoor enthusiasts.
- The combination of oats and chocolate is reminiscent of rustic, homemade energy balls that originated in European kitchens, where wholesome ingredients were prized.
Ingredient breakdown: key components
- Rolled oats: I love the chewy texture they bring, but if you want them softer, try soaking them in a little milk first.
- Dark chocolate chips: Their intense richness makes these bites special, but you can swap in semi-sweet if you prefer a milder chocolate punch.
- Nut butter: I prefer creamy peanut, but almond or cashew work just as well, adding a subtle nutty aroma and smoothness.
- Honey or maple syrup: I use honey for a sticky, sweet glue, but maple syrup gives a more caramel-y note, especially if warmed slightly.
- Vanilla extract: Just a splash enhances everything, but you can skip it or add a pinch of cinnamon for a different vibe.
- Salt: A tiny pinch heightens the chocolate flavor, but if you’re sensitive, leave it out or use sea salt flakes for a burst of crunch.
- Optional add-ins: Dried berries or chopped nuts can boost texture and flavor, just toss them in last to avoid crushing.
Spotlight on key ingredients
Rolled oats:
- I love the chewy texture they bring, but if you want them softer, try soaking them in a little milk first.
- Dark chocolate chips: Their intense richness makes these bites special, but you can swap in semi-sweet if you prefer a milder chocolate punch.
- Nut butter: I prefer creamy peanut, but almond or cashew work just as well, adding a subtle nutty aroma and smoothness.
Dark chocolate chips:
- Their oozy melt offers a burst of richness with every bite, especially when warm from the fridge.
- Nut butter: It acts as the glue, giving the bites a creamy, silky texture that contrasts nicely with the oats’ chewiness.
- Honey or maple syrup: These sweeteners help bind everything together, adding a sticky, glossy finish that’s hard to resist.
Notes for ingredient swaps
- Dairy-Free: Use coconut oil or coconut butter instead of butter or dairy-based spreads. The texture will be a bit richer and more tropical.
- Nut-Free: Swap nut butter for seed butter like sunflower or tahini, but expect a slightly saltier, more earthy flavor.
- Vegan: Replace honey with maple syrup or agave nectar for that same sticky sweetness with a plant-based twist.
- Sugar Variations: Use brown sugar or coconut sugar for a deeper caramel note; they may make the mixture a touch drier, so adjust liquids accordingly.
- Chocolate Options: Swap dark chocolate chips for white chocolate or milk chocolate chips for a sweeter, creamier flavor. The oozy melt will be different but just as satisfying.
- Add-ins: Dried fruits or chopped nuts can be swapped or doubled for extra texture—try cranberries or pistachios for a colorful twist.
Equipment & Tools
- Mixing bowl: Combine and stir ingredients
- Spatula: Mix ingredients thoroughly
- Baking sheet: Hold the bites during chilling
- Parchment paper: Prevent sticking and easy cleanup
- Measuring cups/spoons: Accurately measure ingredients
Step-by-step guide to no bake bites
- Gather your equipment: a mixing bowl, a spatula, a baking sheet, and parchment paper. The sheet doesn’t need to be hot—just a flat, stable surface.
- In the mixing bowl, combine 1 1/2 cups rolled oats, 1/2 cup dark chocolate chips, and a pinch of salt. Stir well to distribute evenly.
- Add 1/2 cup nut butter (peanut or almond), 1/4 cup honey or maple syrup, and 1 teaspoon vanilla extract. Mix until the mixture becomes sticky and cohesive. It should hold together when pressed.
- If the mixture feels too dry or crumbly, add a teaspoon of water or milk and stir again. If it’s too wet, sprinkle in a little extra oats.
- Using your hands or a small scoop, portion out about a tablespoon of mixture and roll into compact balls. Place them on the prepared parchment-lined sheet, spacing them about 2 inches apart.
- Once all the bites are rolled, press gently to flatten slightly if desired. Chill in the fridge for at least 30 minutes to set. The bites should firm up and develop a slight sheen.
Chill the bites in the fridge for at least 30 minutes until firm. Serve straight from the fridge for best texture. Store in an airtight container for up to a week, or freeze for longer storage. No need to reheat—just bite into the cool, fudgy goodness.
How to Know It’s Done
- The mixture is sticky, but not too wet—presses into balls without sticking excessively to your hands.
- Bites hold their shape when rolled and pressed slightly; if they fall apart, add more oats or chill longer.
- The chocolate chips are evenly distributed, and the bites have a matte, slightly shiny surface after chilling.
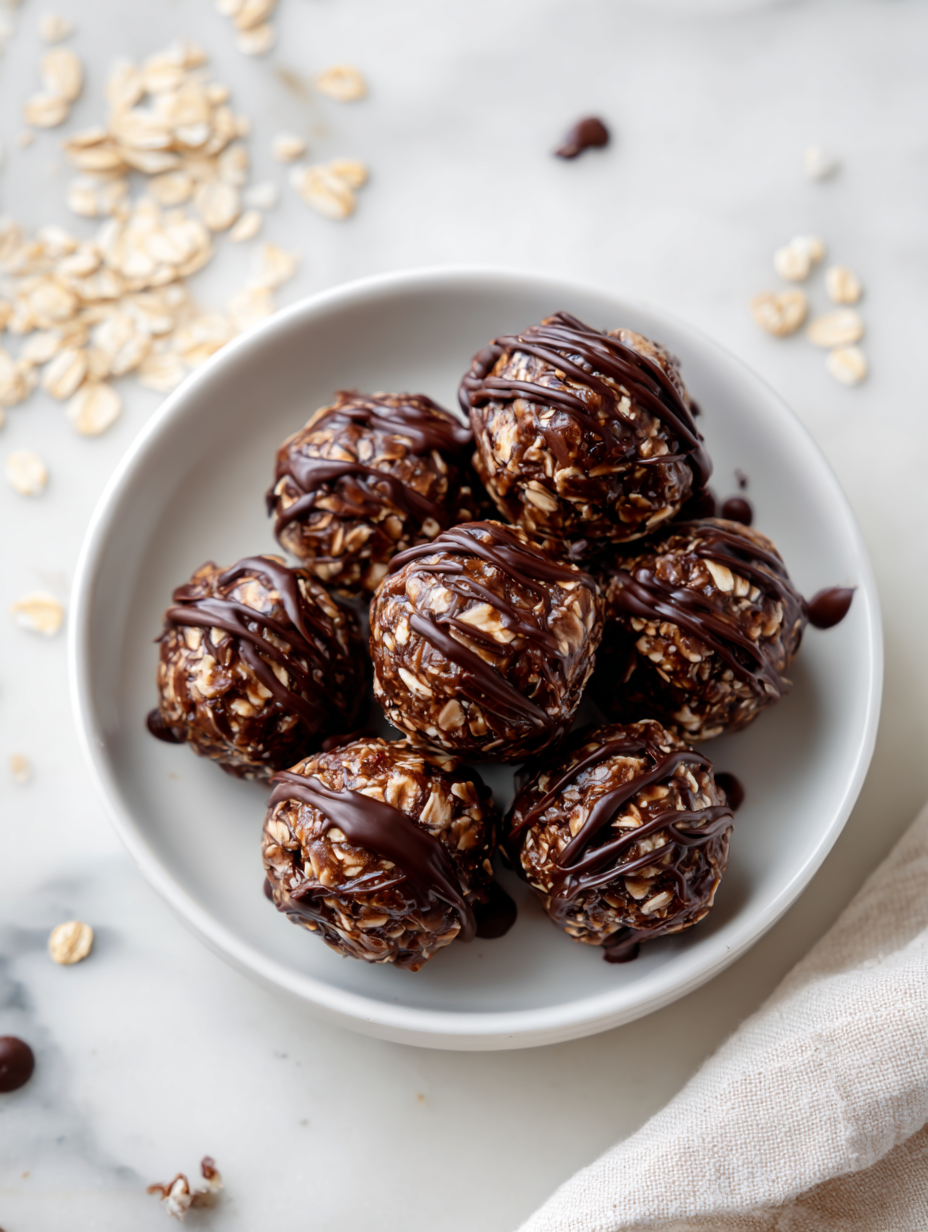
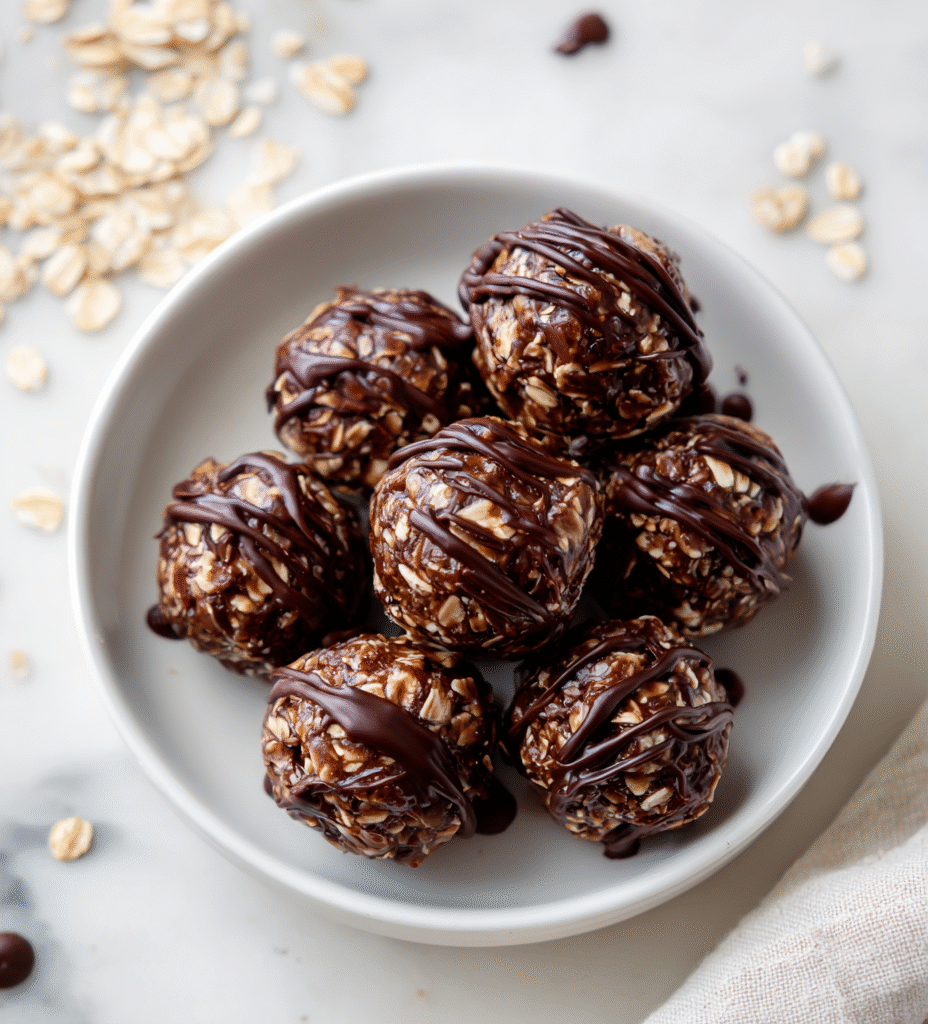
No-Bake Chocolate Oat Bites
Ingredients
Equipment
Method
- Gather all your ingredients and line your baking sheet with parchment paper. In a large mixing bowl, combine the oats, chocolate chips, and a pinch of salt. Stir everything together until evenly distributed.
- Add the nut butter, honey or maple syrup, and vanilla extract to the bowl. Stir thoroughly with a spatula until the mixture becomes thick, sticky, and cohesive, pulling away from the sides of the bowl.
- If the mixture feels crumbly, add a teaspoon of water or milk and stir again; if it's too wet, sprinkle in a little extra oats. The goal is a sticky, moldable consistency.
- Using your hands or a small scoop, grab about a tablespoon of the mixture and roll it firmly into a compact ball. Place each ball onto the prepared parchment-lined sheet, spacing them a couple of inches apart.
- If desired, gently press down on each ball to slightly flatten them. Place the baking sheet in the fridge and chill for at least 30 minutes until firm and set.
- Once chilled, the bites will be fudgy, chewy, and slightly shiny on the surface. Serve straight from the fridge, or store in an airtight container for up to a week. Enjoy these wholesome, no-bake treats anytime you need a quick chocolate fix!
Pro tips for perfect bites
- Bolded mini-head: Use slightly melted chocolate chips to coat the oats evenly, creating a glossy surface that sets quickly.
- Bolded mini-head: Chill the mixture before shaping to prevent stickiness, making rolling into balls much easier.
- Bolded mini-head: Press the bites down gently on the tray to increase surface contact, helping them firm up faster in the fridge.
- Bolded mini-head: Incorporate a pinch of sea salt flakes on top before chilling to enhance the chocolate flavor and add crunch.
- Bolded mini-head: For a richer flavor, toast the oats lightly in a dry pan before mixing—just watch for a nutty aroma and amber hue.
Common mistakes and how to fix them
- FORGOT to measure ingredients accurately? Use a scale for precision and avoid dry or overly wet bites.
- DUMPED in too much chocolate? Stir well to distribute evenly and prevent clumping or uneven texture.
- OVER-TORCHED the chocolate? Use low heat or microwave in short bursts, stirring frequently to avoid burning.
- MISSED chilling time? Ensure the bites are firm and set before handling or serving, or they may fall apart.
Quick fixes and pantry swaps
- When mixture feels crumbly, splash in a teaspoon of water to help it come together.
- If bites are too sticky, dust your hands with oats or refrigerate the mixture for 10 minutes.
- Splash a little warm water on the chocolate to loosen it if it’s thick and hard to stir.
- Patch cracked or broken bites by gently pressing them back together, then chill to set.
- When in doubt, swap out oats for crushed graham crackers for a different texture and flavor profile.
Prep, store, and reheat tips
- The mixture can be prepared a day ahead; keep it covered in the fridge to prevent drying out.
- Store the assembled bites in an airtight container in the fridge for up to one week, maintaining their fudgy texture.
- For longer storage, freeze the bites for up to a month; wrap individually in plastic wrap before placing in a bag.
- Refrigerated bites stay chewy and firm; let them sit at room temperature for 5 minutes if you prefer a softer bite before eating.
- Chilled bites develop a richer chocolate flavor and a slightly denser texture, which is perfect for a quick, cool treat.
Top questions about no-bake bites
1. Can I swap the nut butter?
Yes, you can use almond or cashew butter, but expect a slightly different flavor and creaminess.
2. Can I use honey or syrup interchangeably?
Absolutely, just warm the honey slightly to make it easier to stir into the mixture.
3. Can I freeze these bites?
Yes, freezing extends their life up to a month. Just wrap individually and thaw in the fridge before eating.
4. They’re too sticky to roll—what now?
If they feel too sticky, chill the mixture for 10-15 minutes or dust your hands with oats before rolling.
5. Are these bites dairy-free?
Yes, use dairy-free chocolate chips or chopped dark chocolate to keep it vegan and dairy-free.
6. Can I add other ingredients?
You can substitute with coconut flakes or chopped nuts for added texture and flavor without affecting the binding.
7. Bites aren’t setting properly—what to do?
If the bites aren’t firm enough, increase chilling time or add a touch more oats to absorb excess moisture.
8. How do I shape the bites?
Use a small cookie scoop or your hands to shape them, pressing firmly to ensure they hold together.
9. Can I change the type of chocolate?
Use dark or semi-sweet chocolate for a richer flavor, or switch to white chocolate for a sweeter treat.
10. How do I store leftovers?
Store in an airtight container in the fridge for up to a week, or freeze for longer, just keep covered.
These no-bake chocolate oat bites are a reminder that simplicity can be deeply satisfying. They’re perfect for when you need a quick fix that tastes indulgent but is honestly pretty wholesome.
Every time I make them, I feel a little more prepared—like I’ve got a stash of comfort in tiny, chewy balls. No matter the chaos outside, these bites keep things simple and sweet for a moment of calm.

Hi, I’m Ruby Thorn, the home cook behind The Tender Mess. Join me on the journey of Embracing the mess, fearlessly create —because in the kitchen, the mess sometimes leads to magic.