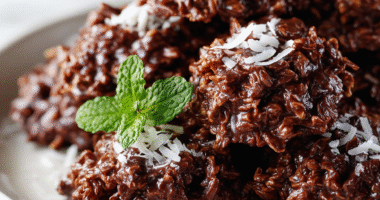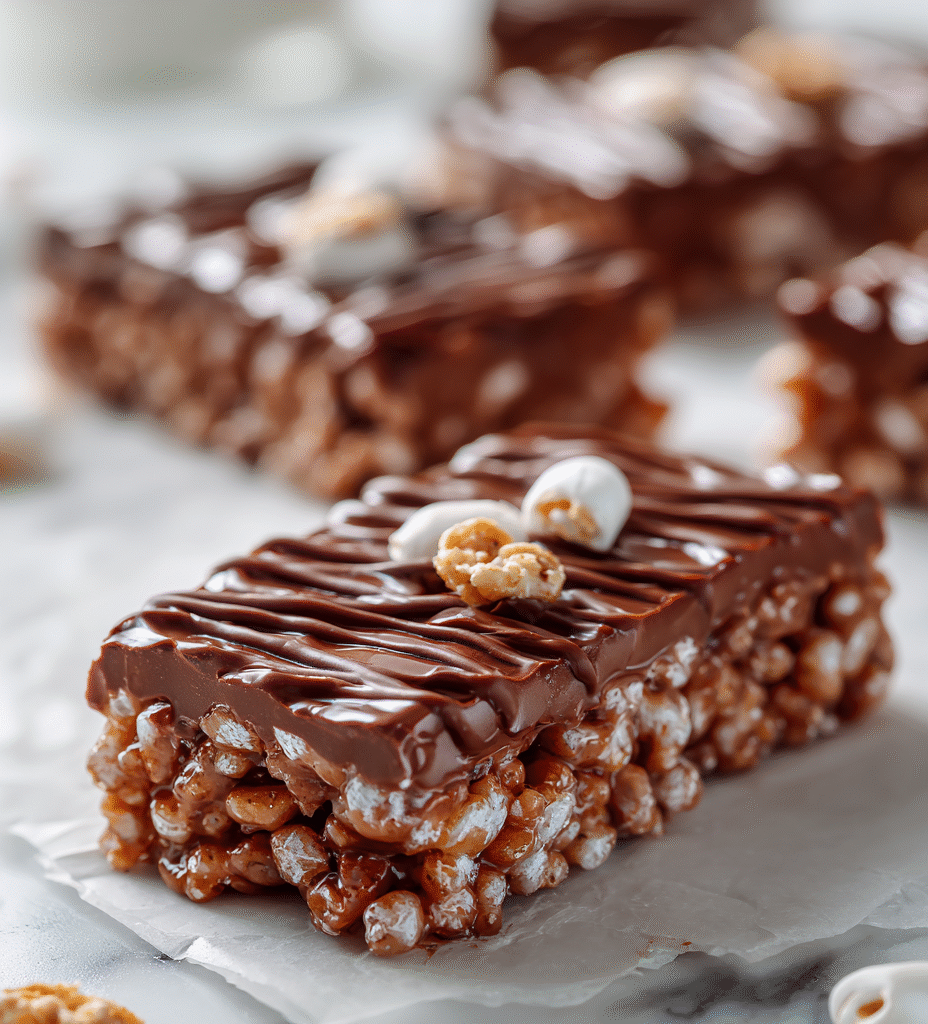
This no-bake chocolate rice bars recipe is a throwback to childhood afternoons when sweet, crispy snacks were just a spoonful away. There’s something satisfying about the way the crispy rice crackles under your teeth, balanced by that deep, smoky cocoa flavor that feels just right after a long day. It’s a treat that comes together quickly, with no oven fuss—perfect for those moments when a sweet craving hits unexpectedly.
What I love most is how adaptable it is—whether you want a richer chocolate punch or a lighter, almost airy crunch. It’s a recipe that’s become my go-to for quick, honest comfort, especially when I don’t want to fuss over baking or complicated ingredients. Plus, it’s a reminder that some of the best snacks are simple and unpolished, just like these bars.
This recipe is inspired by childhood memories of sneaking treats from the kitchen, but with a grown-up twist—rich, smoky cocoa contrasted by the crispy snap of rice. It’s about capturing that secret, fleeting joy of a snack you can make in minutes, no oven required, perfect for when the craving strikes or you need a quick fix for a sweet tooth.
The story behind this recipe
- This recipe came together one rainy afternoon when I needed something quick, satisfying, and forgiving. I remembered those childhood moments sneaking into the kitchen to grab crispy rice treats, but I wanted to elevate it—make it richer and more textured without turning on the oven. That nostalgic crunch and melt-in-your-mouth chocolate combo became a little project I kept returning to whenever I needed a simple, honest sweet fix.
- It struck me how these bars remind us that sometimes, the simplest ingredients—cocoa, rice, butter—can come together to create something unexpectedly rich and comforting. They’re like a secret stash, perfect for sharing or hiding away when you need a quick moment of sweetness. Now, they’re my go-to for impromptu gatherings or just when I want a break from more elaborate desserts.
- heading: The story behind this recipe
Ingredient breakdown: key components
- Cocoa powder: I prefer using natural, unsweetened cocoa for that deep, slightly smoky flavor that really stands out. Skip the Dutch-processed if you want a more robust chocolate punch.
- Sweetener: I usually reach for honey or maple syrup because they add a subtle caramel note. If you want a less sticky bar, try coconut sugar—just expect a slightly different, earthier sweetness.
- Butter: I use unsalted butter for control over salt levels, but if you’re dairy-free, coconut oil works surprisingly well—just watch the melting point and adjust accordingly.
- Crispy rice cereal: The crunch is key, so don’t skimp on quality. For a nutty twist, try adding a handful of toasted rice puffs or even a sprinkle of sea salt on top.
- Vanilla extract: I love a splash of vanilla for warmth, but if you’re out, a pinch of cinnamon or a dash of coffee powder can add a whole new layer of depth.
- Optional add-ins: Nuts, dried fruit, or even a pinch of sea salt on top can elevate these bars. Keep it simple or go wild—your call, but avoid overloading to keep the texture crisp.
Spotlight on key ingredients
Cocoa powder:
- I prefer natural, unsweetened cocoa for that deep, smoky aroma that really wakes up your senses. When heated, it releases a rich, bittersweet scent that’s almost intoxicating. Skip Dutch-process if you want a more robust flavor.
- Crispy rice cereal: The crunch is everything—light, airy, and crackling under your teeth. I love using a good quality brand that stays crispy even after mixing with chocolate. When pressed, it should feel firm and have a satisfying snap.
Cocoa powder:
- Crispy rice cereal: It’s the backbone of these bars—crisp, light, and slightly toasted if you pick the right brand. During melting, it crackles softly, and when pressed, it holds shape but still offers that satisfying crunch. Keep it dry to avoid sogginess.
- It’s the flavor anchor—rich, slightly smoky, and earthy. During cooking, it loosens into a glossy, aromatic paste that’s almost velvety. It’s important to sift well to avoid lumps and ensure a smooth mixture.
Notes for ingredient swaps
- Dairy-Free: Swap butter for coconut oil or vegan margarine. It may alter the richness slightly, but the bars will still hold together well.
- Sweetener Alternatives: Use agave syrup or brown rice syrup instead of honey or maple. Expect a slightly different stickiness and flavor profile.
- Cocoa Powder: Dark cocoa powder offers a more intense chocolate flavor, while cacao powder gives a brighter, more bitter note—both work well.
- Crispy Rice Cereal: For nutty or toasted flavor, try toasted rice puffs or add a handful of chopped nuts for extra crunch.
- Optional Add-ins: Dried fruits or seeds can replace nuts, adding texture and flavor without overwhelming the chocolate base.
- Sweetness Level: Adjust the amount of syrup to suit your taste—less for a milder sweetness, more for a richer, stickier bite.
- Flavor Boosters: A pinch of sea salt or a splash of vanilla extract can deepen the chocolate flavor without changing the core ingredients.
Equipment & Tools
- Square pan: Shape and hold the mixture as it sets.
- Spatula: Mix ingredients and press mixture evenly.
- Microwave-safe bowl: Melt butter and combine ingredients quickly.
- Parchment paper: Prevent sticking and make removal easy.
- Knife: Cut into bars cleanly.
Step-by-step to perfect bars
- Gather your equipment: 20cm (8-inch) square pan, spatula, microwave-safe bowl, and parchment paper. The pan shapes the bars and the bowl melts the chocolate.
- Line the pan with parchment paper, leaving some overhang for easy removal.
- In a microwave-safe bowl, melt 1/2 cup (115g) butter at 30-second intervals, stirring until smooth. This takes about 1-2 minutes. The butter should be completely melted and slightly bubbling.
- Add 1 cup (100g) unsweetened cocoa powder to the melted butter. Stir well until fully combined and glossy. Smell that rich, smoky aroma filling your kitchen.
- Pour in 1/2 cup (120ml) honey or maple syrup. Mix thoroughly to incorporate. You want a smooth, shiny chocolate mixture that’s slightly thick but pourable.
- Add 4 cups (120g) crispy rice cereal. Gently fold in with your spatula until evenly coated. You should hear a crackle as the cereal hits the chocolate.
- Transfer the mixture into the prepared pan. Use the spatula to press it evenly into the corners and smooth the top. It should be firm and compact, with a slight sheen.
- Press a piece of parchment on top and chill in the fridge for at least 2 hours, or until set. If you’re in a rush, a quick 30-minute freeze helps speed up the process.
- Once firm, lift the block from the pan using the parchment overhang. Place on a cutting board and cut into bars or squares with a sharp knife. To keep edges clean, wipe the knife between cuts.
- Store the bars in an airtight container at room temperature for up to 3 days, or in the fridge for a week. For longer storage, freeze for up to a month, wrapped tightly.
Chill the bars in the fridge for at least 2 hours until firm. Slice into squares and serve directly from the fridge or at room temperature if you prefer a softer bite. For best texture, store in an airtight container.
How to Know It’s Done
- Chocolate mixture is smooth, glossy, and well combined before adding cereal.
- Cereal is fully coated and pressed firmly into the pan without gaps.
- Bars are set and firm after chilling, with a slight snap when broken.
No-Bake Chocolate Rice Bars
Ingredients
Equipment
Method
- Line your square pan with parchment paper, leaving overhang on the sides for easy removal.
- In a microwave-safe bowl, melt the butter at 30-second bursts, stirring in between until completely smooth and bubbling slightly.
- Add the cocoa powder to the melted butter and stir well until the mixture turns glossy and deep brown, releasing a rich, chocolatey aroma.
- Pour in the honey or maple syrup, stirring thoroughly to combine into a smooth, shiny chocolate mixture.
- Gently fold in the crispy rice cereal with a spatula, making sure each piece is coated in the chocolate mixture. You should hear a soft crackle as the cereal hits the wet chocolate.
- Transfer the mixture into the prepared pan and press it firmly into an even layer using the back of your spatula. This helps the bars set up tightly and keeps them crunchy.
- Cover the pan with parchment or plastic wrap and place it in the fridge for at least 2 hours, or until the mixture is set and firm to the touch.
- Once chilled and firm, lift the block out of the pan using the parchment overhang and place it on a cutting board.
- Use a sharp knife to cut the mixture into bars or squares, wiping the knife clean between cuts for neat edges.
- Arrange the bars on a plate or store in an airtight container at room temperature for up to 3 days, or refrigerate for longer freshness.
Tips for perfect no-bake bars
- Use fresh, high-quality cocoa powder for a richer, more aromatic chocolate punch.
- When melting butter, do it slowly at low power to prevent splattering and scorching.
- Gently fold in rice cereal to keep its crunch intact, avoiding excessive stirring that softens it.
- Press the mixture firmly into the pan with the back of a spatula to ensure clean, sturdy bars.
- Chill the bars in the fridge until they’re fully set—about 2 hours—so they cut cleanly without crumbling.
- Wipe your knife between cuts for sharp, even edges that make presentation easier.
- For a shiny finish, briefly warm your knife or spatula to glide smoothly through the chilled bars.
Common mistakes and how to fix them
- FORGOT to evenly coat cereal → Mix thoroughly to prevent dry patches.
- DUMPED mixture too hot → Let it cool slightly before pressing into the pan.
- OVER-TORCHED chocolate → Use low heat and stir constantly to avoid burning.
- MISSED pressing firmly → Press mixture with the back of a spatula for compact bars.
Quick fixes and pantry swaps
- If mixture is too sticky, splash in a little more melted butter for easier handling.
- When bars crack while cutting, patch with a tiny dab of warm chocolate to seal edges.
- Splash a bit of hot water on your knife to glide through chilled bars smoothly.
- DUMPED ingredients accidentally too cold? Warm gently to re-melt before pressing again.
- When the rice cereal shimmers with moisture, swap with a dry batch or toast slightly for crunch.
Prep, store, and reheat tips
- You can prepare the chocolate mixture and press it into the pan up to a day ahead. Keep it covered in the fridge to prevent it from drying out, and the aroma of cocoa will intensify overnight.
- Once set, the bars can be stored in an airtight container at room temperature for up to 3 days, where they develop a slightly firmer, more cohesive texture. Keep an eye on humidity to avoid sogginess.
- For longer storage, freeze the bars wrapped tightly in plastic wrap and then in foil—good for up to a month. Thaw at room temperature for about 15 minutes before serving, noticing the chocolate aroma re-emerge as they soften.
- Reheating isn’t usually necessary, but if you want a slightly softer bite, microwave a bar at 10-second intervals, watching for the glossy sheen to return and the scent of melted chocolate to bloom again.
Top questions about no bake chocolate rice bars
1. Can I make these bars gluten-free?
Yes, using gluten-free rice cereal will keep the bars gluten-free, but check your cocoa and sweetener for any additives.
2. Can I make these dairy-free?
Absolutely. You can substitute coconut oil for butter, which will give a slightly different texture but still hold well.
3. Can I use chocolate chips instead of bar chocolate?
Yes, melting chocolate chips with a little coconut oil works as a quick substitute for melting chocolate bars.
4. How long do these bars last?
Storing them in an airtight container at room temperature keeps them good for about 3 days. For longer, freeze them wrapped tightly.
5. How do I know when the bars are ready to cut?
Chill the mixture until it’s firm and set, usually about 2 hours. If it’s still soft, give it more time in the fridge.
6. My mixture is too sticky, what do I do?
If your mixture is too sticky to press, sprinkle in a little extra rice cereal or chill it for 15 minutes to firm up.
7. How can I get clean cuts without crumbling?
Use a sharp knife wiped clean between cuts for neat, clean edges and less crumbling.
8. Should I add salt or other toppings?
Adding a pinch of sea salt on top before chilling enhances the chocolate flavor and balances the sweetness.
9. Can I boost the chocolate flavor?
For a more intense chocolate flavor, use dark cocoa powder or add a splash of espresso for depth.
10. Can I customize the ingredients?
Yes, you can add chopped nuts, dried fruit, or toasted seeds for extra texture and flavor variations.
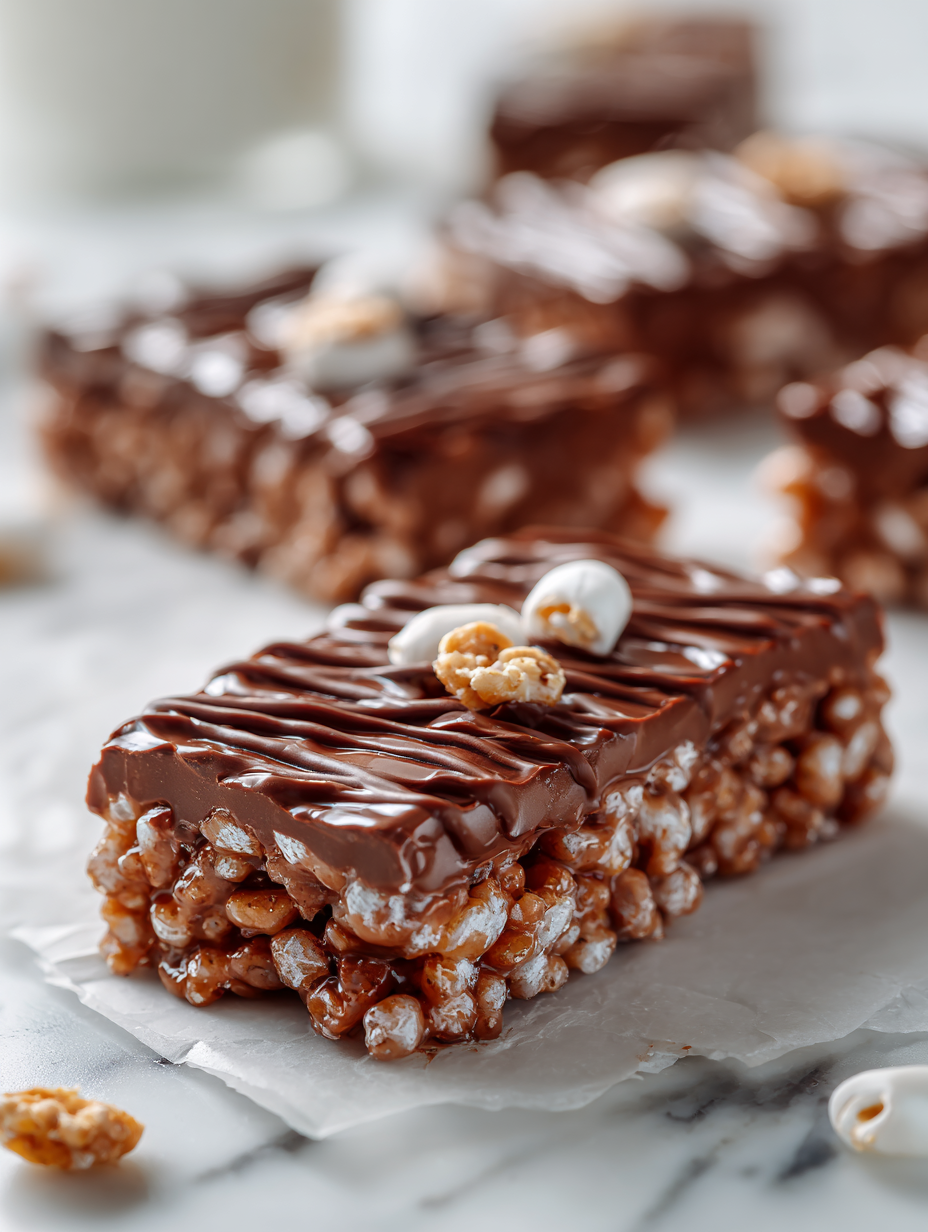
These no-bake chocolate rice bars are a quiet reminder that simple ingredients can deliver big comfort. They come together fast, smell like childhood afternoons, and hit that perfect balance of crispy and chewy with a rich cocoa punch.
Whenever I need something honest, unpolished, and satisfying, I turn to these bars. They’re a humble treat that’s really about the joy of quick, straightforward baking—no fuss, no oven, just good, honest chocolate and crunch in every bite.

Hi, I’m Ruby Thorn, the home cook behind The Tender Mess. Join me on the journey of Embracing the mess, fearlessly create —because in the kitchen, the mess sometimes leads to magic.