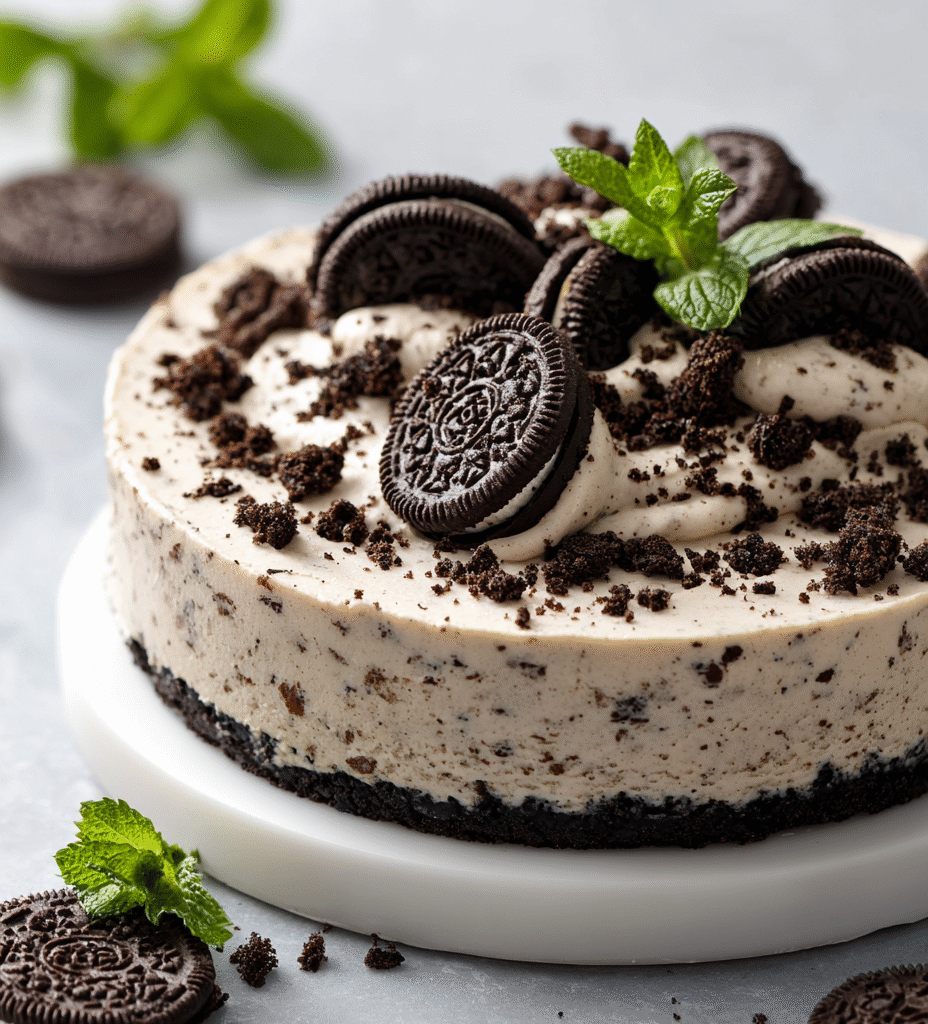
Sometimes, the idea of turning on the oven just feels like too much effort after a long day. That’s when I turn to this no bake Oreo cheesecake—it’s a lifesaver on lazy weekends or whenever I need something sweet but don’t want to fuss with baking. The best part? It’s simple, quick, and somehow feels indulgent without the heavy crust or extra steps. I love how the crushed Oreos give it that perfect crunch and rich flavor, almost like a grown-up cookie dough in creamy form.
This recipe is a bit of a throwback for me—nostalgic, yet surprisingly versatile. I’ve made it for last-minute gatherings, and it always disappears fast. The ease of it means I can focus on enjoying the company instead of stressing over measurements or oven timing. Plus, it’s a crowd-pleaser, especially because everyone has their own Oreo-fueled memories, whether it’s dunking cookies or sneaking bites in secret.
This recipe is inspired by those nights when I just can’t face turning on the oven but still crave something sweet and satisfying. It’s about harnessing the nostalgic crunch of Oreos and transforming it into a creamy, no-fuss cheesecake that’s perfect for lazy weekends or unexpected guests.
A No-Fuss Cheesecake Fix
- I’ve always loved how Oreos remind me of childhood snack times, but turning that into a cheesecake feels like a sweet rebellion.
- There’s a quiet thrill in pulling a dessert together with minimal effort, yet it looks fancy enough to serve to friends.
- This recipe saved me during last-minute gatherings when I needed something quick, creamy, and crowd-pleasing.
- Biting into it, I love that perfect contrast—crunchy cookie bits against smooth, rich filling—just a spoonful of comfort.
- Sometimes, I make it just for myself, a little sweet escape after a hectic day, no oven required.
The story behind this recipe
- This recipe came together after one chaotic weekend when I needed something quick and satisfying, but didn’t want to turn on the oven. I remember rummaging through the pantry, spotting a bag of Oreos, and thinking, why not? That moment of improvisation turned into a favorite go-to for easy desserts, especially when I want something indulgent without the fuss.
- It’s become a bit of a tradition—whenever I have friends over or need a last-minute treat, I whip this up and watch everyone’s eyes light up. There’s something about crushing Oreos and mixing them into creamy cheese that feels like a little act of comfort. Plus, the fact that it’s no-bake makes it perfect for those days when oven space is at a premium or I just can’t face heat.
- heading: The story behind this recipe
Trivia Behind the No Bake Oreo Cheesecake
- This recipe originated from a desire to enjoy cheesecake without turning on the oven, which was especially useful during hot summer days in my early baking days.
- The idea of combining crushed Oreos with creamy cheese dates back to childhood snack memories, but turning it into a no-bake dessert felt like a fresh twist in my late twenties.
- In the early 2000s, no-bake cheesecakes gained popularity due to their simplicity; Oreos, being a beloved cookie, naturally became a key ingredient in many adaptations.
Ingredient breakdown: key components
- Oreo cookies: I love crushing these until they’re almost fine, but a few larger chunks give extra crunch and flavor. Feel free to swap in gluten-free Oreos if needed.
- Cream cheese: I prefer full-fat for that rich, velvety texture, but light cream cheese works if you want a slightly lighter bite—just expect a tad less decadence.
- Heavy cream: Whipping it until soft peaks is key—look for that gentle shimmer and slight curl on the whisk. For a lighter version, try mascarpone, but it won’t whip as airy.
- Sugar: I use regular granulated, but feel free to swap in a bit of honey or maple syrup for a subtle flavor twist—just reduce the liquid slightly.
- Vanilla extract: Adds warmth and depth—don’t skip it. If you’re out, a splash of vanilla bean paste works beautifully, giving tiny specks and richer aroma.
- Lemon juice (optional): Just a squeeze brightens the whole dish with a fresh tang—skip if you prefer a more subdued sweetness, but don’t forget to taste for balance.
- Butter (for crust): Melting butter into crushed Oreos is magic—adds richness and helps everything set. If dairy-free, coconut oil is a good substitute, though it imparts a slight coconut aroma.
Spotlight on key ingredients
Cream cheese:
- Oreo cookies: I crush these until they’re almost fine, but a few larger chunks give extra crunch and flavor. Feel free to swap in gluten-free Oreos if needed.
- I prefer full-fat for that rich, velvety texture, but light cream cheese works if you want a slightly lighter bite—just expect a tad less decadence.
- Heavy cream: Whipping it until soft peaks is key—look for that gentle shimmer and slight curl on the whisk. For a lighter version, try mascarpone, but it won’t whip as airy.
Oreo cookies:
- Their deep chocolate aroma and crunch play a big role in the dessert’s texture and flavor. When crushed, they release a familiar, sweet, smoky scent that’s almost addictive.
- Cream cheese: It behaves like a smooth, slightly sticky paste when softened, and during mixing, it becomes luscious and velvety, essential for that creamy bite everyone loves.
Notes for ingredient swaps
- Dairy-Free: Swap cream cheese for a plant-based version like cashew-based cream cheese. It changes the richness and tang, but still creamy.
- Gluten-Free: Use gluten-free Oreo alternatives or crushed graham crackers with butter for a different texture and flavor profile.
- Sweetener: Replace sugar with honey or maple syrup for a more complex, natural sweetness—reduce the liquid slightly to compensate.
- Heavy Cream: Coconut cream can be a good substitute, adding a subtle coconut flavor and creaminess, but it won’t whip as stiff.
- Butter: Vegan margarine or coconut oil can replace butter in the crust — expect a slightly different aroma and texture.
- Oreo Cookies: For a different crunch, try chocolate digestives or graham crackers crushed into similar-sized pieces.
- Flavor Boost: Add a splash of lemon juice or a hint of orange zest to brighten the cheesecake with fresh citrus notes.
Equipment & Tools
- Springform pan: To shape and contain the cheesecake while setting
- Mixing bowls: For preparing crust and filling separately
- Spatula: To press crust and fold ingredients gently
- Whisk or electric mixer: To whip the cream and blend ingredients smoothly
- Rolling pin: To crush Oreos uniformly
Step-by-step guide to no bake Oreo cheesecake
- Gather your equipment: a 20cm (8-inch) springform pan, a mixing bowl, a spatula, and a whisk. Have the fridge nearby.
- Crush the Oreos: place about 20 cookies in a zip-top bag and crush with a rolling pin until mostly fine with some chunks. Set aside.
- Make the crust: melt 50g (1/4 cup) butter in a small saucepan over low heat or in the microwave (about 30 seconds). Pour over crushed Oreos and mix until evenly coated.
- Press the crust: transfer the Oreo mixture to the springform pan. Use the back of a spoon or a flat-bottomed glass to press firmly into the base, creating an even layer. Chill in the fridge for 15 minutes to set.
- Prepare the filling: in a large bowl, beat 250g (about 9 oz) cream cheese with 50g (1/4 cup) sugar until smooth and fluffy, about 2 minutes.
- Whip the cream: in a separate bowl, whip 200ml (about 3/4 cup) heavy cream until soft peaks form, about 3-4 minutes. Add 1 teaspoon vanilla extract in the last minute.
- Combine: gently fold the whipped cream into the cream cheese mixture until just combined. Fold in 8 crushed Oreos for texture and flavor.
- Pour the filling: transfer the mixture onto the chilled crust. Smooth the top with a spatula. Cover loosely with plastic wrap.
- Set in the fridge: refrigerate for at least 4 hours, preferably overnight, to allow the cheesecake to firm up and flavors to meld.
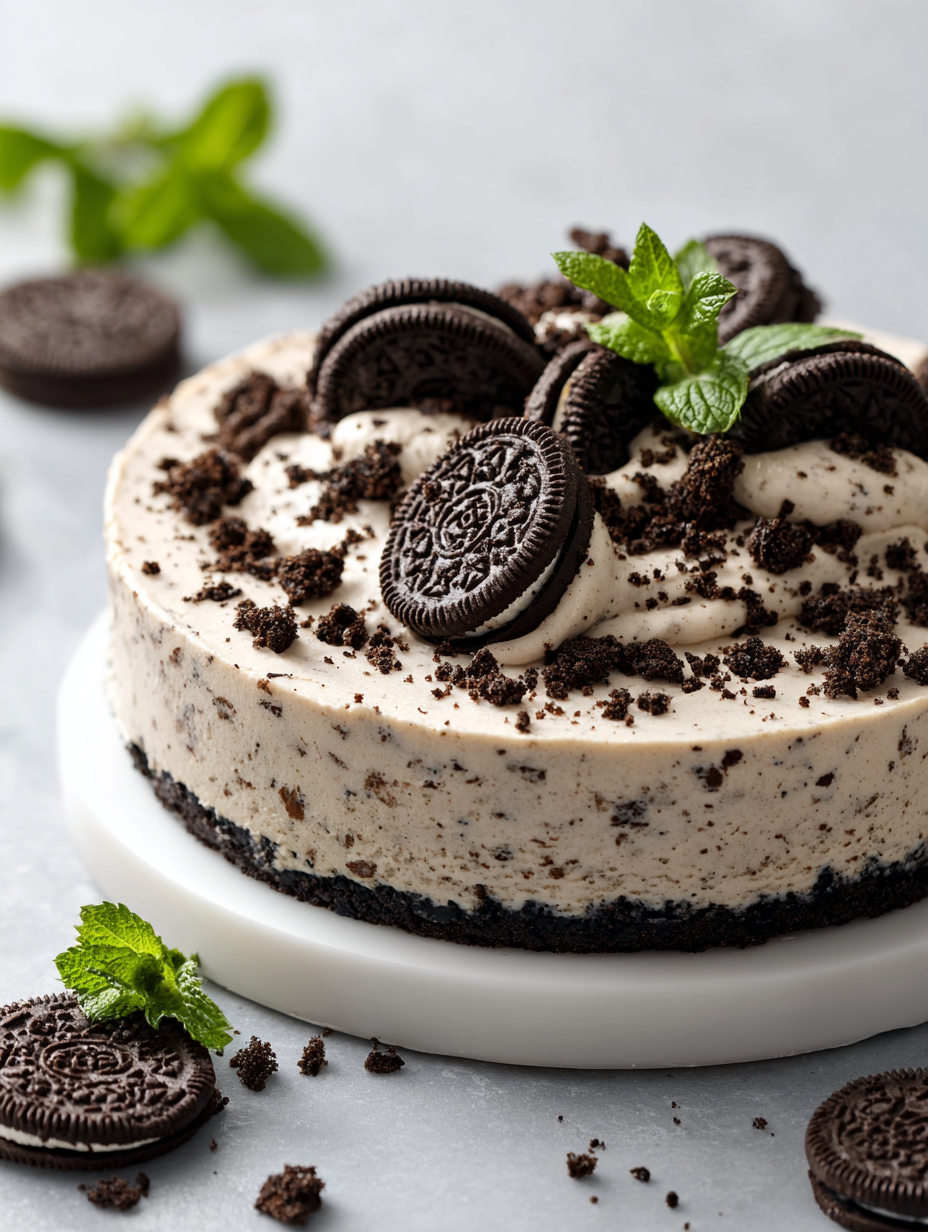
- Final touches: before serving, optionally decorate with extra crushed Oreos or a drizzle of chocolate. Keep refrigerated until ready to cut and serve.
Refrigerate the cheesecake for at least 4 hours or overnight. Before serving, remove from the springform pan carefully, slice with a warm knife for clean cuts, and add any toppings. Serve chilled for best texture.
How to Know It’s Done
- Crust is firm and holds shape when pressed.
- Filling is set with a slight wobble in the center but not liquid.
- Appearance is smooth, with no cracks or looseness on the surface.
No Bake Oreo Cheesecake
Ingredients
Equipment
Method
- Place the Oreo cookies in a zip-top bag and crush them with a rolling pin until mostly fine, leaving some larger chunks for texture. Set aside.
- Pour the crushed Oreos into a mixing bowl, then add the melted butter and stir until evenly coated. This creates the cookie base for your cheesecake.
- Press the Oreo mixture firmly into the bottom of a springform pan, using the back of a spoon or a flat-bottomed glass to create an even crust. Chill in the fridge for 15 minutes to set.
- In a large bowl, beat the softened cream cheese and sugar together until smooth and fluffy, about 2 minutes. This forms the creamy filling's base.
- In a separate bowl, whip the heavy cream with vanilla extract until soft peaks form, about 3-4 minutes. The cream should hold gentle peaks and shimmer slightly.
- Gently fold the whipped cream into the cream cheese mixture, being careful not to deflate the air. Mix until just combined, then fold in 8 crushed Oreos for extra crunch.
- Pour the smooth filling over the chilled crust, spreading it evenly with a spatula. Cover the pan loosely with plastic wrap and refrigerate for at least 4 hours or overnight to set.
- Once set, run a warm knife around the edges of the cheesecake for clean slices. Decorate with extra crushed Oreos or chocolate drizzle if desired.
- Slice and serve chilled, enjoying the creamy texture combined with crunchy cookie bits in every bite.
Tips for perfect no bake cheesecake
- Bolded mini-head: Chill the crust thoroughly—cold butter helps it set into a firm base, preventing cracks later.
- Bolded mini-head: Use room temperature cream cheese—softened cheese mixes smoothly, avoiding lumps in your filling.
- Bolded mini-head: Whip the cream to soft peaks—look for a gentle shimmer and slight curl on the whisk, for airy texture.
- Bolded mini-head: Fold ingredients gently—preserve air in the whipped cream for a light, fluffy cheesecake.
- Bolded mini-head: Don’t overmix once combined—stir just enough to combine, to keep the filling smooth and avoid cracks.
- Bolded mini-head: Chill the assembled cheesecake at least 4 hours—this allows it to firm up and flavors to meld beautifully.
- Bolded mini-head: For clean slices, dip your knife in hot water between cuts—smooth, crack-free servings every time.
Common mistakes and how to fix them
- FORGOT to chill the crust—fix by refrigerating for at least 15 minutes before filling.
- DUMPED too much liquid into the filling—correct by folding in more whipped cream to balance.
- OVER-TORCHED the edges—prevent by checking oven or using a water bath for even baking.
- SKIPPED the fridge rest—ensure cheesecake firms up by chilling at least 4 hours or overnight.
Quick fixes and pantry swaps
- When mixture is too runny, splash in more whipped cream to stiffen.
- If crust crumbles, patch with a bit more melted butter and press firmly again.
- Splash a little hot water on the knife before slicing for cleaner cuts.
- When cheesecake cracks, shield with a dusting of cocoa powder or whipped topping.
- DUMPED too much liquid? Rescue with extra whipped cream folded in gently.
Prep, store, and reheat tips
- Prepare the crust and make the filling up to 24 hours in advance for best texture and flavor. Keep covered in the fridge, where the rich aroma of vanilla and chocolate will develop.
- The cheesecake can be stored tightly wrapped in plastic wrap or in an airtight container for up to 3 days. Expect the texture to firm up slightly and the flavors to meld into a more rounded sweetness.
- Refrigerate the cheesecake for at least 4 hours or preferably overnight. The chilled texture should be firm but creamy; a gentle jiggle in the center indicates readiness.
- To reheat, serve straight from the fridge. If you prefer it slightly softer, let it sit at room temperature for 10–15 minutes—listen for that faint, inviting aroma of vanilla and chocolate as it warms.
Top questions about no bake Oreo cheesecake
1. Can I use pre-whipped cream?
You can use store-bought or homemade whipped cream, but real whipped cream gives it a lighter, fluffier texture. Just make sure it’s well-whipped and soft enough to fold in gently.
2. Can I swap the cream cheese?
Yes, you can substitute cream cheese with mascarpone for a richer, creamier flavor, or a dairy-free cheese if needed. Keep in mind, it may alter the texture slightly.
3. Can I use different cookies?
Absolutely. You can replace Oreo cookies with chocolate digestives or graham crackers crushed into crumbs. Each will give a slightly different flavor and crunch, but still delicious.
4. How can I make this dairy-free?
For a dairy-free version, substitute butter with coconut oil in the crust and use coconut cream instead of heavy cream. The flavor will be a bit more coconut-forward but just as satisfying.
5. Can I make it ahead?
You can prepare the crust and filling a day ahead. Keep them covered in the fridge. The cheesecake benefits from resting overnight to develop a richer flavor and firmer texture.
6. What if my cheesecake cracks?
If your cheesecake is too soft, extend the chilling time. If cracks appear, smooth over with whipped cream or a drizzle of chocolate before serving.
7. How do I get clean slices?
Use a warm (hot water) knife to slice through the cheesecake for clean cuts. Wipe the blade between slices for the best presentation.
8. How do I whip the cream properly?
Ensure the whipped cream is just soft peaks before folding. Over-whipping can make it grainy, while under-whipping won’t provide enough structure.
9. What if my crust is uneven?
If you forget to crush the Oreos finely enough, the crust may be uneven. Fix by pressing smaller crumbs more firmly into the pan and chill again.
10. My filling is too runny—what now?
If the filling feels runny, fold in more whipped cream or chill it longer. If it’s too thick, gently fold in a splash of milk or cream to loosen.
This no bake Oreo cheesecake is more than just a quick fix; it’s a reminder that simplicity can be a form of indulgence. In moments when the oven feels like too much, this creamy, crunchy treat offers comfort with minimal fuss. It’s a dessert that invites nostalgia while fitting effortlessly into busy days.
Sharing this dessert feels like passing on a secret—one that’s rich in flavor but easy to make. Whether it’s for a last-minute gathering or a quiet night in, it’s a sweet way to celebrate the little moments. Sometimes, the simplest recipes leave the biggest impression, and this one is no exception.

Hi, I’m Ruby Thorn, the home cook behind The Tender Mess. Join me on the journey of Embracing the mess, fearlessly create —because in the kitchen, the mess sometimes leads to magic.