
After a hectic week filled with deadlines and chaos, I find myself craving something sweet but simple—these no-bake chocolate truffles are my go-to. They turn just a handful of ingredients into a small, calming ritual that I can do in my pajamas, no oven required. There’s a quiet joy in rolling them between my hands, feeling the rich cocoa and melting butter come together.
Making these truffles feels like a tiny act of self-care, a moment where I pause and create something comforting without fuss. It’s surprising how a few spoonfuls of chocolate, a splash of cream, and a sprinkle of love can transform into bites of pure solace. Especially when life feels a little too loud, these little truffles remind me that sometimes, simple is enough.
Using this no-bake chocolate truffles recipe as a way to unwind after a chaotic week, turning simple ingredients into a small, soothing ritual that offers comfort and a moment of joy.
A Sweet Escape from Chaos
- I love how these truffles turn a dull afternoon into a little celebration, just by rolling chocolate into tiny balls.
- There’s a nostalgic rush I get when I smell the cocoa powder—reminds me of childhood treats, simple and honest.
- Making these is a small act of rebellion against the fussiness of fancy desserts, all about ease and pure flavor.
- Every time I dip my fingers into the mixture, I feel a quiet, grounding satisfaction—like a tiny victory in my day.
A Tiny Ritual of Comfort
- This recipe came about during a weekend when I was digging through my pantry, looking for something quick but rich. I remembered how my grandma used to keep a tin of store-bought truffles in the fridge, a secret stash she’d sneak from me and my siblings. That nostalgic moment made me want to recreate that cozy feeling with ingredients I could control. Now, it’s become my little ritual whenever I need a sweet, no-fuss escape from the daily grind.
- heading
- story_type
Truffle Origins and Fun Facts
- Legend has it that truffles were originally a luxury reserved for European aristocracy, with early recipes dating back to the Renaissance.
- The term ‘truffle’ may derive from the Latin word ‘tuber’, meaning swelling or lump, referencing their underground growth.
- Modern no-bake versions emerged in the mid-20th century as a quick, decadent treat for busy households without oven access.
- Chocolate truffles gained international fame in France, where chocolatiers perfected their rich, ganache-filled centers.
Key Ingredients and Tips
- Chocolate: I prefer a good quality dark chocolate with a rich, cocoa aroma—makes the truffles intensely flavorful. You can swap in semi-sweet if you like a sweeter bite, but skip the overly sweetened varieties for depth.
- Heavy Cream: It creates that luscious, melt-in-your-mouth texture—trust me, full-fat makes all the difference. If you’re dairy-free, coconut milk gives a similar creaminess, though it adds a slight coconut note.
- Butter: Adds richness and helps bind everything together—use unsalted for control over saltiness. Margarine can work in a pinch but won’t melt as smoothly, affecting the texture.
- Cocoa Powder: I use Dutch-processed for its smooth, mellow flavor, but natural cocoa works too—just expect a slightly more tangy taste. Sift it well to avoid lumps that can ruin the smooth coating.
- Sweetener (optional): I sometimes add a touch of honey or maple syrup for extra depth, especially if my chocolate isn’t quite sweet enough. Adjust based on your chocolate’s sweetness and your taste buds.
- Flavorings (vanilla, salt): A splash of vanilla amplifies the chocolate’s richness, and a tiny pinch of salt balances the sweetness—don’t skip these to keep the flavor layered and rounded.
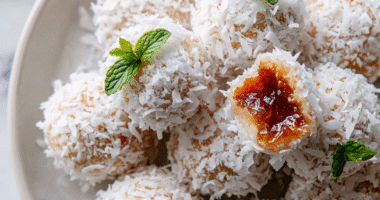
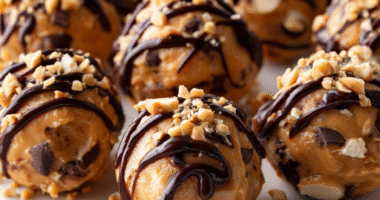
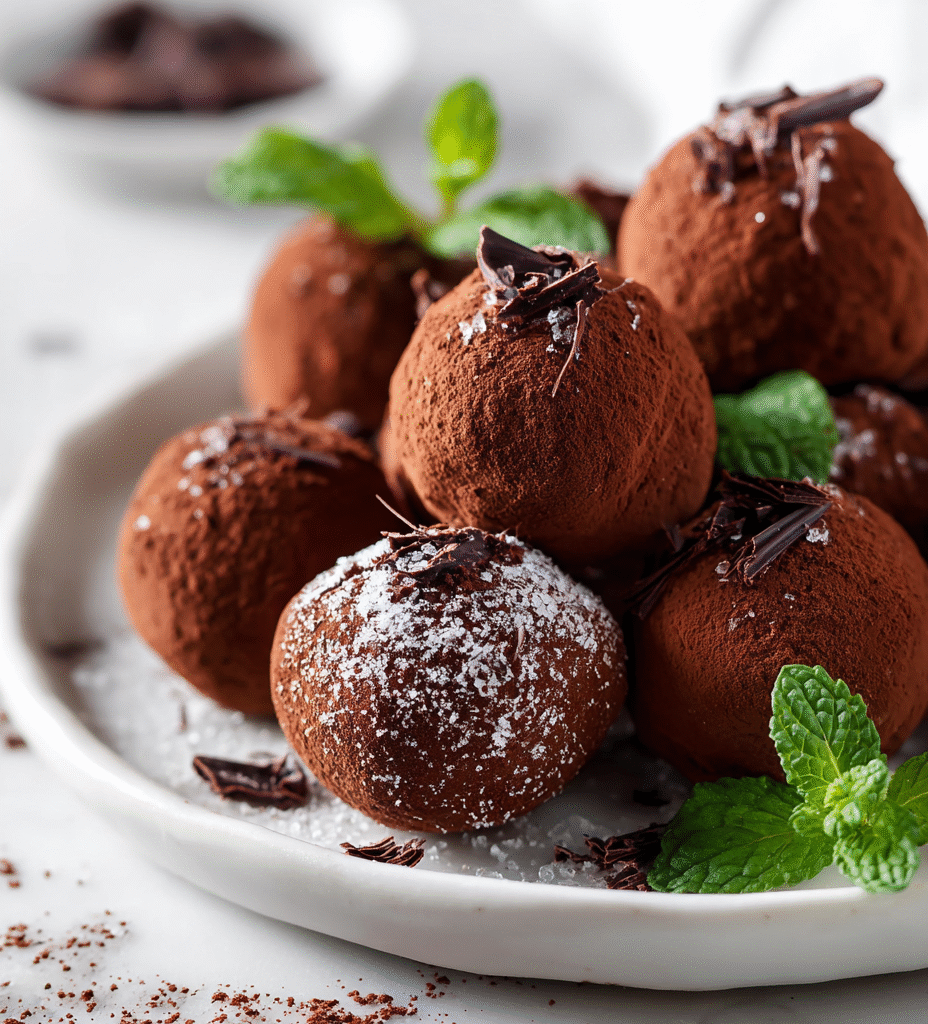
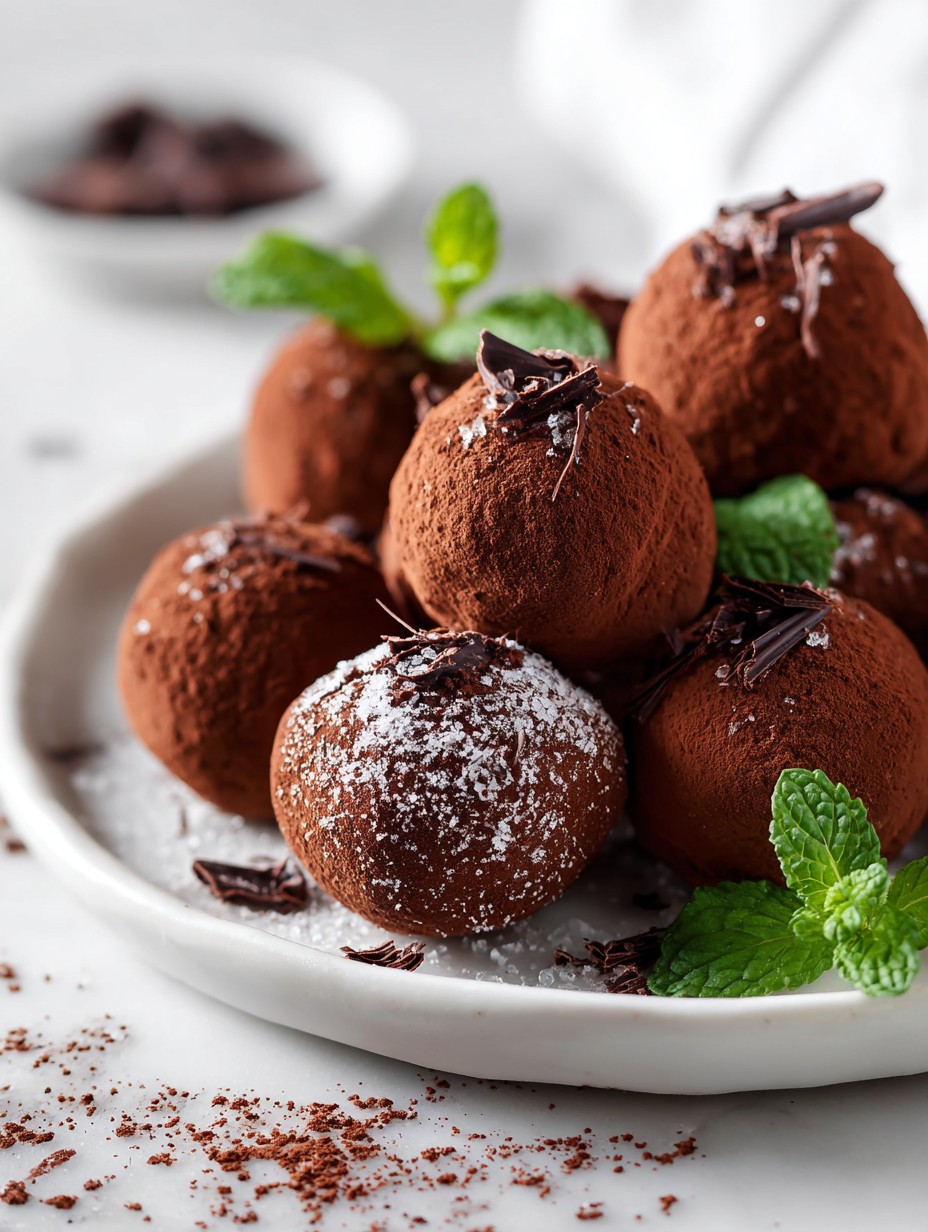
- Coatings (cocoa, nuts, sprinkles): Rolling the truffles in cocoa is classic, but crushed nuts or sprinkles add texture and visual flair. Toasting nuts briefly beforehand brings out their aroma and makes them crunchier.
Spotlight on key ingredients
Chocolate:
- I prefer a good quality dark chocolate with a rich, cocoa aroma—makes the truffles intensely flavorful. You can swap in semi-sweet if you like a sweeter bite, but skip the overly sweetened varieties for depth.
- Heavy Cream: It creates that luscious, melt-in-your-mouth texture—trust me, full-fat makes all the difference. If you’re dairy-free, coconut milk gives a similar creaminess, though it adds a slight coconut note.
- Cocoa Powder: I use Dutch-processed for its smooth, mellow flavor, but natural cocoa works too—just expect a slightly more tangy taste. Sift it well to avoid lumps that can ruin the smooth coating.
Butter and Coatings:
- Butter: Adds richness and helps bind everything together—use unsalted for control over saltiness. Margarine can work in a pinch but won’t melt as smoothly, affecting the texture.
- Coatings (cocoa, nuts, sprinkles): Rolling the truffles in cocoa is classic, but crushed nuts or sprinkles add texture and visual flair. Toasting nuts briefly beforehand brings out their aroma and makes them crunchier.
Notes for ingredient swaps
- Dairy-Free: Swap heavy cream for coconut cream or almond milk. Expect a slightly thinner, coconut-y richness.
- Vegan Option: Use dairy-free chocolate and coconut milk. The texture stays smooth, but flavor might be a touch fruitier.
- Sweetener Alternatives: Replace sugar with honey or maple syrup for a more complex, caramel-like flavor. Adjust to taste.
- Nut Coatings: Use crushed almonds, hazelnuts, or toasted coconut flakes instead of traditional nuts for varied crunch and aroma.
- Cocoa Powder: Dutch-processed cocoa gives a smoother, mellower taste; natural cocoa adds a brighter, more tangy note. Sift well.
- Flavor Boost: Add a pinch of chili powder or espresso powder to intensify the chocolate’s depth. Use sparingly to avoid overpowering.
- Chocolate Type: Mix dark and semi-sweet for layered bitterness and sweetness. Milk chocolate can be too sweet, but works for kids.
Equipment & Tools
- Heatproof mixing bowl: To melt the chocolate evenly without burning.
- Double boiler or microwave: For gentle, controlled melting of chocolate.
- Spoon or small scoop: To portion and shape the truffles uniformly.
- Parchment-lined baking sheet: To set the shaped truffles without sticking.
- Sifter or fine sieve: To dust cocoa powder smoothly over the truffles.
Step-by-step guide to no bake truffles
- Equipment & Tools: Use a heatproof mixing bowl for melting chocolate, a spoon or spatula for mixing, and a baking sheet lined with parchment for chilling. A small scoop or teaspoon helps with uniform sizing.
- Melt the chocolate: Chop 200g of dark chocolate into small pieces. Place in the heatproof bowl. Set over a double boiler or microwave in 30-second bursts, stirring until smooth. Aim for 45°C/113°F, just melted but not overheated.
- Combine ingredients: Pour 100ml of heavy cream into the melted chocolate. Add a teaspoon of vanilla extract and a pinch of salt. Mix well until glossy and uniform. If the mixture looks dull or separates, gently warm and stir again.
- Chill the mixture: Cover the bowl with plastic wrap. Let it sit in the fridge for 1 hour, or until firm but still pliable. The mixture should be scoopable but not frozen solid.
- Shape the truffles: Use a small spoon or scoop to portion out about 1 teaspoon of mixture. Roll between your palms into a ball, about 2 cm diameter. Place on the prepared baking sheet. Repeat until all mixture is used.
- Optional coatings: Roll each ball in sifted cocoa powder, crushed nuts, or sprinkles. For a glossy finish, you can also dip in melted chocolate and set on parchment.
- Rest & set: Chill the shaped truffles for at least 30 minutes. This allows the coating to firm up and the flavors to meld. Keep in an airtight container in the fridge.
- Final check: The truffles should be firm but yield slightly when pressed. The coating should be dry and matte, with no stickiness or gloss that indicates melting.
- Serve & enjoy: Bring to room temperature before serving if refrigerated. The truffles will soften slightly, releasing a rich, cocoa aroma. Perfect for quick indulgence or gifting.
Chill the shaped truffles in the fridge for at least 30 minutes to firm up. Serve at room temperature for the best aroma and texture. Present them on a simple plate or store in an airtight container in the fridge, bringing to room temp before serving for optimal flavor.
How to Know It’s Done
- Chocolate mixture is smooth and glossy after melting.
- Truffles hold shape when rolled, not sticky or crumbly.
- Coatings are dry, matte, and set after chilling.
No-Bake Chocolate Truffles
Ingredients
Equipment
Method
- Chop the dark chocolate into small, even pieces to help it melt evenly.
- Place the chopped chocolate in a heatproof mixing bowl and set aside.
- Warm the heavy cream until just bubbling around the edges—either in a microwave in short bursts or on the stovetop using a double boiler.
- Pour the hot cream over the chopped chocolate, letting it sit for a minute to soften the chocolate.
- Gently stir the mixture with a spoon or spatula until it becomes smooth, glossy, and fully combined—this is your luscious ganache.
- Add a teaspoon of vanilla extract and a pinch of salt to the ganache, stirring again until well incorporated.
- Cover the bowl with plastic wrap and refrigerate for about an hour, or until the mixture firms up enough to scoop and shape.
- Once chilled, scoop out small portions of the ganache with a spoon or small scoop, then roll between your palms into tiny balls.
- Place the shaped truffles on a parchment-lined baking sheet. Use a sifter to dust them generously with sifted cocoa powder for a classic finish.
- Chill the dusted truffles for another 30 minutes to set the coating, then bring to room temperature before serving to enhance flavor and aroma.
Notes
Pro Tips for Perfect Truffles
- Use high-quality chocolate for a pronounced cocoa flavor—melts smoothly and coats beautifully.
- Slightly underheat the cream and chocolate mixture; it will continue to melt off-heat, ensuring a glossy finish.
- Chill the mixture until just firm; over-chilling makes rolling sticky and frustrating.
- When rolling, keep hands slightly cool or damp to prevent sticking and mess.
- Dust cocoa powder through a fine sieve for an even, matte finish on each truffle.
- For a shinier coating, dip chilled truffles in melted chocolate then set on parchment and refrigerate briefly.
- To enhance flavor, toast nuts lightly before crushing for coatings—aroma intensifies and adds crunch.
Common mistakes and how to fix them
- FORGOT to sift cocoa powder → Sift cocoa to prevent lumps and ensure smooth coating.
- DUMPED hot mixture directly into fridge → Cool slightly before chilling to avoid condensation and separation.
- OVER-TORCHED chocolate → Melt chocolate gently in low heat or microwave in short bursts, stirring often.
- SKIPPED chilling step → Chill until firm to make rolling easier and prevent melting on hands.
Quick Fixes and Swaps
- When mixture is too thick → Splash in a little warm cream and stir until smooth.
- If truffles stick to your hands → Splash with cold water or chill mixture briefly for easier handling.
- When cocoa coating looks dull → Patch with a light dusting of fresh cocoa powder for a matte finish.
- Splash melted chocolate too thick → Reheat gently over low heat or in short microwave bursts, stirring frequently.
- When mixture is too runny → Rescue with a few more crushed cookies or a spoonful of room-temperature butter to firm it up.
Prep, store, and reheat tips
- Chill the chocolate mixture in advance; it firms up enough for easy rolling, about 1 hour in the fridge, and helps develop flavor.
- Truffles can be shaped a day ahead—store them in an airtight container in the fridge for up to 3 days, which deepens the cocoa aroma.
- For longer storage, freeze the uncoated or coated truffles for up to 2 weeks. Wrap tightly to prevent freezer burn and flavor transfer.
- Refrigerate or freeze the truffles; bring to room temperature before serving. The texture softens and the flavor blooms with a slight warmth.
- Reheating isn’t necessary, but if the coating feels too firm after chilling, let the truffles sit at room temperature for 10 minutes until slightly softer and fragrant.
Top questions about no bake truffles
1. Can I use any chocolate for these truffles?
Use high-quality dark chocolate with a rich cocoa aroma for the best flavor. Cheaper chocolates can make the truffles taste dull.
2. How long should I chill the chocolate mixture?
Chilling the mixture for at least an hour helps it firm up, making it easier to roll without sticking.
3. Can I make these dairy-free?
Yes, coconut milk or almond milk can replace heavy cream. Expect a slightly different texture and a hint of coconut or nutty flavor.
4. How do I know when the mixture is ready for shaping?
Mix until the mixture is glossy and smooth, with no lumps. It should be thick enough to hold its shape when scooped.
5. What coatings can I use for the truffles?
Dust the truffles with sifted cocoa powder or roll in crushed nuts or sprinkles for variety and texture.
6. My mixture is too soft to roll, what do I do?
If the mixture is too soft, chill it longer or add a little crushed cookie or extra cocoa powder to firm it up.
7. How should I store these truffles?
Store the truffles in an airtight container in the fridge for up to 3 days, or freeze for longer storage.
8. Should I bring the truffles to room temperature before serving?
Bring refrigerated truffles to room temperature for 10-15 minutes before serving to enhance aroma and flavor.
9. How do I get a shiny coating on the truffles?
Dipping the chilled truffles in melted chocolate gives a shiny, crisp coating. Chill briefly afterward to set the shell.
10. Why did my chocolate coating crack and how do I fix it?
If the chocolate cracks when dipping, warm it slightly or add a small amount of vegetable oil for better flow.
These no-bake chocolate truffles are a tiny reminder that sometimes, the simplest ingredients can become something unexpectedly comforting. They’re perfect for when life feels chaotic and you need a quick, sweet moment that doesn’t demand much fuss. Plus, they’re a quiet act of kindness—something you can do for yourself, or share with someone who could use a little sweetness.
In the end, it’s not just about the chocolate or the ease, but the small ritual of shaping and savoring. These truffles have a way of grounding me, even on the busiest days, with their rich smell and melt-in-your-mouth texture. It’s surprising how a little chocolate can bring a quiet pause when everything else feels rushed.

Hi, I’m Ruby Thorn, the home cook behind The Tender Mess. Join me on the journey of Embracing the mess, fearlessly create —because in the kitchen, the mess sometimes leads to magic.