This no bake cornflake cookies recipe is my quick fix for when the craving hits and I need something sweet without the fuss of turning on the oven. It’s honest, simple, and packed with memories of chaotic afternoons helping my grandma, who’d always have a jar of cornflakes and a mountain of melted marshmallows on the counter. The smell of toasted corn and the sticky feel of melted marshmallows bring back those messy, joyful moments.
What I love most about this recipe is how forgiving it is—no precise measurements or fancy ingredients needed. It’s a bit rough around the edges, just like those childhood afternoons, and that’s what makes it so comforting. Whether you’re in a rush or just craving a nostalgic treat, these cookies come together fast and taste like a warm hug from the kitchen of your past.
This recipe is my go-to for when I need a quick, nostalgic treat that’s honest and unpolished, just like those chaotic afternoons from childhood when I’d help my grandma in her messy kitchen, smelling of caramel and melted chocolate.
Nostalgic Crunch in Every Bite
- Helping my grandma in her cluttered kitchen, I learned that simple treats can carry a universe of memories.
- Cracking open a jar of fresh cornflakes always takes me back to those chaotic, sticky afternoons of childhood.
- There’s a wild, carefree joy in making these cookies without fuss—just melted marshmallows and cornflakes, no rules.
- Every time I make these, I feel a rush of pride for capturing that imperfect, honest sweetness from my past.
The story behind this recipe
- This recipe sprang from a lazy afternoon in my childhood kitchen, where I’d sit on the counter watching my mom toss cornflakes into melted marshmallows. It’s funny how something so simple can feel like a secret handshake to childhood freedom and flavor. Whenever I need a quick, no-fuss treat, I think of those warm, sticky afternoons full of laughter and mess.
- Making these cookies brings back that chaotic joy—no measuring, no oven, just instinct and memory. They remind me that sometimes, the best sweets are the easiest, most honest ones—kind of like life’s little shortcuts that turn out just right.
- heading: The story behind this recipe
Historical & Cultural Tidbits
- These no bake cookies became a staple during the Great Depression, using pantry staples to create something sweet when ovens were scarce.
- Cornflakes were invented in 1894 as a health food, and quickly found their way into countless recipes, including this simple treat.
- This recipe is a childhood classic in many households, especially in the Midwest, where corn and marshmallows are common kitchen characters.
- The charm of no bake cookies lies in their ability to bring families together quickly, turning simple ingredients into shared memories.
Key Ingredient Insights
- Marshmallows: I love the gooey stretch of melted marshmallows, which cling to everything; skip the mini ones if you want less mess.
- Cornflakes: I prefer the classic crunchy texture, but you can try toasted oats for a nuttier bite that adds depth.
- Butter: A splash helps melt marshmallows smoothly, but for a richer flavor, use browned butter if you’re feeling indulgent.
- Vanilla extract: Just a tiny splash brightens the sweetness—don’t skip it, even if it seems subtle at first.
- Optional add-ins: Nuts or dried fruit can be tossed in, but I like them plain—the simplicity keeps the nostalgic feel intact.
- Cooking spray: A light spritz on your hands makes shaping easier and keeps the sticky mess at bay.
- Sweetener: Honey or golden syrup can replace marshmallows if you want a different chew, but it’ll change the classic gooey texture.
Spotlight on key ingredients
Marshmallows:
- I love their gooey stretch when melted, which clings to everything; skip mini ones if you want less mess.
- Cornflakes: I prefer the classic crunch, but toasted oats give a nuttier bite that adds depth.
Cornflakes:
- Their crisp snap and toasted aroma make each bite nostalgic, and they hold up well without getting soggy.
- They can become softer if overmixed or exposed to moisture—work quickly after melting.
Notes for ingredient swaps
- Dairy-Free: Use coconut oil instead of butter for richness without dairy, but expect a slightly different mouthfeel and flavor.
- Vegan Marshmallows: Swap traditional marshmallows for vegan versions—these melt similarly but might have a subtler sweetness.
- Sweetener Alternatives: Honey or agave syrup can replace marshmallows for a different chewiness and a more floral or earthy note.
- Cornflake Variations: Try toasted oats or puffed rice for a nuttier or lighter crunch, but expect different texture profiles.
- Add-ins: Nuts, dried fruit, or chocolate chips can be mixed in—just keep in mind they alter the classic simplicity and may add moisture.
- Oil Sprays: Use a light spray of neutral oil instead of cooking spray to coat hands—this helps shape cookies without added flavor.
- Flavor Enhancers: A pinch of cinnamon or a splash of lemon juice can brighten the cookies, adding a new dimension to this nostalgic treat.
Equipment & Tools
- Large mixing bowl: For mixing the coated cornflakes evenly.
- Saucepan: To melt marshmallows and butter smoothly.
- Wooden spoon: For stirring the marshmallow mixture and folding in the cornflakes.
- Parchment paper-lined baking sheet: To set the cookies without sticking.
- Measuring cups and spoons: To accurately measure ingredients and ensure consistency.
- Spray bottle of cooking spray: To lightly coat hands for shaping and prevent sticking.
Step-by-step guide to no bake cookies
- Gather your equipment: a large mixing bowl, a saucepan, a wooden spoon, and a baking sheet lined with parchment paper. The saucepan is for melting marshmallows, the bowl for mixing, and the sheet for setting cookies.
- Measure about 4 cups of cornflakes and set aside. Use a standard measuring cup; don’t eyeball this part, it’s the backbone of the crunch.
- In the saucepan, melt 3 tablespoons of butter over medium heat (about 160°C / 320°F). Watch for a gentle crackle, then add 10 oz of marshmallows. Stir constantly until fully melted and smooth, about 2-3 minutes.
- Once melted, remove from heat. Quickly stir in 1 teaspoon of vanilla extract and a pinch of salt if you like. This is the flavor boost that ties everything together.
- Pour the marshmallow mixture over the cornflakes in the bowl. Using the wooden spoon, gently fold until all the flakes are coated—don’t crush them, just coat evenly. The mixture should be sticky but manageable.
- Scoop the mixture onto the prepared baking sheet. Use a spoon or your hands (sprayed lightly with cooking spray for less mess) to shape into mounds or press into a pan if you prefer bars. Don’t pack too tightly unless you want dense cookies.
- Let the cookies sit at room temperature for about 30 minutes. The marshmallows will firm up as they cool, giving that perfect sticky-crunchy texture. No refrigeration needed unless you live in a hot climate.
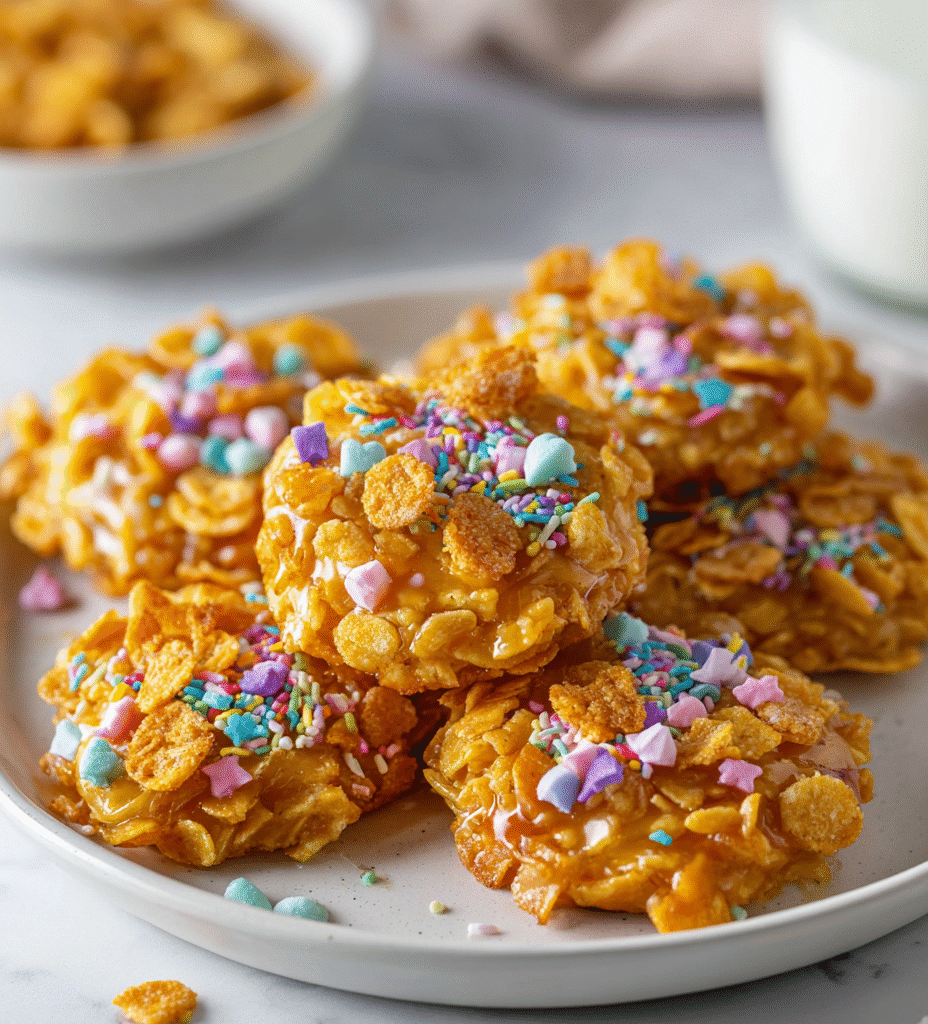
- Once set, carefully peel the cookies away from the parchment. If they’re sticking, a quick spray of water on your hands helps shape or separate them. Slice into squares or leave as rustic mounds.
Allow the cookies to cool and set at room temperature for 30 minutes. Then, peel from the parchment and cut into squares if desired. Serve immediately or store in an airtight container for up to 3 days.
How to Know It’s Done
- Color: marshmallow mixture should be glossy and just starting to turn golden.
- Texture: cookies should hold shape but remain chewy with a crunchy exterior.
- Appearance: edges should be firm and slightly shiny, no greasy spots or sogginess.
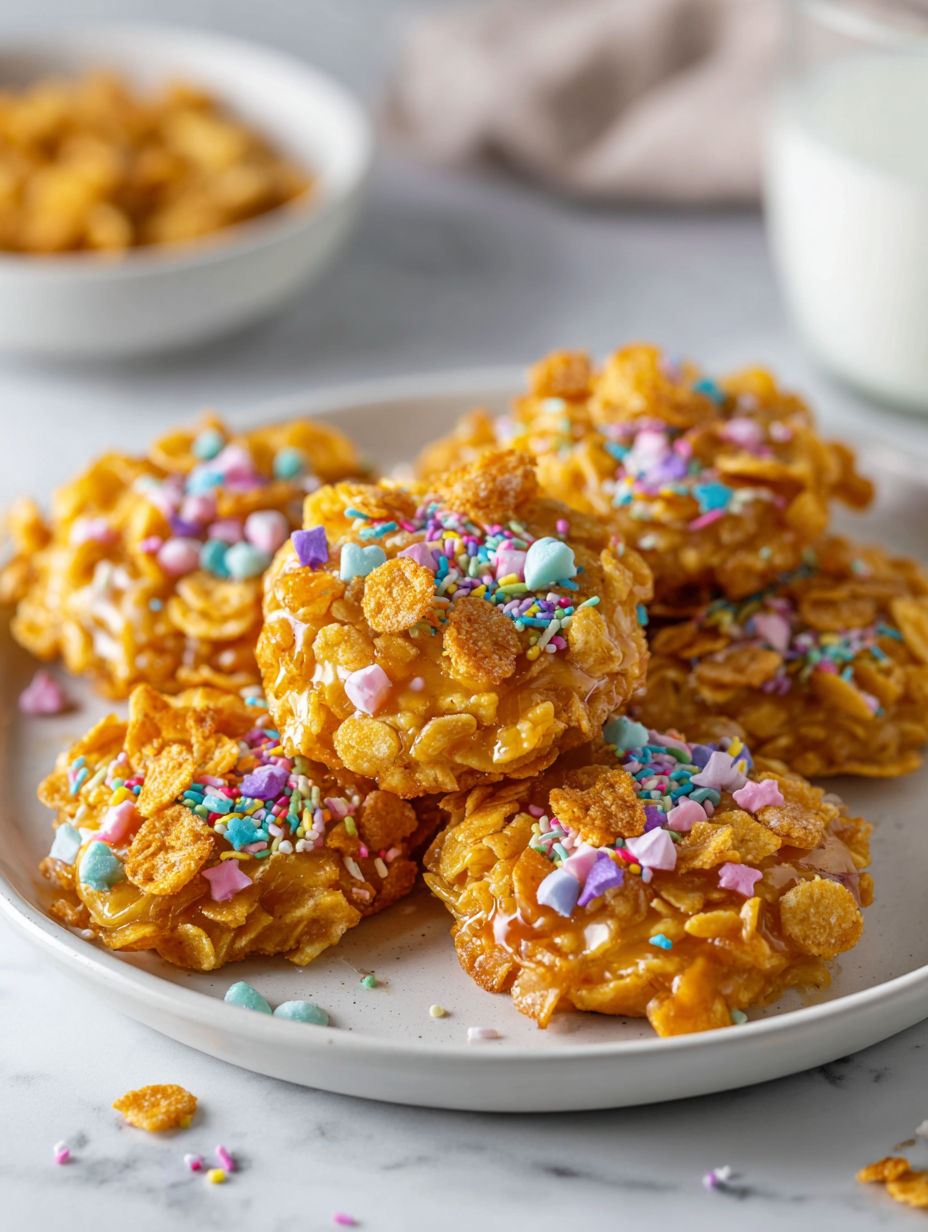
No Bake Cornflake Cookies
Ingredients
Equipment
Method
- Gather your equipment: a large mixing bowl, a saucepan, a wooden spoon, and a parchment-lined baking sheet. Measure out your cornflakes and set aside.
- In the saucepan, melt the butter over medium heat, listening for a gentle crackle and smelling the rich aroma—that’s when it’s just right.
- Add the marshmallows to the melted butter, stirring constantly until they are fully melted and the mixture is glossy and smooth, about 2-3 minutes.
- Remove the saucepan from heat, then stir in the vanilla extract to brighten the flavor. If desired, add any optional mix-ins now.
- Pour the melted marshmallow mixture over the cornflakes in the large bowl. Gently fold everything together with the wooden spoon until the flakes are evenly coated, being careful not to crush them.
- Using a spoon or lightly sprayed hands, scoop portions of the mixture and shape into mounds or press into a pan to make bars. Place them on your prepared parchment-lined sheet.
- Let the cookies sit at room temperature for about 30 minutes until they firm up and develop their chewy-crunchy texture.
- Once set, peel the cookies from the parchment paper and enjoy! Store any leftovers in an airtight container at room temperature for up to 3 days.
Notes
Pro tips for perfect cookies
- Bold marshmallows: Use fresh marshmallows for maximum stretch and gooiness; stale ones won’t melt as smoothly.
- Crunch test: Gently press a cookie; it should be firm but yield slightly, indicating proper setting.
- Mix lightly: Fold in cornflakes carefully to keep them crunchy—overmixing crushes the flakes and makes cookies dense.
- Temperature check: When melting marshmallows, watch for a gentle bubbling—don’t let it boil, or it can burn.
- Shape quickly: Use wet hands or spray to shape the mixture—sticky hands make the process smoother and less messy.
- Cooling cues: Let cookies sit at room temp until they’re firm—about 30 minutes—so they don’t fall apart when handled.
- Storage tip: Keep cookies in an airtight container at room temp—stay crispy for 2-3 days, softening if exposed to humidity.
Common mistakes and how to fix them
- FORGOT to prepare your parchment-lined tray—use a clean, flat surface for setting cookies.
- DUMPED marshmallow mixture too hot—wait until it stops crackling and cools slightly before mixing.
- OVER-TORCHED marshmallows—remove from heat immediately if you smell burning, to prevent bitterness.
- MISSED stirring in vanilla—add it quickly after removing from heat to preserve the bright flavor.
Quick Fixes & Pantry Swaps
- When mixture is too sticky, splash a little water on your hands before shaping.
- If cookies crackle loudly when melting marshmallows, lower heat to prevent burning.
- Splash a tiny bit of vanilla if flavor seems flat after mixing.
- Patch cracked cookies with a dab of melted marshmallow to reattach pieces.
- Shield your spoon from sticking by greasing it lightly with cooking spray.
Prep, store, and reheat tips
- Prepare the cookie mixture ahead of time by melting marshmallows and butter; keep it warm to avoid setting prematurely.
- Cookies can be stored in an airtight container at room temperature for up to 3 days, maintaining their chewy-crunchy texture.
- For longer storage, freeze the cookies in a sealed container for up to a month; let them thaw at room temperature before serving.
- Reheat cookies briefly in the microwave (10-15 seconds) if you prefer a softer, warm treat—watch for melting marshmallows.
- When reheating, the aroma of toasted corn and melted marshmallow will re-emerge, inviting you back to that nostalgic kitchen.
Top questions about no bake cookies
1. Can I use regular marshmallows instead of mini ones?
Use mini marshmallows for smoother melting, but regular size will work too—just stir longer.
2. Can I melt butter separately before adding marshmallows?
Yes, you can melt butter first, then add marshmallows; it might take a minute longer to melt fully.
3. How do I prevent the marshmallows from burning?
Stir quickly once marshmallows melt to avoid burning and to keep the mixture smooth.
4. My cookies are too soft—what should I do?
If cookies are too soft, refrigerate for 15-20 minutes to firm them up before serving.
5. Can I use stale cornflakes?
Using fresh cornflakes ensures maximum crunch; stale flakes will be softer and less crisp.
6. Can I prepare the mixture ahead of time?
Yes, melted marshmallow mixture can be stored in the fridge for a day, but it firms up and may be harder to work with.
7. How do I shape sticky cookie mixture easily?
Use a slightly greased spoon or your hands (sprayed with cooking spray) for shaping to prevent sticking.
8. How long do no bake cookies last?
Store cookies in an airtight container at room temperature for up to 3 days; keep away from humidity.
9. My mixture is too stiff—what now?
If the mixture is too thick, add a tiny splash of water or melted butter to loosen it.
10. Can I add extras like nuts or chocolate chips?
For a more indulgent flavor, add a teaspoon of vanilla or a pinch of salt to the mixture before setting.
These cookies are the kind of treat that sneaks up on you with familiar comfort and a little chaos. They remind me that sometimes, the simplest ingredients and a bit of impulsiveness make the best memories—and snacks.
Whenever I make these, I’m transported back to a kitchen full of messy hands and sweet smells. They’re perfect for a quick fix or a lazy afternoon, no fuss required, just honest, crunchy-sweet goodness.

Hi, I’m Ruby Thorn, the home cook behind The Tender Mess. Join me on the journey of Embracing the mess, fearlessly create —because in the kitchen, the mess sometimes leads to magic.