Sometimes, cravings strike out of nowhere, and you need something quick, satisfying, and not complicated. These no-bake nut bars are just that—easy to throw together in a pinch, using ingredients I usually have on hand. They’re perfect for when you want a little sweet crunch without any fuss.
What I love about these bars is how they turn everyday nuts into a moment of comfort. Toasted until golden, they bring a warm, rich aroma that makes the kitchen smell like a cozy bakery. Plus, they’re a nostalgic reminder of childhood treats, but with a grown-up twist of caramelized sweetness and crunchy texture.
No-bake nut bars aren’t just practical—they’re a small act of kindness to your busy day. Whether it’s a quick snack or a last-minute gift, they come together fast, taste deeply satisfying, and leave you with that little feeling of having whipped up something special, even in chaos.
Focusing on how these no-bake nut bars serve as a quick, satisfying fix when cravings hit unexpectedly, highlighting their simplicity and the comforting crunch of toasted nuts that make them feel like a little treat you can whip up in a moment of chaos or nostalgia.
The story behind this recipe
- This recipe came together one chaotic afternoon when I just needed something sweet and crunchy, but didn’t want to turn on the oven. I remembered how my grandma used to toss nuts with honey and let them set—simple, honest, no fuss. That nostalgic crunch stuck with me, and I wanted to recreate it in a quick, no-bake form, perfect for busy days or unexpected guests.
- While experimenting, I realized that toasted nuts add such a deep, warm aroma that instantly makes the kitchen feel cozy. These bars became my go-to for a moment of comfort, especially when I’m craving something homemade but short on time. They’re like a little portable hug—crunchy, sweet, and just enough.
- heading: ‘The story behind this recipe’
Ingredient breakdown
- Honey: It’s my secret to binding everything together—adds a sticky, golden sweetness that’s irresistible. If you want a less sweet version, try maple syrup instead, but watch the flavor shift to earthier notes.
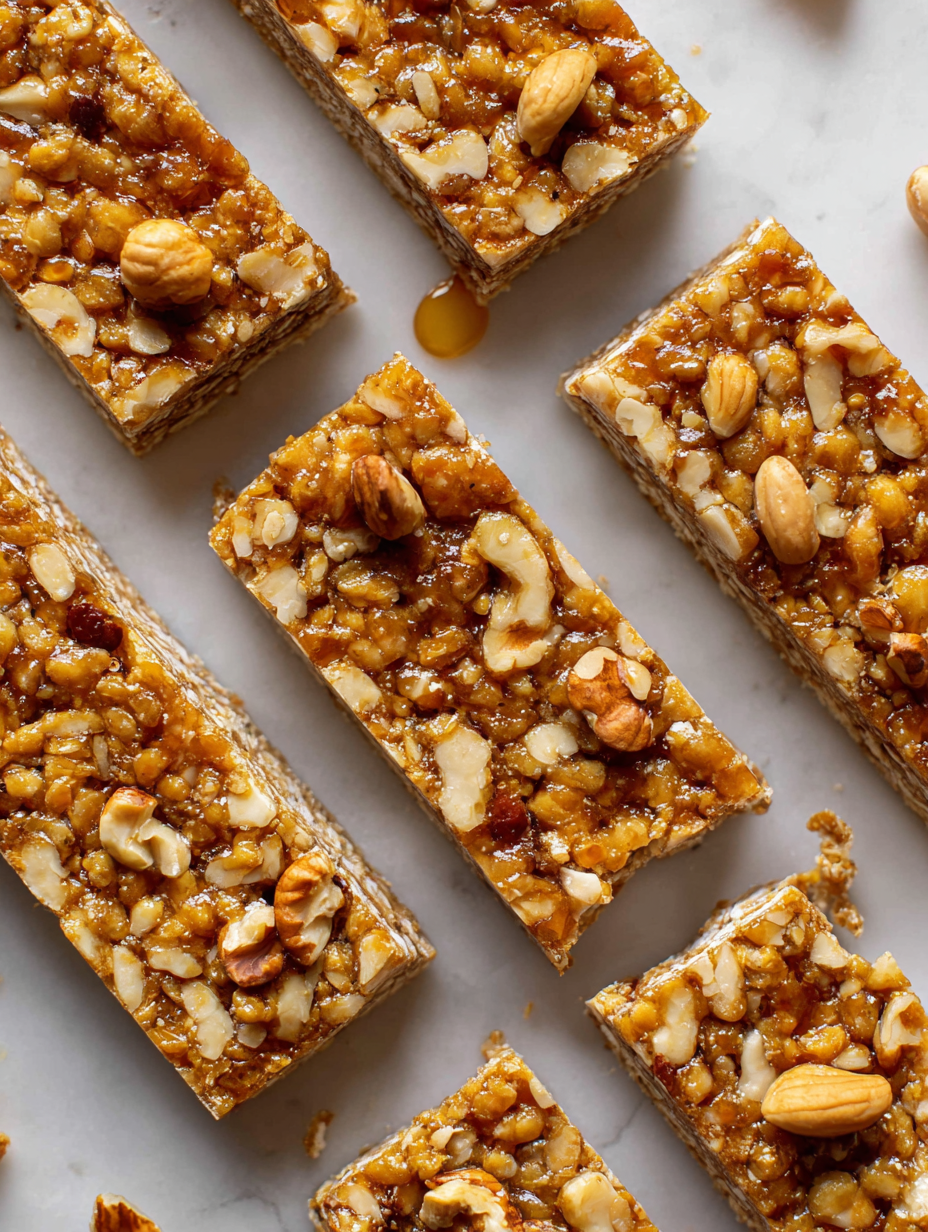
- Mixed Nuts: I prefer a combo of almonds, cashews, and walnuts for their varied crunch and flavor. Feel free to swap in your favorites, but toasting them first really boosts that nutty aroma and crunch.
- Medjool Dates: They’re the glue here, soft and chewy with a caramel-like richness. If dried figs or prunes are all you’ve got, they’ll work too—just chop well and maybe add a touch more honey.
- Dark Chocolate: I love a good 70% for a slight bitterness that balances the sweetness. Swap with milk chocolate if you want it milder, but aim for at least 60% for depth and meltability.
- Sea Salt Flakes: A pinch of flaky sea salt elevates the flavor with a burst of briny contrast. Skip it if you prefer sweeter, or use smoked salt for a smoky twist that’s surprisingly good.
- Coconut Oil: Helps everything set and adds a subtle richness. If you don’t have it, a little butter works, but expect a slightly different texture—less glossy, more crumbly.
Spotlight on key ingredients
Nuts:
- Honey: It’s my secret to binding everything together—adds a sticky, golden sweetness that’s irresistible. If you want a less sweet version, try maple syrup instead, but watch the flavor shift to earthier notes.
- Mixed Nuts: I prefer a combo of almonds, cashews, and walnuts for their varied crunch and flavor. Feel free to swap in your favorites, but toasting them first really boosts that nutty aroma and crunch.
Dates & Chocolate:
- Dates: They’re the glue here, soft and chewy with a caramel-like richness. If dried figs or prunes are all you’ve got, they’ll work too—just chop well and maybe add a touch more honey.
- Dark Chocolate: I love a good 70% for a slight bitterness that balances the sweetness. Swap with milk chocolate if you want it milder, but aim for at least 60% for depth and meltability.
Notes for ingredient swaps
- Sweetener: Maple syrup can replace honey for a less floral, more earthy sweetness. It’s a bit thinner, so adjust quantity slightly.
- Nuts: Use roasted sunflower seeds or pumpkin seeds if you want a milder flavor and a different crunch profile.
- Dates: Dried figs or prunes make good substitutes, adding a slightly different chewiness and a richer, darker flavor.
- Chocolate: Carob chips are a good dairy-free, caffeine-free alternative with a milder cocoa flavor. Expect a slightly different melt.
- Oil: Coconut oil adds a subtle sweetness and gloss, but butter or ghee can be used for a richer, more buttery texture.
- Binding agent: If you’re out of dates, mashed bananas or cooked sweet potato work in a pinch, but will alter taste and texture.
Equipment & Tools
- Square baking dish: Holds the mixture for setting and slicing.
- Saucepan: To gently heat and melt ingredients.
- Spatula: To stir and spread the mixture evenly.
- Parchment paper: For easy removal and clean cuts.
- Knife: To cut the set bars into pieces.
Step-by-step guide to no bake nut bars
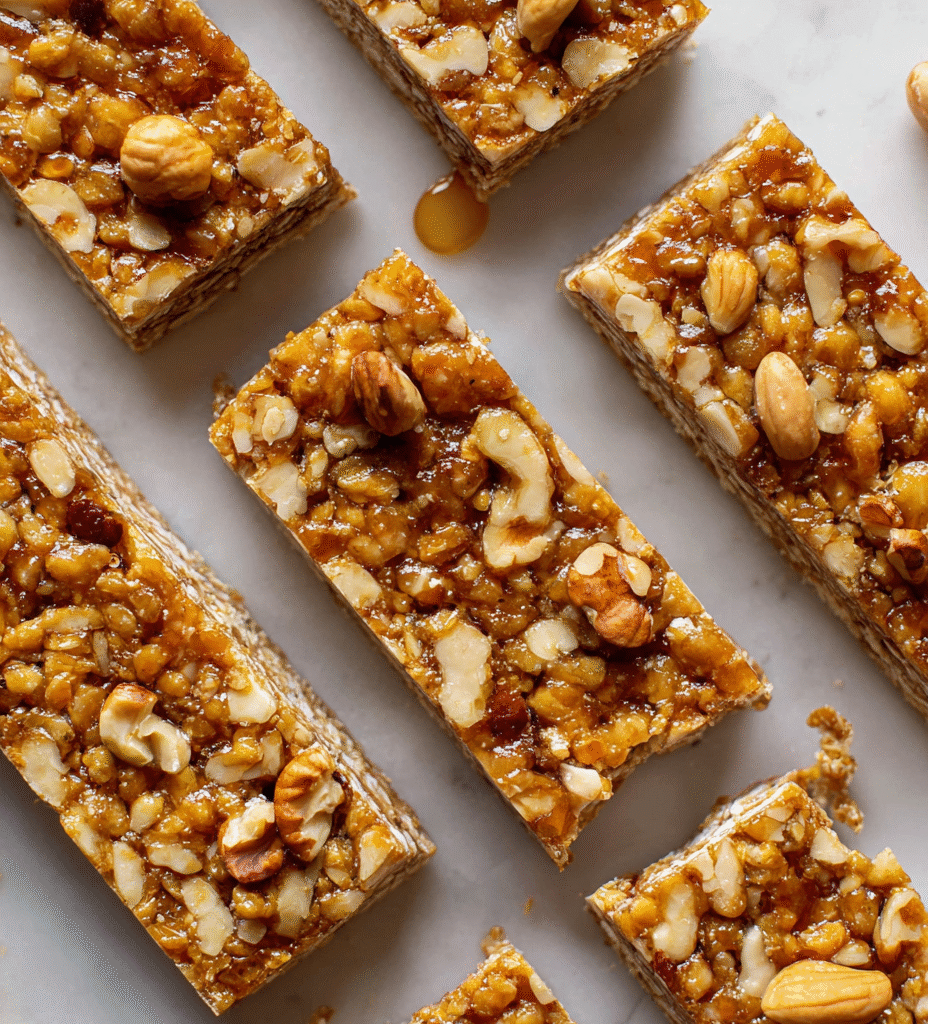
- Gather your equipment: a square baking dish (20×20 cm), a saucepan, a spatula, and parchment paper. Line the dish with parchment for easy removal.
- Toast the nuts: heat a dry skillet over medium (about 180°C/350°F). Add nuts in a single layer. Stir frequently until golden and fragrant, about 5 minutes. Remove and let cool.
- Prepare the sticky base: in the same pan, combine chopped dates and honey over low heat (about 60°C/140°F). Stir until dates soften and mixture becomes gooey, about 3 minutes. If it’s too thick, add a teaspoon of water.
- Mix in nuts: add toasted nuts to the warm date mixture. Stir well until evenly coated. Be quick—this mixture thickens fast as it cools.
- Transfer to the dish: pour the mixture into your prepared baking dish. Use a spatula to spread evenly and press down firmly, about 1 inch thick. Work quickly before it sets.
- Chill to set: place the dish in the fridge for at least 2 hours, or until firm. For a quicker set, freeze for 30-45 minutes. The bars should be firm and slightly shiny.
- Cut and finish: lift the set mixture out using the parchment paper. Slice into bars or squares with a sharp knife. For cleaner cuts, wipe the knife between slices.
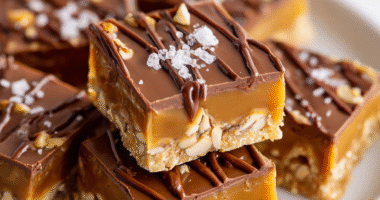
- Optional chocolate drizzle: melt dark chocolate (70%) in a microwave or double boiler. Drizzle over the bars for extra richness. Let sit until the chocolate firms, about 15-20 minutes.
- Serve: enjoy your nut bars at room temperature or slightly chilled. Keep leftovers in an airtight container in the fridge for up to a week.
Chill the bars until fully firm, at least 2 hours. Cut into desired shapes. Drizzle with melted chocolate if using. Serve at room temp or chilled for best texture.
How to Know It’s Done
- Nut mixture is golden and fragrant before mixing in dates.
- Date and honey mixture is gooey but not runny when combined.
- Bars are firm and hold shape after chilling.
No-Bake Nut Bars
Ingredients
Equipment
Method
- Line your square baking dish with parchment paper for easy removal.
- Toast the mixed nuts in a dry skillet over medium heat, stirring frequently until they’re golden and fragrant, about 5 minutes. Remove and let cool slightly.
- Chop the Medjool dates into small pieces to help them blend smoothly.
- Combine the chopped dates and honey in a saucepan over low heat, stirring gently until the mixture becomes sticky and gooey, about 3 minutes. Warm just enough to soften the dates.
- Add the toasted nuts to the warm date mixture and stir quickly to coat all the nuts evenly before the mixture cools and hardens.
- Transfer the nut mixture into your prepared baking dish and press down firmly with the spatula to create an even layer about 1 inch thick.
- Place the dish in the fridge for at least 2 hours, or until the mixture is firm and set. For a quicker option, freeze for 30-45 minutes.
- While the bars are chilling, melt the dark chocolate with coconut oil in short bursts in the microwave, stirring until smooth and shiny.
- Once set, lift the nut mixture out of the dish using the parchment paper and place on a cutting board.
- Use a sharp knife to cut the bars into squares or rectangles, wiping the knife between cuts for clean edges.
- Drizzle the melted dark chocolate over the cut bars for a glossy finish. Let the chocolate set at room temperature or in the fridge for about 15 minutes.
- Enjoy these chewy, crunchy nut bars at room temperature or chilled. Store leftovers in an airtight container in the fridge for up to a week.
Tips & Tricks for Perfect Bars
- Bolded tip: Toast nuts until fragrant and golden for a richer, nuttier flavor and crunch.
- Bolded tip: Warm the date mixture gently—just until it’s gooey—so it coats the nuts smoothly.
- Bolded tip: Use a spatula to press the mixture firmly into the pan for even setting and neat edges.
- Bolded tip: Chill the bars until completely firm—at least 2 hours—to prevent crumbling when cutting.
- Bolded tip: Wipe your knife between slices for clean, sharp cuts and a tidy appearance.
- Bolded tip: For a glossy finish, drizzle melted chocolate over the set bars and let it set fully.
- Bolded tip: If the mixture is too thick to spread, warm it slightly to loosen before pressing.
Common mistakes and how to fix them
- FORGOT to cool nuts before chopping? Toast again to regain crunch and aroma.
- DUMPED too much oil? Adjust with more nuts or reduce added oil next time.
- OVER-TORCHED nuts? Lower heat and stir constantly to prevent bitterness.
- MISSED the chilling step? Extend fridge time or briefly freeze to firm up quickly.
Quick Fixes and Pantry Swaps
- When mixture is too sticky, splash in a teaspoon of hot water and stir well.
- If nuts are soggy, dump and toast again until fragrant and crunchy.
- Over-torched nuts? Patch with a sprinkle of sea salt and stir quickly.
- Splash a little more honey if the mixture isn’t binding properly.
- When bars crack or crumble, shield with a thin layer of melted chocolate for a glossy fix.
Prep, store, and reheat tips
- Prepare the nut mixture and line your dish the night before. It firms up better after a good rest in the fridge, making slicing easier and cleaner.
- Store the bars in an airtight container at room temperature for up to 3 days. The nuts will stay crunchy and the flavors fresh, with just a slight hint of toasted richness.
- For longer storage, keep them refrigerated in a sealed container for up to 2 weeks. The cold firms the texture further, but let them come to room temp before serving to soften the chocolate drizzle.
- Reheat a chilled bar briefly in the microwave (10-15 seconds) until just slightly warmed and fragrant—perfect for melting the chocolate drizzle or softening the nuts slightly. Watch for gooeyness, not melt-down.
- If you want to freeze them, wrap individual bars tightly in plastic wrap, then store in a freezer bag. They’ll keep well for up to a month. Thaw at room temp for about 20 minutes for the best texture and aroma.
Top questions about no bake nut bars
1. Can I use raw nuts instead of toasted?
Use stored or roasted nuts for deeper flavor, but raw nuts work fine if toasted first.
2. Can I substitute dried figs or prunes?
Yes, soften the dates in warm water for 10 minutes then drain before chopping to make blending easier.
3. How long should I chill the bars?
Chill the bars in the fridge for at least 2 hours to ensure they set properly and are firm enough to cut.
4. Can I customize the flavor with extras?
Add a pinch more salt or a splash of vanilla extract to enhance flavor if desired.
5. Can I make these dairy-free?
Use dairy-free chocolate or carob chips if you want a vegan or dairy-free version.
6. What if the mixture is too sticky to spread?
If the mixture is too sticky, sprinkle a little more chopped nuts or add a teaspoon of water to loosen it.
7. How should I store the bars?
Store leftovers in an airtight container in the fridge for up to a week, or freeze for longer storage.
8. How do I melt chocolate without burning it?
To melt chocolate smoothly, microwave in 20-second bursts, stirring between, until just melted and shiny.
9. My bars are cracking when I cut them, what do I do?
If the bars crack when cutting, briefly warm the knife with hot water and wipe dry for cleaner slices.
10. How can I deepen the nut flavor?
For a more caramelized flavor, toast the nuts a little longer until fragrant and golden.
These no-bake nut bars are a small, honest treat you can throw together when chaos or nostalgia hits hard. They pack a crunch and sweetness that feels like a quick hug, no oven required. Sometimes, the simplest things—crunchy nuts, sticky honey, a swipe of chocolate—are what make the day a little easier to handle. Just a reminder that comfort can come in the shape of a homemade bar, especially right now. Enjoy every bite of that crunchy, sweet moment. Sometimes, that’s enough to get you through.
]}}

Hi, I’m Ruby Thorn, the home cook behind The Tender Mess. Join me on the journey of Embracing the mess, fearlessly create —because in the kitchen, the mess sometimes leads to magic.