
This no bake cheesecake bars recipe is born from those frantic moments when dessert needs to happen, and quickness is the priority. I love how the creamy filling comes together with just a few ingredients, no oven required, which makes it perfect for hot summer days or when the oven’s already full. It’s honest, simple, and satisfying—just like those spontaneous gatherings where everyone leaves with a slice and a smile.
What I really appreciate about this recipe is its forgiving nature. No crust rolling, no water baths, no fuss. Just a quick mix, a press into the pan, and a chill. It’s become my escape route for busy weekends or last-minute dinner parties, and honestly, it’s the kind of dessert I keep coming back to when I crave something rich but effortless.
This recipe is inspired by the chaos of last-minute gatherings, where I needed something sweet and impressive without the fuss of baking. It’s about harnessing the raw, creamy goodness that comes together in minutes, perfect for when time is tight but the craving is real. I love how this no-bake version captures that indulgence with a fraction of the effort, making it my go-to for spontaneous dessert moments.
Impromptu Sweetness
- This recipe is my secret weapon for last-minute parties, where I need something impressive but simple.
- Biting into a chilled, creamy bar instantly takes me back to summer afternoons with family, laughter echoing in the kitchen.
- I love how forgiving this recipe is—perfect for those days when I just want dessert without the fuss, no oven required.
- Every time I make these, I’m reminded that sometimes, the best treats are the ones that come together fast and taste like indulgence.
The story behind this recipe
- This recipe came about during a weekend when I was cleaning out the fridge and found a forgotten block of cream cheese. Instead of letting it go to waste, I threw together a quick crust and whipped up the filling, realizing how satisfying it is to have a dessert that’s both effortless and indulgent. It’s become my go-to for when I need something sweet without the fuss.
- What started as a kitchen improvisation turned into a favorite because it’s so forgiving—no oven, no fuss, just chill and enjoy. I love how the creamy texture and bright lemon notes remind me of summer gatherings, even on the coldest days. It’s that perfect blend of simplicity and richness that keeps me reaching for this whenever I want a treat that feels special but is actually easy.
- heading
- story_type
Historical & Cultural Tidbits
- This recipe traces its roots to mid-20th-century convenience cooking, where rapid desserts became popular in post-war America.
- No bake cheesecakes gained fame in the 1960s as a fuss-free alternative to traditional baked versions, especially in busy households.
- The concept of skipping oven baking was partly driven by the desire to avoid heating up kitchens during hot summers, making it ideal for seasonal gatherings.
Key Ingredients Breakdown
- Cream cheese: I like it soft and slightly warm; it blends smoothly and feels velvety on the tongue. If your cream cheese is cold, soften it in the microwave for 10-15 seconds to avoid lumps.
- Graham cracker crumbs: I toast mine lightly for a richer, toasty flavor that enhances the crust’s crunch. Skip to a store-bought crust if pressed for time, but the homemade version feels more satisfying.
- Butter: I melt it until bubbling and fragrant, which helps the crumbs stick together perfectly. Use salted butter—less fuss, just a pinch of salt balances the sweetness.
- Sugar: I prefer a fine caster sugar for a smoother filling, but granulated works fine. If you want a less sweet bar, cut the sugar back by a tablespoon or two.
- Lemon juice: Brightens everything with a zing that cuts through the richness. Fresh is best, but bottled lemon juice works in a pinch if you want that tart punch.
- Heavy cream: Whipped until soft peaks, it adds a lightness that balances the dense cream cheese. For a dairy-free version, try coconut cream—just refrigerate overnight and whip until fluffy.
- Vanilla extract: I use pure vanilla to deepen the flavor; skip or reduce if you prefer a more subtle taste, but honestly, it’s the little vanilla that makes it feel special.
Spotlight on Key Ingredients
Cream cheese:
- I like it soft and slightly warm; it blends smoothly and feels velvety on the tongue. If your cream cheese is cold, soften it in the microwave for 10-15 seconds to avoid lumps.
- Graham cracker crumbs: I toast mine lightly for a richer, toasty flavor that enhances the crust’s crunch. Skip to a store-bought crust if pressed for time, but the homemade version feels more satisfying.
Heavy cream:
- Lemon juice: Brightens everything with a zing that cuts through the richness. Fresh is best, but bottled lemon juice works in a pinch if you want that tart punch.
- Whipped until soft peaks, it adds a lightness that balances the dense cream cheese. For a dairy-free version, try coconut cream—just refrigerate overnight and whip until fluffy.
Notes for ingredient swaps
- Dairy-Free: Swap cream cheese for a plant-based version like cashew-based cream cheese—rich, but with a nutty undertone.
- Gluten-Free: Use gluten-free graham crackers or digestive biscuits for the crust—just as crumbly and flavorful.
- Sweetener: Replace sugar with honey or maple syrup—adds a different depth and a hint of caramel, but adjust for moisture.
- Lemon Juice: Use bottled lemon juice if fresh isn’t available—less bright, but still tangy enough to lift the filling.
- Heavy Cream: Coconut cream works well—rich and dairy-free, with a slight coconut aroma that complements the tartness.
- Crust Base: Almond meal or crushed cookies—adds a nutty or more indulgent flavor, experiment to find your fave.
- Flavor Variations: Add cocoa powder or fruit purees—mix in for a different twist, but be mindful of moisture content.
Equipment & Tools
- 9×9 inch pan: Holds the crust and filling, shapes the bars.
- Mixing bowls: Combine and whip ingredients.
- Spatula: Spread and fold ingredients smoothly.
- Parchment paper: Eases removal and cleanup.
Step-by-step guide to no bake cheesecake bars
- Gather your equipment: a 9×9 inch pan (for a sturdy crust and bars), a mixing bowl, a spatula, and a parchment paper for easy removal.
- Prepare the crust: in a bowl, combine 1 ½ cups of graham cracker crumbs with ½ cup melted butter. Mix until everything is evenly coated and resembles wet sand.
- Press the crust: transfer the mixture to the pan. Use the back of a spoon or a flat-bottomed glass to press it firmly into an even layer on the bottom. Chill in the fridge for 15 minutes to firm up.
- Make the filling: in a large bowl, beat 16 oz softened cream cheese with ½ cup sugar until smooth and creamy, about 2 minutes. Scrape down the sides as needed.
- Add flavor: stir in 1 teaspoon vanilla extract and 2 tablespoons lemon juice, blending until fragrant and bright. The lemon adds a zing that balances the richness.
- Whip the cream: in a separate bowl, whip 1 cup heavy cream until soft peaks form, about 3-4 minutes. Be careful not to overwhip, or it’ll turn grainy.
- Combine: fold the whipped cream into the cream cheese mixture in thirds. Gently mix until smooth and fluffy, avoiding deflation.
- Assemble: pour the filling over the chilled crust. Use a spatula to spread it evenly across the surface. Smooth out the top for a clean look.
- Chill: cover the pan with plastic wrap and refrigerate for at least 4 hours, preferably overnight. The filling needs time to set and develop flavor.
- Check for doneness: the filling should be firm but still creamy, with a slight jiggle in the center when gently shaken. The edges should be set and slightly pulling away from the sides.
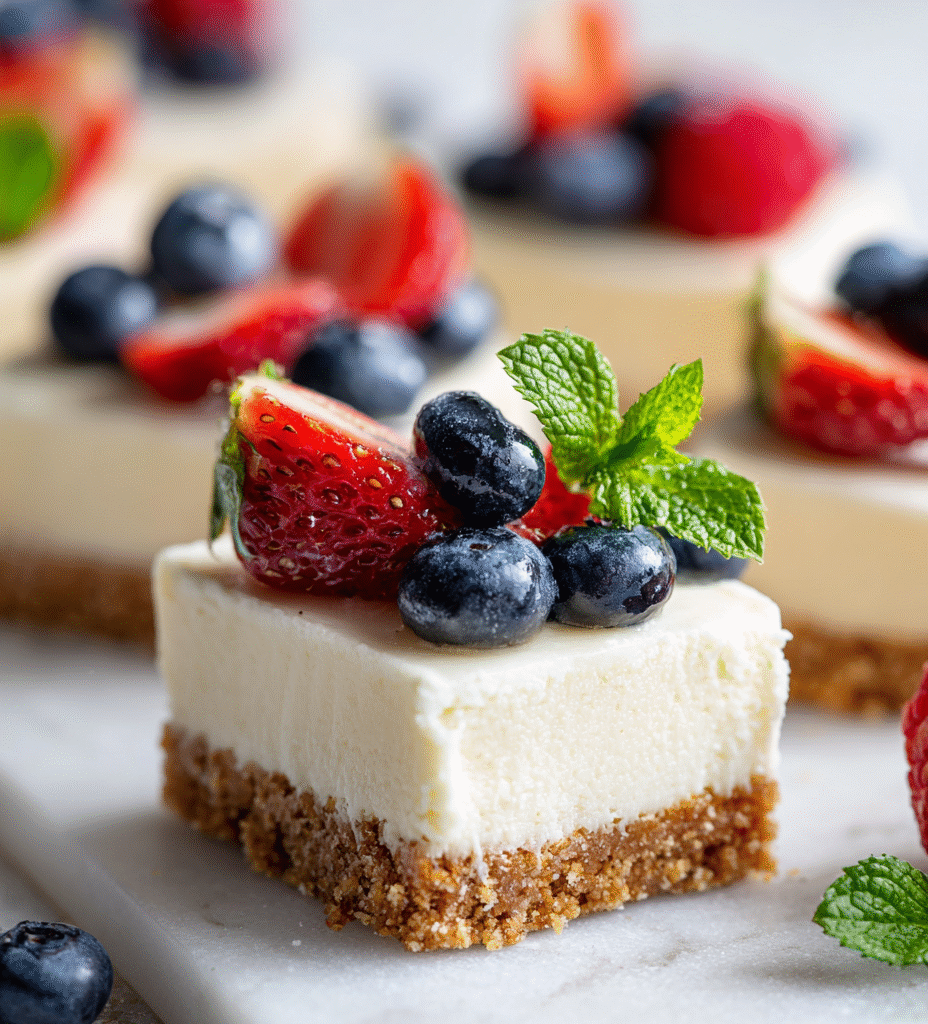
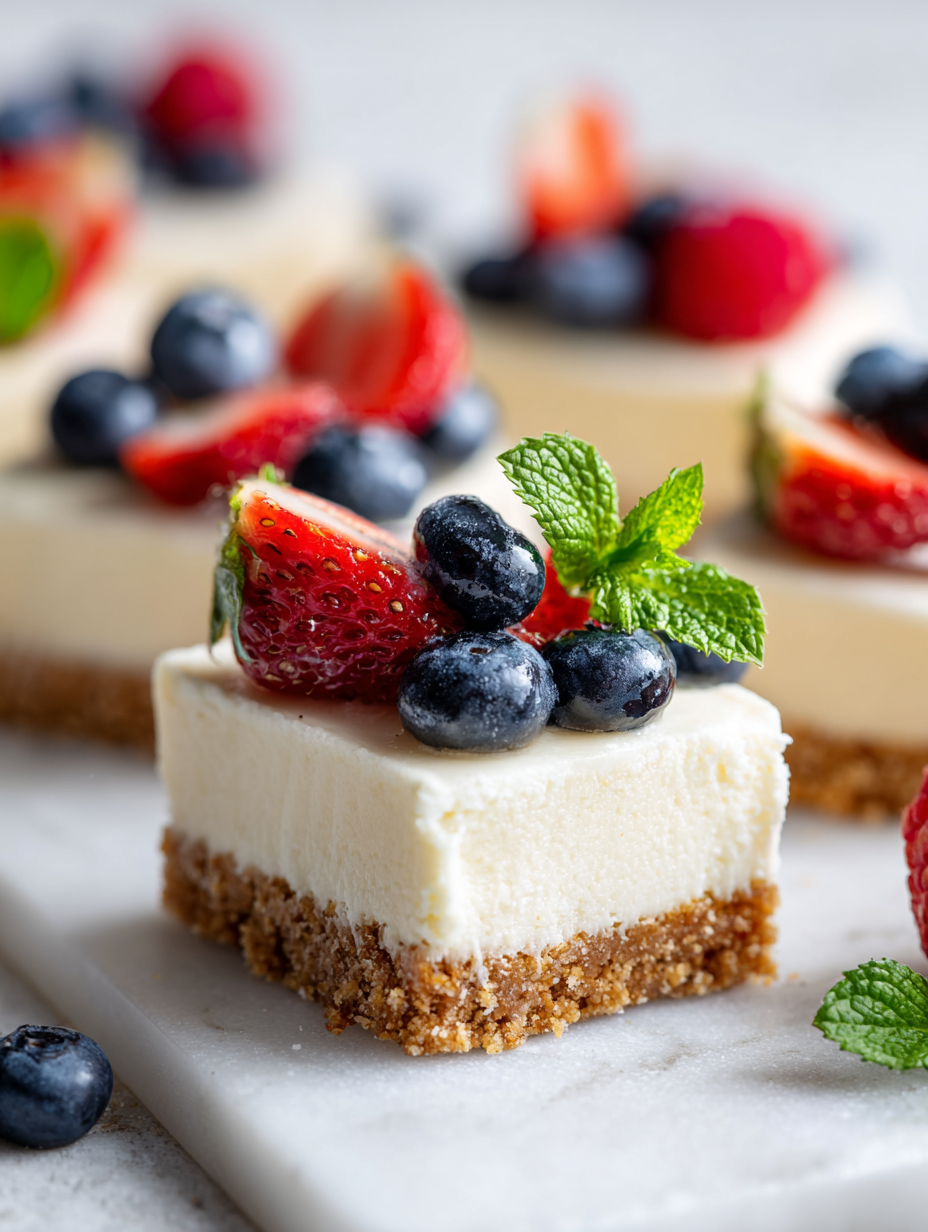
- Serve: lift out of the pan using the parchment paper, cut into squares, and plate. Add fresh berries or a drizzle of chocolate if desired.
Refrigerate the assembled bars uncovered for full setting. Slice with a sharp knife, wiping blade between cuts. Serve chilled, decorated or plain, as you prefer.
How to Know It’s Done
- Filling is firm and holds shape when cut.
- Top is smooth and set, no jiggle in the center.
- Crust is golden and pressed firmly, no crumbles.
No Bake Cheesecake Bars
Ingredients
Equipment
Method
- Line your 9x9 inch pan with parchment paper, leaving some overhang for easy removal.
- Combine the graham cracker crumbs with the melted butter in a bowl, mixing until the crumbs are evenly coated and resemble wet sand.
- Press the crumb mixture firmly into the prepared pan, creating an even crust on the bottom. Chill in the refrigerator for about 15 minutes to set.
- In a large bowl, beat the softened cream cheese with sugar until smooth and creamy, about 2 minutes. You want it to feel soft and velvety.
- Stir in the lemon juice and vanilla extract until combined; the mixture will become fragrant and slightly zingy.
- In a separate bowl, whip the chilled heavy cream until soft peaks form, listening for gentle swooshes and watching it increase in volume.
- Gently fold the whipped cream into the cream cheese mixture in thirds, carefully combining until smooth and fluffy without deflating the airiness.
- Pour the creamy filling over the chilled crust, smoothing the top with a spatula for an even surface. Cover with plastic wrap.
- Refrigerate the assembled bars for at least 4 hours, preferably overnight, until the filling is firm and set.
- Once chilled, lift the cheesecake out of the pan using the parchment overhang. Slice into squares with a sharp knife dipped in hot water for clean cuts.
- Serve the bars chilled, perhaps topped with fresh berries or a drizzle of chocolate for extra indulgence.
Tips for perfect cheesecake bars
- Use room temperature cream cheese for smoother, creamier filling that melts in your mouth.
- Toast your graham cracker crumbs lightly for a nutty aroma that adds depth to the crust.
- Chill your whipped cream until just firm to keep the filling light and fluffy, not runny.
- Press the crust firmly into the pan to prevent crumbles and ensure clean slices.
- Use a sharp knife dipped in hot water to get clean, smooth cuts through the chilled bars.
- If the filling cracks when slicing, pop the bars back in the fridge for 10 minutes to firm up.
- For a brighter flavor, add a teaspoon of lemon zest into the filling for extra zing.
Common mistakes and how to fix them
- FORGOT to chill crust: Repress and chill for 15 minutes to prevent crumbling.
- DUMPED filling too quickly: Fold whipped cream gently to keep it airy and light.
- OVER-TORCHED crust: Bake at 180°C (350°F) for 8-10 minutes, watch for golden edges.
- TOO runny filling: Ensure cream cheese is softened and fully blended before adding whipped cream.
Quick fixes and pantry swaps
- When filling is too runny, chill it for 15 minutes to firm up.
- If crust crumbles, press it more firmly and refrigerate before adding filling.
- Splash a little lemon juice if filling lacks brightness for a fresh zing.
- Patch cracks by briefly returning bars to fridge; chilling helps set any minor fissures.
- Shield edges from over-torching by keeping a close eye during baking or toasting.
Prep, store, and reheat tips
- Prepare the crust and press it into the pan up to a day ahead; keep covered in the fridge for a firm, crumbly base.
- Assemble the filling a few hours before serving; store covered in the fridge to keep it fresh and creamy.
- Bars can be refrigerated for up to 3 days; the flavors meld and the texture stays smooth if kept cold.
- Reheat slices slightly in the microwave for 5-10 seconds if you prefer them softer, but they’re best served chilled.
- For longer storage, freeze the bars wrapped tightly in plastic wrap and foil for up to 2 weeks; thaw in the fridge before serving.
Top questions about no bake cheesecake bars
1. Can I use low-fat cream cheese?
Yes, using full-fat cream cheese gives the best creamy texture. Light versions can make it less rich.
2. Can I substitute the graham cracker crust?
Absolutely, you can swap graham crackers with digestive biscuits or gluten-free options, but keep the texture similar.
3. How far in advance can I prepare these?
Yes, you can make these ahead and keep them in the fridge for up to 3 days. Freeze for longer storage.
4. My filling is too runny, what should I do?
If the filling is too soft, chill it in the fridge for 30 minutes to firm up before spreading.
5. Can I omit the lemon juice?
Use fresh lemon juice for brightness and a tangy kick. Bottled works in a pinch, but fresh is best.
6. Are dairy-free options possible?
Yes, whip coconut cream or cashew-based alternatives for a dairy-free version that’s still luscious.
7. How do I cut perfect slices?
Chill the bars uncovered overnight to set fully, and use a sharp knife dipped in hot water for clean slices.
8. My crust is crumbly, how fix it?
If your crust crumbles, press it more firmly into the pan and refrigerate for 15 minutes before adding the filling.
9. How do I know when the whipped cream is ready?
Ensure the whipped cream is just soft peaks—overwhipping makes it grainy and less fluffy.
10. Can I customize the flavor?
Add a teaspoon of lemon zest to boost brightness or a splash of vanilla for extra depth.
These no-bake cheesecake bars are a reminder that sometimes, the simplest ingredients can create something truly satisfying. They’re perfect for spontaneous moments or when you just need a cool treat without turning on the oven. I keep a batch in the fridge for those hurried afternoons or unexpected guests, and they never disappoint.
Sharing this recipe feels like passing along a little piece of comfort—creamy, bright, and easy enough to make on a whim. No matter the season, these bars bring a touch of indulgence that’s honest and unpretentious. Sometimes, the best desserts are the ones that come together fast and leave everyone asking for more.

Hi, I’m Ruby Thorn, the home cook behind The Tender Mess. Join me on the journey of Embracing the mess, fearlessly create —because in the kitchen, the mess sometimes leads to magic.