
This no bake chocolate almond bars recipe is like a little piece of childhood comfort that you can whip up in minutes. I love how it transforms simple pantry staples into something rich, nutty, and just a bit indulgent without turning on the stove. It’s the kind of treat that feels like a warm hug, especially when you need a quick pick-me-up.
What draws me back to this recipe is the nostalgic feeling it stirs—crunchy almonds, smooth chocolate, and that sweet, slightly salty combo that takes me straight back to snack times as a kid. It’s perfect for lazy afternoons or when unexpected guests pop in and you want something homemade but effortless. Plus, there’s something satisfying about making a dessert that’s all about quick assembly and no fuss.
Focusing on the nostalgic comfort of childhood treats, this recipe transforms simple ingredients into an indulgent, no-bake delight that feels like a warm hug from the past.
The story behind this recipe
- This recipe came from a moment of desperate need—something sweet, quick, and no fuss after a long day. I remember rummaging through my pantry, spotting a bag of almonds and a leftover bar of dark chocolate, and thinking, why not? That impulsive mix turned into these bars I keep coming back to, especially when I want comfort without the oven heat.
- What really stuck with me was how easy it was to assemble, yet it felt like I was making something special. The crunch of almonds, the richness of melted chocolate, and that faint saltiness—like a little secret in each bite. It’s become a go-to when I need a treat that’s quick but still feels indulgent.
- heading: The story behind this recipe
Ingredient breakdown: key components
- Almonds: I love to use toasted almonds for their smoky, rich aroma that really pops here. If you’re short on time, raw almonds work fine, but toast them lightly for extra flavor.
- Dark chocolate: I prefer a 70% cocoa bar—melts smoothly and adds a bittersweet depth. To avoid seizing, melt it gently over a double boiler or in short bursts in the microwave, stirring thoroughly.
- Butter: I use unsalted to control the salt level, but salted butter adds a subtle savory note if that’s what you prefer. Melt it until it’s just shimmering, not bubbling.
- Sweetener: I lean on honey or maple syrup for a bit of natural sweetness and moisture. If you’re after a less sticky result, try a dash of agave instead.
- Binder: I sometimes add a touch of coconut oil to make the bars extra glossy and easier to cut. It also helps the chocolate set smoothly and adds a slight coconut aroma.
- Optional add-ins: Sea salt or flaky sea salt on top really enhances the chocolate and nut combo. A pinch of sea salt makes a big flavor difference—don’t skip it if you like that salty-sweet contrast.
- Optional extras: Dried cranberries or a sprinkle of shredded coconut can add a pop of color and texture, making every bite more interesting.
Spotlight on key ingredients
Almonds:
- I love toasted almonds for their smoky, rich aroma that really pops here. If you’re short on time, raw almonds work fine, but toast them lightly for extra flavor.
- Dark chocolate: I prefer a 70% cocoa bar—melts smoothly and adds a bittersweet depth. To avoid seizing, melt it gently over a double boiler or in short bursts in the microwave, stirring thoroughly.
Dark chocolate:
- I prefer a 70% cocoa bar—melts smoothly and adds a bittersweet depth. To avoid seizing, melt it gently over a double boiler or in short bursts in the microwave, stirring thoroughly.
- Butter: I use unsalted to control the salt level, but salted butter adds a subtle savory note if that’s what you prefer. Melt it until it’s just shimmering, not bubbling.
Notes for ingredient swaps
- Dairy-Free: Replacing butter with coconut oil keeps the bars dairy-free and adds a subtle coconut aroma, but may slightly alter the texture and richness.
- Nut Variations: Swap almonds for peanuts or cashews for different crunch and flavor profiles. Peanuts bring earthiness, cashews offer creaminess.
- Chocolate Types: Use milk chocolate for a sweeter, creamier result or white chocolate for a milder, sweeter taste. Dark chocolate provides a richer, more intense flavor.
- Sweetener Options: Maple syrup or honey can replace sugar or corn syrup. They add moisture and a distinct flavor—honey being floral, maple being smoky.
- Add-ins: Dried cranberries, shredded coconut, or chopped dried apricots can add color and texture. Adjust quantities to avoid overpowering the chocolate and nuts.
- Binder Alternatives: Coconut oil or a touch of vegetable glycerin can help the mixture set, especially if using alternative chocolates or nut butters.
- Salt Topping: Use flavored sea salts like smoked or smoked sea salt for an added dimension, or skip altogether if you prefer a less salty finish.
Equipment & Tools
- Baking dish (20×20 cm / 8×8 inch): Holds the mixture as it sets and makes cutting easier.
- Spatula: Spreads and presses the mixture evenly into the dish.
- Microwave-safe bowl: Melts the chocolate gently and evenly.
- Toasting skillet: Toasts almonds to develop flavor and aroma.
- Sharp knife: Cuts clean bars without squishing the chocolate.
- Parchment paper: Prevents sticking and eases removal of set bars.
Step-by-step guide to no bake bars
- Gather your equipment: a 20×20 cm (8×8 inch) baking dish, a spatula, a microwave-safe bowl, and parchment paper. Line the dish with parchment for easy removal.
- Roughly chop 200g dark chocolate (70% cocoa) into small pieces. This helps it melt evenly and quickly.
- In the microwave-safe bowl, melt the chocolate in 30-second bursts, stirring after each, until smooth and glossy. Be careful not to overheat; chocolate should be just melted, not sizzling.
- While melting, toast 150g almonds in a dry skillet over medium heat for 3-5 minutes until fragrant and slightly darker. Stir often to avoid burning. Let cool slightly.
- Once melted, add 2 tablespoons of unsalted butter and stir until fully incorporated. The mixture should be smooth and shiny.
- Chop the toasted almonds coarsely and fold them into the melted chocolate mixture. Mix thoroughly to coat all the nuts evenly.
- Pour the mixture into your prepared dish. Use a spatula to spread it out evenly, pressing down gently to compact. Smooth the surface.
- Place the dish in the fridge for at least 2 hours, or until set. If in a hurry, freeze for 30-45 minutes, checking that the chocolate is firm and slightly crackly around the edges.
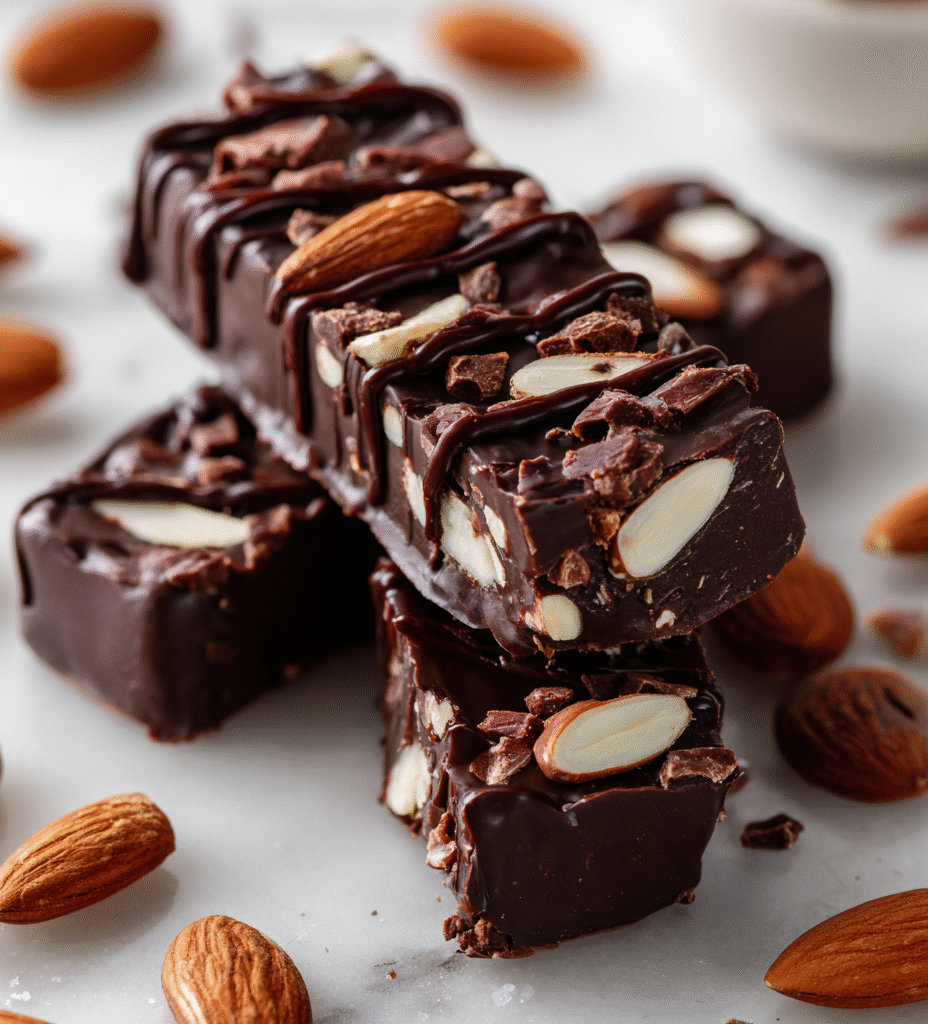
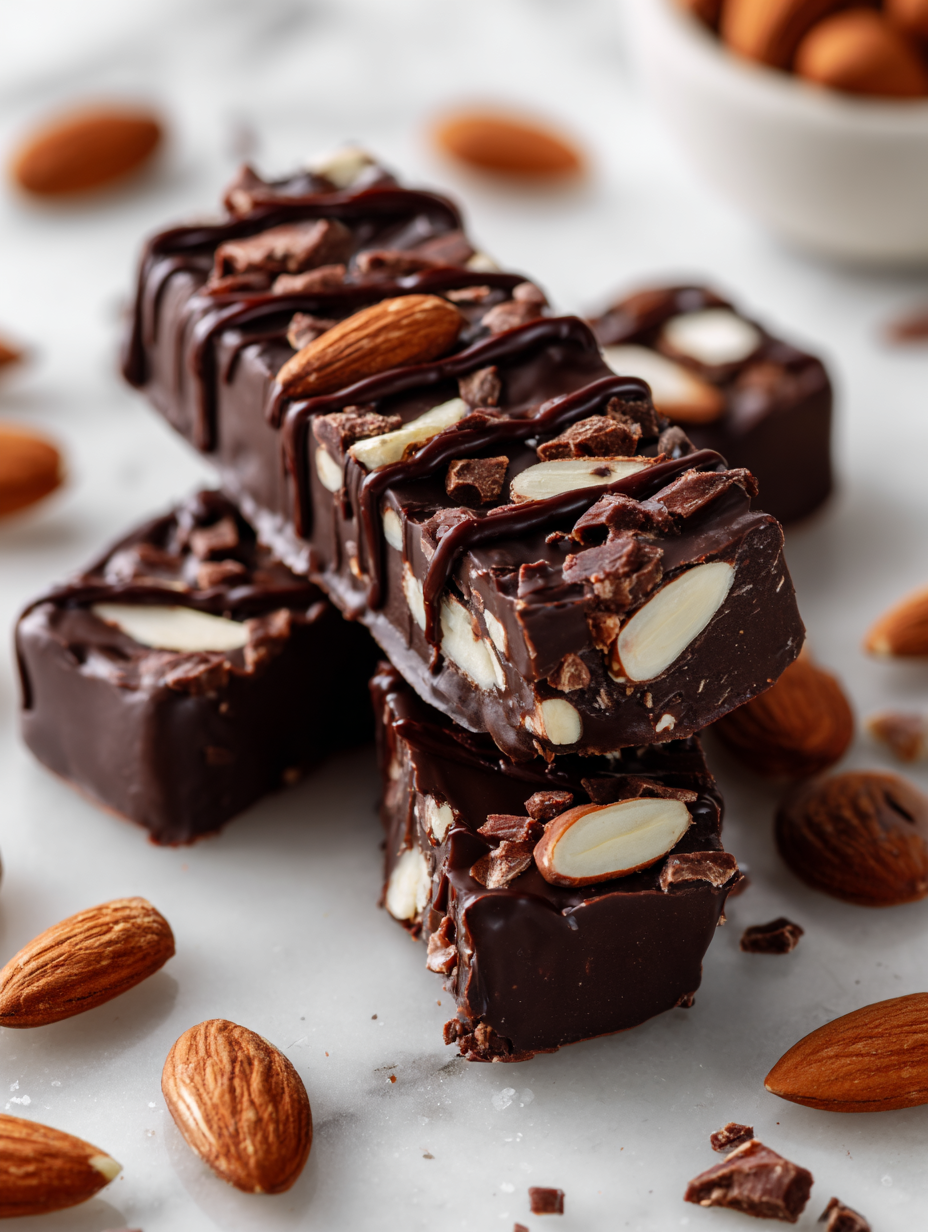
- Once firm, lift the block out of the dish using the parchment paper. Cut into bars or squares with a sharp knife. For clean edges, wipe the knife with a warm damp cloth between cuts.
- Finish by sprinkling a pinch of flaky sea salt on top if desired. Serve immediately or store in an airtight container in the fridge.
Chill the bars in the fridge until completely set, about 2 hours. Use parchment to lift them out, then cut into squares. Finish with a sprinkle of flaky sea salt or your favorite toppings for extra flair.
How to Know It’s Done
- Chocolate is glossy and fully melted without lumps.
- Almonds are evenly coated and fragrant after toasting.
- Bars are firm and crack when gently pressed after chilling.
No Bake Chocolate Almond Bars
Ingredients
Equipment
Method
- Line your baking dish with parchment paper, leaving some overhang for easy removal.
- Place your almonds in a dry skillet over medium heat and toast for about 3-5 minutes until fragrant and slightly darker. Stir often to prevent burning. Let cool slightly.
- While the almonds cool, chop the dark chocolate into small pieces for easier melting.
- Gently melt the chocolate in a microwave-safe bowl in 30-second bursts, stirring well after each. Continue until smooth and glossy—be careful not to overheat.
- Stir in the melted butter and honey into the melted chocolate until fully combined, creating a smooth, shiny mixture.
- Coarsely chop the toasted almonds and fold them into the chocolate mixture, ensuring all nuts are coated evenly.
- Pour the mixture into your prepared dish and use a spatula to spread it out evenly. Press down gently to compact and create a firm surface.
- Place the dish in the fridge and chill for at least 2 hours until set. For a quicker option, freeze for about 30-45 minutes, but don't forget to check that the chocolate is firm and crackly around the edges.
- Once set, lift the bars out of the dish using the parchment overhang. Use a sharp knife to cut into squares or rectangles, wiping the blade with a warm cloth between cuts for clean edges.
- Optional: sprinkle flaky sea salt over the top for a salty-sweet finish, then serve immediately or store in an airtight container in the fridge for up to 5 days.
Notes
Pro tips for perfect bars
- Chop chocolate finely: Smaller pieces melt faster and more evenly, reducing risk of seizing or burning.
- Toast almonds thoroughly: A deep, nutty aroma signals they’re ready, adding smoky flavor and crunch to your bars.
- Gently melt chocolate: Use short bursts in the microwave, stirring often to keep it smooth and glossy.
- Press mixture firmly: Use the back of a spatula or your fingers to compact the mixture evenly in the pan, preventing cracks.
- Chill completely: Wait at least 2 hours for the bars to set fully; a quick freeze for 30 minutes works in a pinch.
- Wipe knife between cuts: Keep edges clean and neat by cleaning the blade with a warm cloth after each slice.
- Add salt just before serving: Flaky sea salt sprinkled on top enhances flavor contrast and adds a gourmet touch.
Common mistakes and how to fix them
- FORGOT to evenly coat the mixture → Stir thoroughly to prevent dry spots.
- DUMPED in too much chocolate → Use precise measurements for balanced flavor.
- OVER-TORCHED the chocolate → Melt on low heat or short bursts, stir often.
- MISSED chilling time → Allow at least 2 hours for proper setting and clean cuts.
Quick fixes and pantry swaps
- If chocolate seizes, splash in a teaspoon of vegetable oil and stir until smooth.
- When bars crack while cutting, chill them for 10 more minutes for cleaner slices.
- DUMPED in too many almonds? Add a little more melted chocolate to balance flavors.
- OVER-TORCHED the chocolate? Switch to a double boiler or microwave in short bursts.
- When mixture is too sticky, dust with a little cocoa powder or powdered sugar to help shape.
Make-Ahead & Storage Tips
- You can prepare the chocolate mixture and toast the almonds a day ahead; store separately in airtight containers to keep their crunch and aroma fresh.
- Once assembled, these bars can be kept in the fridge for up to 5 days. The cool environment keeps the chocolate firm and flavors well-preserved, with a slight chill aroma that enhances the richness.
- For longer storage, wrap the bars individually in plastic wrap and freeze for up to 1 month. They develop a firmer texture but retain the nutty, chocolatey scent when thawed properly.
- Reheating isn’t necessary; serve straight from the fridge or freezer. If you want softer, warm slightly at room temperature for 5 minutes until the chocolate just begins to melt and releases a sweet cocoa scent.
Top questions about no bake bars
1. How do I melt chocolate without burning it?
You can melt the chocolate in short bursts in the microwave, stirring often to avoid burning and seize. Using a double boiler works well too for gentle heat.
2. How long should I chill the bars?
To keep the bars firm, chill them in the fridge for at least 2 hours. If in a hurry, freeze for 30-45 minutes but watch closely.
3. Can I add salt on top?
A pinch of flaky sea salt on top just before serving enhances the chocolate and almonds, adding a salty crunch that balances sweetness.
4. Can I use different nuts?
You can swap almonds for peanuts, cashews, or other nuts. Toast them for extra flavor or use raw if you prefer a milder taste.
5. What kind of chocolate should I use?
Using a 70% cocoa dark chocolate gives a bittersweet flavor and smooth melt. Milk or white chocolate will be sweeter and creamier.
6. How should I store these bars?
Store the bars in an airtight container in the fridge for up to 5 days. For longer storage, freeze wrapped bars for up to a month.
7. My mixture is too sticky, what now?
If the mixture is too sticky, dust your hands or the spatula with cocoa powder or powdered sugar to help shape and press it into the pan.
8. How do I toast almonds properly?
To enhance crunch and aroma, toast the almonds lightly in a dry skillet over medium heat until fragrant, about 3-5 minutes.
9. Chocolate seizing, what do I do?
If chocolate seizes, add a teaspoon of vegetable oil and stir until smooth. This can rescue a melting mishap.
10. Can I make these quickly?
For quick assembly, melt the chocolate gently, fold in nuts, press into a dish, and chill. No oven needed, just patience for setting.
These no bake chocolate almond bars are a little reminder that sometimes the simplest ingredients create the most satisfying treats. The crunch of almonds paired with the smooth, bittersweet chocolate feels like a nostalgic hug you didn’t realize you needed. They’re perfect for spontaneous sweet cravings or when you want something homemade without the fuss.
Making them brings a quiet moment of satisfaction—no oven heat, just quick melting and mixing. Once chilled, they cut clean and firm, with that perfect salty-sweet balance you crave. A small batch that feels like a warm memory, ready whenever you want it.

Hi, I’m Ruby Thorn, the home cook behind The Tender Mess. Join me on the journey of Embracing the mess, fearlessly create —because in the kitchen, the mess sometimes leads to magic.