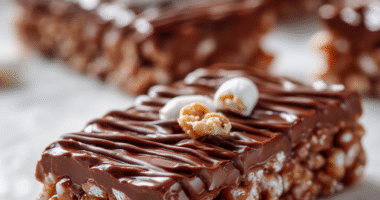

Sometimes, you just need a sweet fix that doesn’t require turning on the oven or pulling out a bunch of ingredients. These no-bake peanut butter bars are that kind of treat—simple, honest, and honestly, a little bit nostalgic. I grew up sneaking spoonfuls of peanut butter straight from the jar, so these bars feel like a grown-up twist on that familiar comfort.
What I love most is how adaptable they are—crunchy, chewy, rich, or light depending on your mood. Plus, no baking means less mess and more time to enjoy the good stuff. They’re perfect for when you need something quick but crave that perfect peanut butter punch, especially during busy weekends or when unexpected guests pop in.
This recipe is about reclaiming childhood comfort with a simple, no-fuss treat that’s as satisfying for grown-ups as it is nostalgic. I love how it’s a quick fix for those moments when you need something sweet but don’t want to turn on the oven or fuss over complicated steps. It’s honest, straightforward, and feels like a warm hug on a busy day.
This recipe is about reclaiming childhood comfort with a simple, no-fuss treat that’s as satisfying for grown-ups as it is nostalgic. I love how it’s a quick fix for those moments when you need something sweet but don’t want to turn on the oven or fuss over complicated steps. It’s honest, straightforward, and feels like a warm hug on a busy day.
The story behind this recipe
- This recipe came together one chaotic afternoon when I needed a quick sweet fix without turning on the oven. I remember rummaging through my pantry, looking for something familiar and comforting, and realized I had everything I needed for these bars—peanut butter, graham crackers, and a bit of chocolate. It’s that simple moment of improvisation that turned into a go-to treat for busy days.
- I’ve always loved peanut butter in its purest form—spread thick on bread or straight from the jar. Making these bars felt like reconnecting with that childhood joy, but with a grown-up twist. They’re honest, a bit messy, and totally forgiving—perfect for when you want something sweet without any fuss.
- heading
- story_type
Key ingredients at a glance
- Creamy peanut butter: I prefer smooth for that melt-in-your-mouth texture; you can swap in crunchy if you want some bites of nuttiness, but watch out for crumbs that might make the bars crumbly.
- Graham crackers: They give a sweet, toasty base—crush them until fine, but if you want a more rustic texture, leave some larger bits; just keep the crumbs even for smooth edges.
- Butter: I melt it gently to blend everything smoothly; if you’re dairy-free, coconut oil works but adds a slight coconut scent that’s subtly sweet.
- Chocolate chips: I love semi-sweet for balance, but dark chocolate gives a richer, deeper flavor—melt with a splash of coconut oil for a glossy finish.
- Powdered sugar: It sweetens and firms up the filling—if you prefer a less sweet bar, cut back a bit, but don’t skip it entirely or the texture might be too loose.
- Vanilla extract: A splash boosts flavor—skip if you’re out, but it really rounds out the peanut butter richness with a warm aroma.
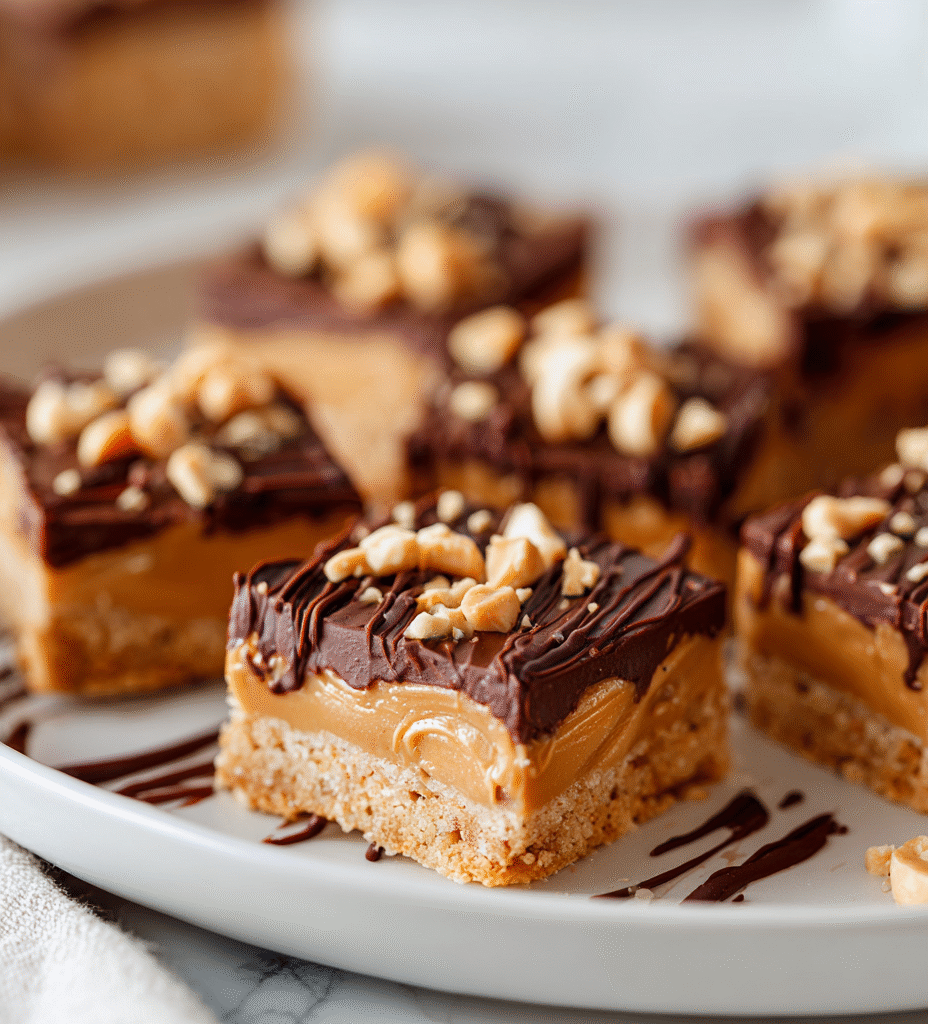
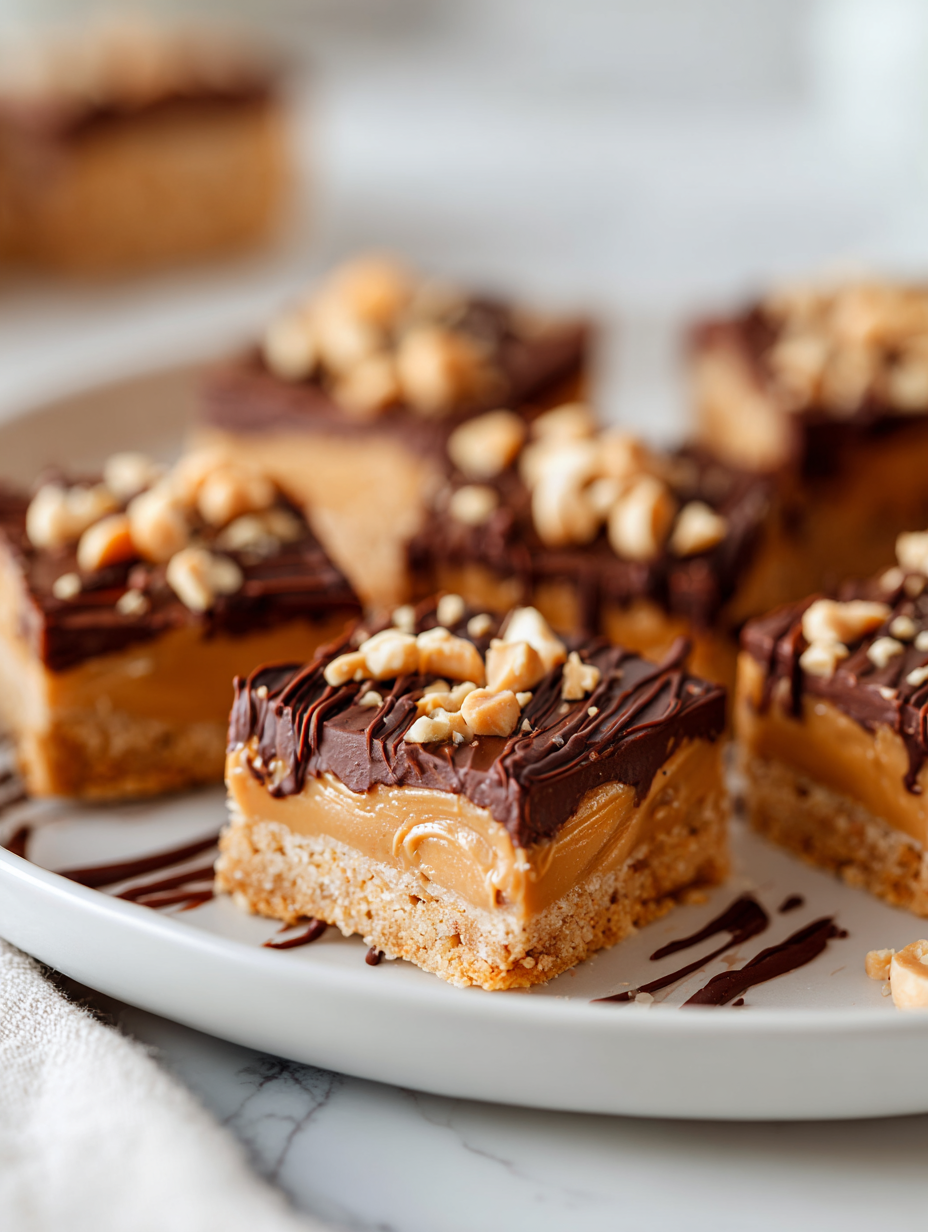
- Optional toppings (sea salt, chopped nuts): These add crunch and a hit of contrast—sprinkle on top before chilling for the best effect.
Spotlight on key ingredients
Peanut Butter:
- Creamy peanut butter: I prefer smooth for that melt-in-your-mouth texture; you can swap in crunchy if you want some bites of nuttiness, but watch out for crumbs that might make the bars crumbly.
- Graham crackers: They give a sweet, toasty base—crush them until fine, but if you want a more rustic texture, leave some larger bits; just keep the crumbs even for smooth edges.
- Butter: I melt it gently to blend everything smoothly; if you’re dairy-free, coconut oil works but adds a slight coconut scent that’s subtly sweet.
Chocolate:
- Chocolate chips: I love semi-sweet for balance, but dark chocolate gives a richer, deeper flavor—melt with a splash of coconut oil for a glossy finish.
- Powdered sugar: It sweetens and firms up the filling—if you prefer a less sweet bar, cut back a bit, but don’t skip it entirely or the texture might be too loose.
- Vanilla extract: A splash boosts flavor—skip if you’re out, but it really rounds out the peanut butter richness with a warm aroma.
Notes for ingredient swaps
- Dairy-Free: Swap butter for coconut oil. It’ll add a subtle coconut aroma and slightly alter the texture, making it a bit more crumbly but still rich.
- Nut-Free: Use sunflower seed butter instead of peanut butter. It offers a similar creamy texture but with a milder, slightly earthy flavor.
- Gluten-Free: Replace graham crackers with gluten-free digestives or crushed rice cereal. Expect a lighter, crispier base with less toasty sweetness.
- Vegan: Use vegan margarine or coconut oil in place of butter, and dairy-free chocolate chips. The flavor remains rich, with a hint of coconut.
- Sugar Alternatives: Substitute powdered sugar with maple sugar or coconut sugar for a more caramelized note. Adjust sweetness to taste, as these are less sweet than powdered sugar.
- Chocolate: For a different flavor profile, try milk or white chocolate chips, which will add sweetness and creaminess, but change the overall taste.
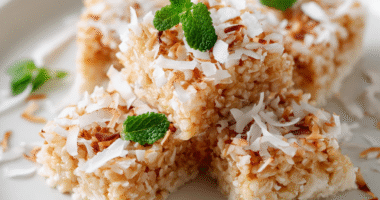
- Add-ins: Mix in chopped nuts, dried fruit, or coconut flakes before pressing into the pan for extra texture and flavor variations.
Equipment & Tools
- 20x20cm (8×8 inch) pan: Holds the layered mixture and shapes the bars.
- Mixing bowls: Combine ingredients and crush crackers.
- Spatula: Press the mixture into the pan and spread melted chocolate.
- Microwave-safe bowl: Melt butter and chocolate evenly.
- Sharp knife: Cut into neat squares once set.
Step-by-step guide to no bake bars
- Gather your equipment: a 20x20cm (8×8 inch) square pan, mixing bowls, spatula, and a microwave-safe bowl for melting chocolate.
- In a large bowl, crush the graham crackers until fine; set aside. You want crumbs that feel like damp sand—slightly sticky but hold together when pressed.
- In a microwave-safe bowl, melt the butter on medium (about 50% power) for 30-40 seconds until just melted and warm. Smell the rich, buttery aroma filling the kitchen.
- Add peanut butter to the melted butter; stir until smooth and glossy, about 1 minute. It should feel oozy and fragrant of roasted nuts.
- Pour in the crushed graham crackers and powdered sugar. Mix thoroughly until evenly coated and the mixture feels firm but pliable, about 2 minutes.
- Transfer this mixture into your prepared pan. Press down firmly with the spatula, creating an even layer. You should hear a slight crackle as you pack it in.
- In a microwave-safe bowl, melt the chocolate chips with a teaspoon of coconut oil on medium (about 50% power) for 30-40 seconds. Stir until shiny and smooth, smelling rich and slightly smoky.
- Pour the melted chocolate over the peanut butter layer. Use the spatula to spread it evenly to the edges. The chocolate should shimmer and set quickly upon contact.
- Tap the pan gently on the counter to settle the chocolate layer. Chill in the fridge for at least 2 hours, or until the chocolate is firm and the bars feel set when pressed.
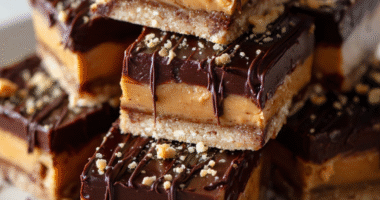
- Once chilled, remove from the fridge. Cut into squares with a sharp knife, wiping it clean between cuts for clean edges. The bars should be firm, shiny, and slightly crackly on top.
Chill the bars in the fridge for at least 2 hours until firm. Slice into squares, then serve directly from the fridge for best texture. Keep leftovers in an airtight container for up to 3 days, or freeze for longer storage.
How to Know It’s Done
- Chocolate layer is glossy and set, not sticky or soft.
- Bars feel firm and hold shape when pressed gently.
- Edges are clean and smooth after cutting.
No-Bake Peanut Butter Bars
Ingredients
Equipment
Method
- Crush the graham crackers into fine crumbs using a rolling pin or food processor, then transfer them to a large mixing bowl.
- Melt the butter gently in a microwave-safe bowl for about 30-40 seconds until warm and fragrant.
- Add the peanut butter to the melted butter and stir until smooth and glossy, about 1 minute. The mixture should feel gooey and fragrant of roasted nuts.
- Pour the peanut butter mixture into the crushed graham crackers along with the powdered sugar. Mix thoroughly until all ingredients are evenly coated and the mixture feels firm but pliable, about 2 minutes.
- Press the mixture firmly into the prepared pan, creating an even layer. Use the spatula to pack it down until it feels compact and you hear a slight crackle as you press.
- In a microwave-safe bowl, melt the chocolate chips with a teaspoon of coconut oil for about 30-40 seconds, stirring until smooth and shiny. The chocolate should shimmer and smell rich and sweet.
- Pour the melted chocolate evenly over the layered peanut butter mixture in the pan. Use the spatula to spread it smoothly to the edges, creating a glossy top.
- Tap the pan gently on the counter to settle the chocolate layer and remove air bubbles. Place the pan in the fridge and chill for at least 2 hours, or until the chocolate is set and the bars feel firm.
- Once chilled, remove the pan from the fridge. Use a sharp knife to cut into neat squares, wiping the knife clean between cuts for clean edges. The bars should be glossy, firm, and slightly crackly on top.
- Serve the bars directly from the fridge for best texture. Store any leftovers in an airtight container in the fridge for up to 3 days or freeze for longer storage. Enjoy this nostalgic, no-bake treat!
Pro tips for perfect bars
- Bolded mini-head: Use room-temperature peanut butter for easier mixing and a smoother, more cohesive filling.
- Bolded mini-head: Melt chocolate slowly on medium power to avoid scorching—stir frequently and watch for glossy, smooth texture.
- Bolded mini-head: Press the mixture firmly into the pan—listen for a slight crackle to ensure it’s compact and even.
- Bolded mini-head: Chill the bars in stages—initially in the fridge for 30 minutes, then longer until fully set for clean cuts.
- Bolded mini-head: For a shiny chocolate finish, add a small splash of coconut oil before melting and pour quickly for a glossy top.
- Bolded mini-head: Use a sharp, warm knife to cut the chilled bars—wipe clean between cuts to keep edges neat and tidy.
- Bolded mini-head: If the chocolate layer cracks or cracks when slicing, reheat briefly to soften and smooth with a spatula.
Common mistakes and how to fix them
- FORGOT to level the mixture → Pack it firmly for clean edges.
- DUMPED chocolate too hot → Let it cool slightly before pouring.
- OVER-TORCHED the chocolate → Stir immediately to prevent burning.
- FAILED to chill enough → Chill at least 2 hours for proper set.
Quick Fixes and Pantry Swaps
- When chocolate shimmers, splash a bit of coconut oil to smooth and shimmer.
- If bars crumble, chill longer or press mixture more firmly into the pan.
- Splash hot melted chocolate quickly to prevent cracking on top.
- Patch cracks by reheating the chocolate slightly and smoothing with a spatula.
- Shield delicate toppings with a light layer of melted chocolate for extra shine.
Prep, store, and reheat tips
- You can prepare the peanut butter mixture up to 24 hours ahead; keep it covered in the fridge to prevent drying out.
- Chill the assembled bars in the fridge for at least 2 hours, or overnight, until the chocolate sets and they feel firm to the touch.
- Store leftovers in an airtight container in the fridge for up to 3 days; the bars will stay chewy and the chocolate glossy.
- For longer storage, freeze the bars wrapped tightly in plastic wrap and then in foil for up to 1 month.
- Reheat chilled or frozen bars briefly at room temperature or in the fridge—watch for melting chocolate and ensure they’re still firm and shiny before serving.
Top questions about no bake peanut butter bars
1. Can I use natural peanut butter?
Yes, using natural peanut butter works, but it might make the mixture less sticky. You may need to add a bit more powdered sugar to help it hold together.
2. Can I make these vegan?
Absolutely, you can swap in dairy-free chocolate chips and coconut oil for the topping. It changes the richness slightly but keeps it vegan-friendly.
3. My bars are too soft or crumbly, what now?
If the bars are too soft, pop them back in the fridge for 30 minutes. If they’re too crumbly, try pressing them more firmly or chilling longer.
4. Can I use different base ingredients?
You can substitute graham crackers with crushed digestive biscuits or even plain rice cereal for a different texture and flavor.
5. Can I add toppings?
Yes, adding chopped nuts or dried fruit on top before chilling adds crunch and bursts of flavor—just sprinkle on before the chocolate layer sets.
6. How long should I chill the bars?
Chilling for at least 2 hours is best. If pressed for time, freeze for 30-45 minutes until firm, but watch not to freeze too long, or the chocolate can crack.
7. How do I cut the bars cleanly?
Use a sharp, warm knife for clean cuts. Wipe it between slices for neat edges. If the chocolate cracks, rewarm the knife slightly and slice again.
8. The chocolate isn’t shiny, what do I do?
If the chocolate layer is dull or sticky, reheat it slightly with a splash of coconut oil and stir until glossy before pouring.
9. How should I store leftover bars?
Store leftovers in an airtight container in the fridge for up to 3 days. For longer storage, freeze individually wrapped bars for up to a month.
10. Can I melt the chocolate differently?
Yes, you can melt the chocolate with a bit of coconut oil in a microwave or double boiler, stirring often until smooth and shiny.
These no bake peanut butter bars are a quiet reminder of how simple, honest treats can be the most satisfying. They come together fast and bring a nostalgic warmth that’s perfect for any day that needs a little sweetness. Honestly, they’re the kind of dessert that makes you appreciate the small, good moments.
Pull them out of the fridge, cut clean slices, and watch that glossy chocolate top crack just slightly—like a little reward. They’re a practical, forgiving treat for whenever a craving hits or unexpected guests show up. Sometimes, the simplest recipes turn out to be the most memorable—these are no exception.

Hi, I’m Ruby Thorn, the home cook behind The Tender Mess. Join me on the journey of Embracing the mess, fearlessly create —because in the kitchen, the mess sometimes leads to magic.