This no bake chocolate chewie recipe is a quick dive into childhood memories, where simple ingredients came together in messy, delicious spurts. It’s the kind of treat that feels like a small rebellion—no oven, no fuss, just spooning out sticky, fudgy goodness from the fridge. Perfect for those moments when you need a chocolate fix without the wait.
What I love most is how forgiving and adaptable it is; you can tweak the nuts, add a dash of sea salt, or swap in peanut butter without losing that chewy, chocolaty core. It’s honest cooking—no perfect edges, just rustic, satisfying bites. Sometimes, it’s the easiest recipes that remind us how much joy comes from just mixing, chilling, and tasting.
This recipe is a nostalgic nod to childhood afternoons, where the simplicity of no bake treats meant quick gratification and messy hands. It’s about the imperfect joy of scooping, pressing, and tasting chocolatey goodness straight from the fridge, no oven required.
A Childhood Chocolate Fix
- I remember sneaking bites from the mixing bowl as a kid, the rich chocolate smell filling the kitchen.
- There’s a messy, carefree joy in pressing these into the pan—no perfection needed, just good, honest fun.
- This recipe always feels like a small act of rebellion on busy days—no oven, no fuss, just chill and enjoy.
- Nothing beats that moment when the chocolate starts to firm up in the fridge, releasing that deep, fudgy aroma.
- Sharing these chewy bites with friends always sparks nostalgic stories of childhood summers and simple pleasures.
A Childhood Chocolate Fix
This recipe came about during a frantic evening when I wanted something sweet but didn’t want to turn on the oven. I remembered a batch of leftover marshmallows and a block of dark chocolate in the pantry, and suddenly, no bake chews felt like the perfect fix. It’s a messy, satisfying process that reminds me how simplicity can be the most delicious. Plus, it’s a treat I’ve been making since childhood, only now I tweak it with my own little touches.
Historical & Cultural Tidbits
- These no bake chews have roots in 1950s home kitchens, where quick, foolproof treats became staples.
- They likely evolved from fudge recipes, simplified to require no baking and more accessible ingredients.
- Originally popular among busy families, they offered a way to satisfy a chocolate craving with minimal effort.
- The combination of chocolate and marshmallow in no bake forms was a clever way to create texture and richness effortlessly.
- Today, these treats are a nostalgic reminder of simpler times, often passed down through generations as comfort food.
Ingredient breakdown: key components
- Chocolate: I prefer a good quality dark chocolate, it melts smoothly and gives that rich, deep flavor. If you only have milk chocolate, it’s sweeter and milder, but still works.
- Marshmallows: They create that gooey, stretchy texture I love. Use mini marshmallows for a more uniform melt, or large ones chopped up if that’s what you have.
- Butter: I use unsalted butter for control over saltiness, but salted butter adds a little extra flavor if you’re feeling bold. Melt it until just shimmering.
- Sweetener: Brown sugar adds a caramel note that pairs beautifully with the chocolate, but honey or maple syrup can be a nice swap for a different sweetness profile.
- Nuts: I like pecans or walnuts for crunch, but you can skip them or try pistachios for a pop of color and flavor. Toasting nuts first intensifies their aroma.
- Vanilla extract: This small splash enhances the chocolate without overpowering. If you’re out, a pinch of vanilla bean powder works well, too.
- Optional add-ins: Sea salt, a pinch of cinnamon, or even a dash of espresso powder can elevate the flavor—just a little goes a long way.
Spotlight on key ingredients
Chocolate:
- I prefer a good quality dark chocolate, it melts smoothly and gives that rich, deep flavor. If you only have milk chocolate, it’s sweeter and milder, but still works.
- Marshmallows: They create that gooey, stretchy texture I love. Use mini marshmallows for a more uniform melt, or large ones chopped up if that’s what you have.
- Butter: I use unsalted butter for control over saltiness, but salted butter adds a little extra flavor if you’re feeling bold. Melt it until just shimmering.
Nuts and Flavoring:
- Nuts: I like pecans or walnuts for crunch, but you can skip them or try pistachios for a pop of color and flavor. Toasting nuts first intensifies their aroma.
- Vanilla extract: This small splash enhances the chocolate without overpowering. If you’re out, a pinch of vanilla bean powder works well, too.
Notes for ingredient swaps
- Chocolate: I prefer a good quality dark chocolate, it melts smoothly and gives that rich, deep flavor. If you only have milk chocolate, it’s sweeter and milder, but still works.
- Marshmallows: They create that gooey, stretchy texture I love. Use mini marshmallows for a more uniform melt, or large ones chopped up if that’s what you have.
- Butter: I use unsalted butter for control over saltiness, but salted butter adds a little extra flavor if you’re feeling bold. Melt it until just shimmering.
- Sweetener: Brown sugar adds a caramel note that pairs beautifully with the chocolate, but honey or maple syrup can be a nice swap for a different sweetness profile.
- Nuts: I like pecans or walnuts for crunch, but you can skip them or try pistachios for a pop of color and flavor. Toasting nuts first intensifies their aroma.
- Vanilla extract: This small splash enhances the chocolate without overpowering. If you’re out, a pinch of vanilla bean powder works well, too.
- Optional add-ins: Sea salt, a pinch of cinnamon, or even a dash of espresso powder can elevate the flavor—just a little goes a long way.
Equipment & Tools
- 20cm square baking pan: Holds the mixture and helps shape the chews.
- Saucepan: Melts butter and chocolate gently over low heat.
- Rubber spatula: Stirs and folds ingredients smoothly without scratching the pan.
- Parchment paper: Eases removal and clean slicing.
- Sharp knife: Slices cleanly through firm chocolate.
Step-by-step guide to no bake chews
- Gather your equipment: 20cm square baking pan, saucepan, rubber spatula, and parchment paper. Line the pan with parchment for easy removal.
- In a medium saucepan, melt 1/2 cup unsalted butter over low heat—just melts and starts to shimmer, about 2 minutes. Stir occasionally.
- Add 2 cups dark chocolate chips to the melted butter. Stir gently until smooth and glossy, about 3 minutes. If the chocolate isn’t melting evenly, lower the heat and stir constantly.
- Stir in 1 cup mini marshmallows and 1 teaspoon vanilla extract. Continue mixing until marshmallows are just coated and slightly melted, about 2 minutes. If marshmallows aren’t melting, add a tiny splash of warm water and stir.
- Remove from heat. Quickly fold in 1/2 cup chopped nuts if using. Mix until evenly distributed. The mixture should be thick and shiny, with a rich chocolate aroma.
- Pour the mixture into your prepared pan. Use a spatula or the back of a spoon to press it evenly into the corners and smooth the top. Press down firmly to compact.
- Let it cool at room temperature for 15-20 minutes, then transfer to the fridge. Chill for at least 2 hours, or until firm and set. The edges should be firm and slightly crack when pressed.
- Once cooled and firm, lift out the block using the parchment paper. Slice into 1-inch squares with a sharp knife. For clean cuts, wipe the blade between slices.
- Plate the chews on a serving dish. For best texture, serve slightly chilled with a glass of milk or coffee.
Chill the assembled mixture in the fridge for at least 2 hours. Once firm, lift out with parchment, slice into squares, and serve. Store leftovers in an airtight container in the fridge for up to a week.
How to Know It’s Done
- Chocolate mixture is smooth and glossy, with no lumps.
- Mixture holds together when pressed, not sticky or runny.
- Edges are set and slightly crack when pressed, indicating proper firmness.
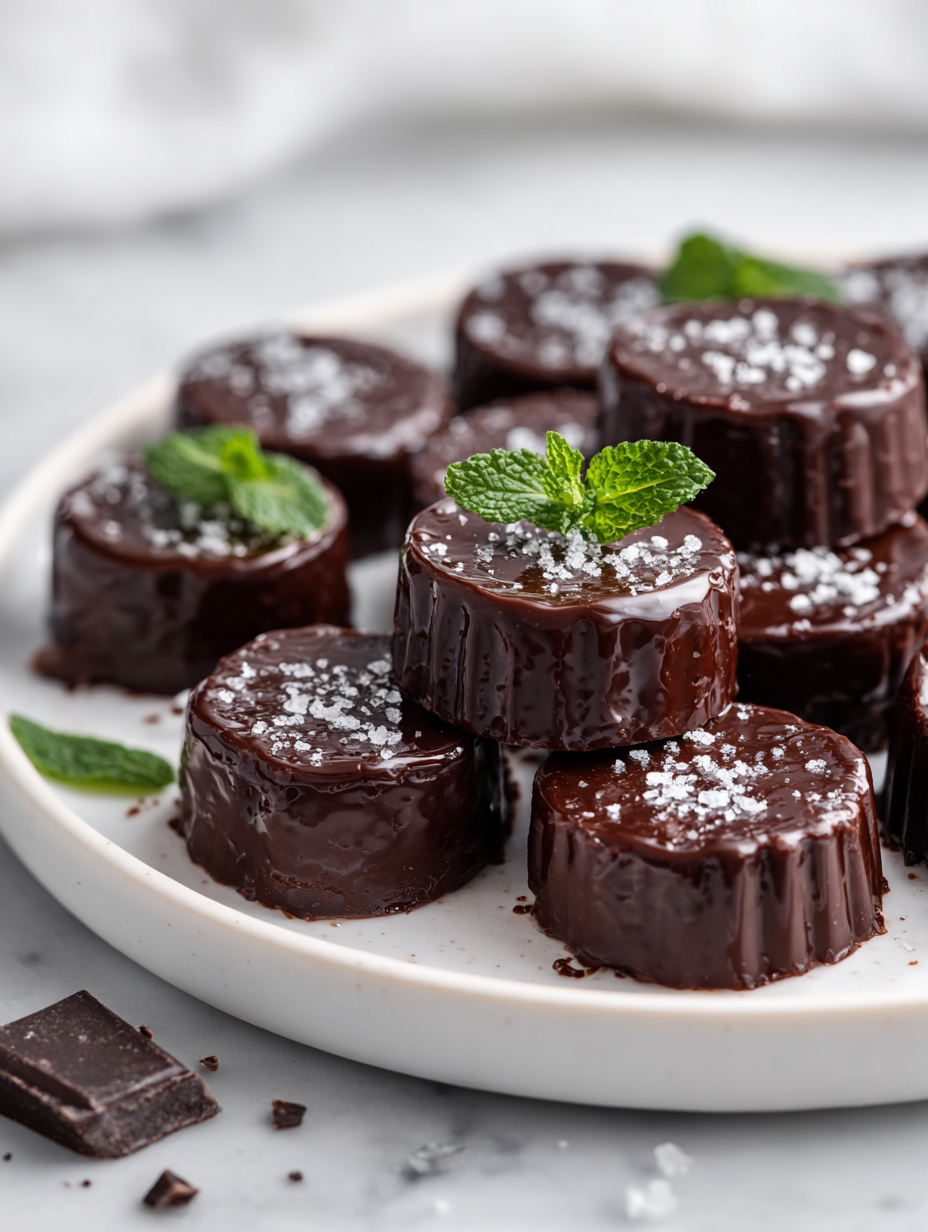
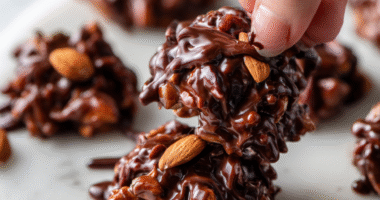
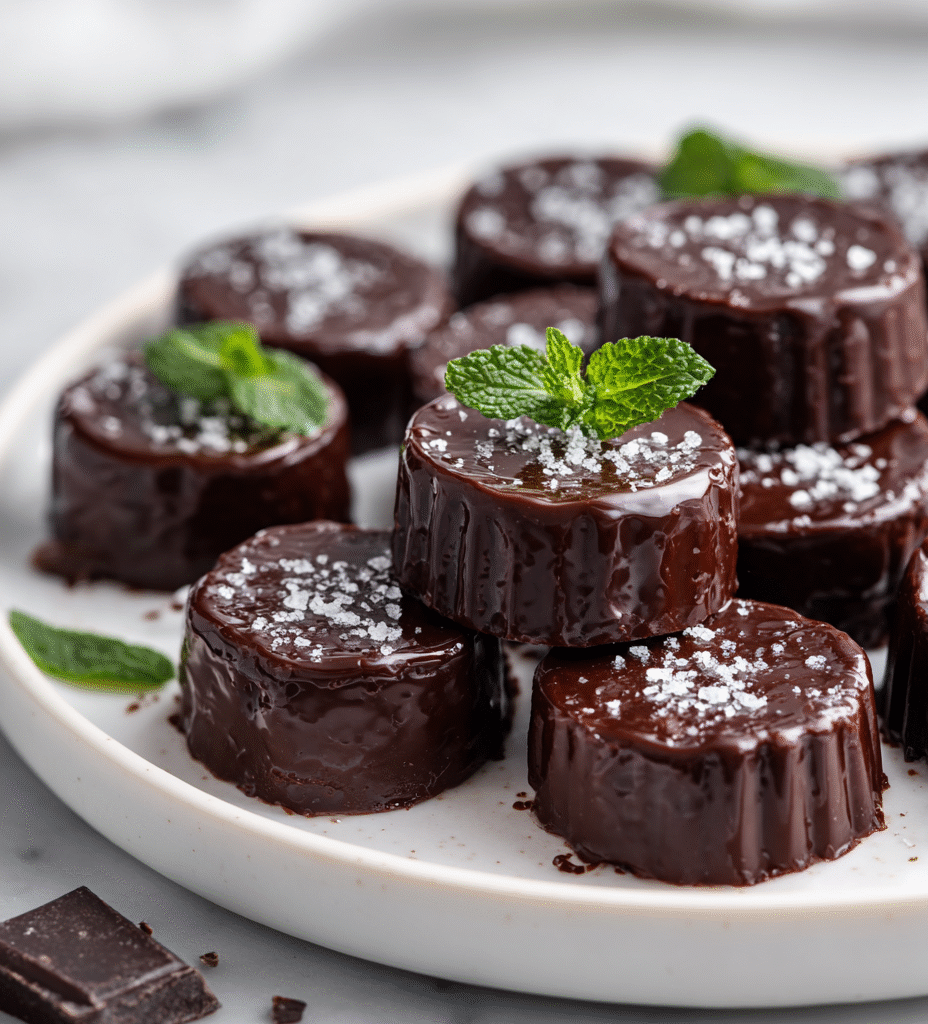
No Bake Chocolate Chews
Ingredients
Equipment
Method
- Line your square pan with parchment paper to make removal easy. Gather your saucepan, spatula, and other tools before starting.
- In the saucepan, melt the butter over low heat until it shimmers softly, filling your kitchen with a rich, buttery aroma. Stir occasionally to encourage even melting, about 2 minutes.
- Add the dark chocolate chips to the melted butter. Stir gently with a spatula until the mixture is smooth, glossy, and fully melted, about 3 minutes. You should hear a gentle bubbling and see a shiny, uniform chocolate sauce.
- Stir in the mini marshmallows and vanilla extract. Continue stirring until the marshmallows are just starting to melt and the mixture is thickened and gooey, about 2 minutes. The marshmallows will create a stretchy, shiny texture that smells sweet and chocolatey.
- Remove the saucepan from heat and quickly fold in the chopped nuts. Mix until evenly distributed, ensuring nuts are coated in the glossy chocolate mixture.
- Pour the thick, fudgy mixture into your prepared pan. Use the spatula to press it evenly into the corners and smooth the top with gentle pressure, creating a rustic, slightly textured surface. This step helps compact everything for better slices.
- Let the mixture cool at room temperature for about 15 minutes, then transfer the pan to the fridge. Chill for at least 2 hours until the mixture is firm, crackly at the edges, and holds a clean cut when pressed.
- Once chilled and set, lift the block out of the pan using the parchment paper. Place on a cutting board and slice into 1-inch squares with a sharp knife, wiping the blade between cuts for clean slices.
- Arrange the chews on a serving plate. These sticky, chewy treats are best enjoyed slightly chilled, paired with a glass of milk or your favorite coffee for a nostalgic snack.
Tips & Tricks for Perfect Chewies
- Bolded mini-head: Use low heat → Keeps the chocolate smooth and prevents burning, stirring constantly for a glossy finish.
- Bolded mini-head: Chill gradually → Let the mixture cool slightly at room temp before refrigerating to avoid condensation and sogginess.
- Bolded mini-head: Press firmly → When spreading in the pan, press down to compact ingredients, ensuring even slices and chewy texture.
- Bolded mini-head: Wipe the knife → Clean blade between slices to get neat, clean cuts without sticking or tearing.
- Bolded mini-head: Add nuts last → Fold in nuts right before pouring into the pan to keep them crunchy and evenly distributed.
- Bolded mini-head: Use parchment → Lining your pan makes for easy removal and clean slicing, especially with sticky mixtures.
- Bolded mini-head: Store properly → Keep chews in an airtight container in the fridge for up to a week; bring to room temp for softer bites.
Common mistakes and how to fix them
- FORGOT to stir continuously → Stir slowly and steadily to prevent burning.
- DUMPED chocolate too quickly → Add chocolate gradually for smooth melting.
- OVER-TORCHED mixture → Remove from heat as soon as it melts completely.
- MISSED chilling time → Chill until firm, at least 2 hours, for proper texture.
Quick Fixes for Sticky Situations
- If chocolate seizes, splash in a tiny bit of warm cream and stir until smooth.
- When mixture is too sticky, dust with a little powdered sugar or cocoa powder to help shape.
- Splash cold water on the pan if mixture sticks; it cools and releases stubborn chocolate.
- Patch cracks by gently pressing back together, then chill a few more minutes to set.
- Shield overcooked chocolate by removing from heat immediately and stirring in a splash of warm milk.
Prep, store, and reheat tips
- Prepare the mixture up to a day ahead; keep it covered in the fridge to prevent drying out. The chocolate aroma deepens overnight.
- Store the sliced chews in an airtight container in the fridge for up to a week. The texture stays chewy but can firm up slightly.
- For longer storage, freeze in a sealed bag for up to a month. Thaw at room temperature for 10 minutes before serving—expect a slightly softer bite.
- Reheat gently in the microwave for 10-15 seconds until just softening; watch for melting edges and a warm, fudgy smell.
Top questions about no bake chews
1. Can I melt the chocolate in the microwave?
Yes, using a microwave to melt the chocolate and butter works quickly—just do short bursts and stir well.
2. Can I use different types of chocolate?
Absolutely, you can swap in white chocolate or milk chocolate, but expect a different sweetness and flavor profile.
3. Can I use regular marshmallows instead of mini ones?
Using mini marshmallows helps them melt evenly, but large marshmallows chopped smaller also work fine.
4. How long should I chill the chews?
Chilling for at least 2 hours helps the chews set properly; longer in the fridge makes them firmer and more satisfying.
5. Can I add salt or spices?
Yes, adding a pinch of sea salt enhances the chocolate flavor and balances sweetness—try sprinkling it on top before chilling.
6. My mixture is sticky, what do I do?
If the mixture is too sticky, briefly chill it in the fridge for 10 minutes before pressing into the pan.
7. How do I get clean slices?
To prevent cracking when slicing, wipe the knife with a damp cloth between cuts and slice slowly.
8. How long do these last in the fridge?
Store chews in an airtight container in the fridge for up to a week; they stay chewy and fresh.
9. Can I freeze chews?
You can freeze the slices for up to a month; let them thaw at room temperature for a soft, chewy bite.
10. What if my chocolate seizes or curdles?
If the chocolate seizes or becomes grainy, add a splash of warm cream and stir until smooth again.
These no bake chocolate chewies are a simple reminder that the best treats often come from just a few honest ingredients. There’s a raw, nostalgic pleasure in biting into the chewy, fudgy center and catching that burst of rich chocolate aroma. Making them feels like a small, satisfying act of rebellion—no oven, no fuss, just pure, messy joy.
In times when you crave comfort or a quick sweet fix, these chews deliver with every bite. They’re perfect for sharing, for lazy afternoons, or whenever nostalgia hits hardest. Sometimes, the simplest recipes become the most treasured, offering a bit of sweetness that’s easy to get lost in.

Hi, I’m Ruby Thorn, the home cook behind The Tender Mess. Join me on the journey of Embracing the mess, fearlessly create —because in the kitchen, the mess sometimes leads to magic.